The trailer has been a work in progress for 8 years now and it's time for the next upgrade. I ordered a Road Shower http://www.roadshower.com/index.shtml today to mount to side of the trailer opposite the hi-lift jack. I opted for the mid-sized model http://roadshower.com/woo/product/road-shower-4/ that gives me 7 gallons capacity. Estimated shipping is October, so I patiently wait.
CDN M101 in Vegas
- Thread starter vegasjeepguy
- Start date
-
Guest, UPDATE We went through the site migration runbook and completed all steps. We will need to complete the migration next week, but will leave the forums up for the weekend. A few days after maintenance, a major upgrade revision to the forum site will occur.
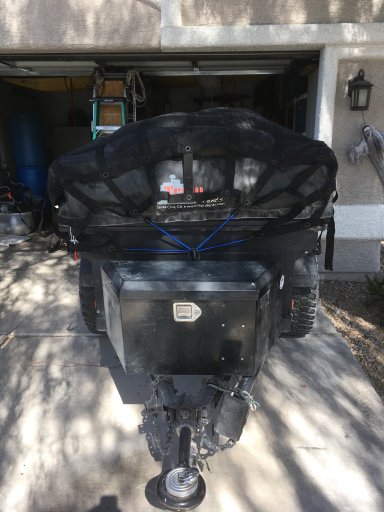
Another member found this cargo net and posted a review. I was so impressed and happened to have a need I ordered the 6.75’ x 8’ version. I wanted to be able to secure some bulky items that wouldn’t damage the RTT or its cover and this was just the ticket.

I did contact Tepui about securing items to the top of the tent and their reply was:
“Unfortunately we can't recommend strapping anything to the top of the tent
for transport. In our experience, it introduces a different air flow, and
extra turbulence put the tent and what was strapped on top at risk for
being blown off.”
I’m not too worried about anything blowing off with this cargo net. With the RTT being trailer mounted, it sits below the roof of the Jeep and is effectively in the backdraft. Plus the net is secured to the trailer tie-downs adding additional security of holding the tent to the trailer.

One piece of gear I had in mind was camo net and poles. Many times when camping in the desert, shade is hard to come by and the camo net is perfect for that.

I also picked up a couple of bungee cords to tie up the loose ends so nothing is flapping in the wind on the road.


I did contact Tepui about securing items to the top of the tent and their reply was:
“Unfortunately we can't recommend strapping anything to the top of the tent
for transport. In our experience, it introduces a different air flow, and
extra turbulence put the tent and what was strapped on top at risk for
being blown off.”
I’m not too worried about anything blowing off with this cargo net. With the RTT being trailer mounted, it sits below the roof of the Jeep and is effectively in the backdraft. Plus the net is secured to the trailer tie-downs adding additional security of holding the tent to the trailer.

One piece of gear I had in mind was camo net and poles. Many times when camping in the desert, shade is hard to come by and the camo net is perfect for that.

I also picked up a couple of bungee cords to tie up the loose ends so nothing is flapping in the wind on the road.


Last edited:
There is that too...Using a camo net also hides you from government helicopters....
wow, this setup is awesome! I am just starting to build an overlanding/camping trailer myself in very similar fashion to yours. I do plan to make my own RTT though, I don't have the cash to drop on one of those awesome Tepui Tents, so I am going to make mine from 1/4" plywood and fiberglass and an old Jeep cover lol, once I get working on it, I will start a build thread =)
A remarkable, well done trailer rig! Simple, lightweight, cost effective . . .and damn good lookin!
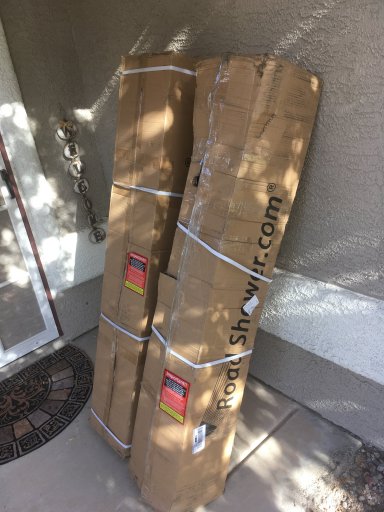
Road Shower(s) were delivered today. I purchased one for myself and another for a buddy to repay him for all the welding, fabrication and install assistance he’s done for me over the years.

One box was in pretty rough shape, but everything was there and no damage to the unit. Install was straightforward and easy and only took a few minutes. I mounted the shower on the side of the trailer opposite the hi-lift jack bolting it to the sidewall.


One box was in pretty rough shape, but everything was there and no damage to the unit. Install was straightforward and easy and only took a few minutes. I mounted the shower on the side of the trailer opposite the hi-lift jack bolting it to the sidewall.


Last edited:
Once mounted I decided to fill the Road Shower and test it out. They recommend sanitizing the Road Shower once a year if you plan on using it for potable water. I filled it with about a gallon of water and pressurized it around 60psi (65 is max) with a bicycle pump, or so I thought. Apparently, the gauge on my pump was faulty and it wasn’t even close to 60psi (probably closer to 20) and I would figure this out later. While water pressure was good to start, it quickly slowed noticeably.
After running that initial gallon through the Road Shower, I sanitized it with a mixture of 3-4 gallons of water and bleach. This time I used my Vaiar compressor to pressurize the shower and performance was noticeably improved. Reading only around 40psi, water flow was strong and steady. I then refilled the shower several times to ensure all of the water/bleach mixture was rinsed through, each time keeping the unit pressurized with the compressor.
The first time I filled it to rinse, I filled it almost completely with very little air. This resulted in initially poor performance due to the lack of air volume to pressurize. Keeping the compressor going, that performance quickly improved as the volume of pressurized air increased. The final time I filled it, I wanted to check the volume of water I could expect to transport while still having a good amount of air in the tank to pressurize.
Since the Road Shower 4 is advertised as a 7 gallon tank, I wasn’t sure if that was total or usable capacity (accounting for the need to leave space for air to properly pressurize). Filling the tank while leaving enough air in the tank did give me exactly 7 gallons of water as I filled my 7 gallon Aqua-tainer in less than a minute. I had removed the nozzle keeping the tank pressurized at about 40psi with the compressor.
What I have not done yet is run a tank with just the initial pressurizing to see how it performs. I’m not terribly concerned as I plan on running it with my Vaiar compressor when camping. I am also glad I won’t be using a bicycle pump as that seemed to be quite a bit more work.
The last thing I have yet to do is rotate the RTT 180* so it opens to the other side of the trailer. That’s a two-man job that I will hopefully get to today. I also want to use that opportunity to leave it in the December Vegas sun for a few hours to see how well it heats ups.
Last edited:

Off-Road Ranger I
- 2,672
- First Name
- Phillip
- Last Name
- McIntosh
- Member #
-
8730
- Ham/GMRS Callsign
- KG5LTZ
Great build and write up. You stole that trailer, legally of course but stole it nonetheless. You’ve done a great job getting the full potential out of it.
I realize now I got a great deal, but didn’t fully realize that at the time. Today I was able to rotate the RTT so it opens opposite the Road Shower. Filled up and pressurized the shower and headed over to my buddy’s to deliver his unit to him. He was very impressed with the quality and operation and will be mounting his on a Ford van he is converting to an expedition vehicle. He plans on fabricating a roof rack and mounting the Road Shower on the rack.Great build and write up. You stole that trailer, legally of course but stole it nonetheless. You’ve done a great job getting the full potential out of it.
Looking at his proposed setup brought to mind the advantages and disadvantages of my trailer mount setup. With the Road Shower at waist level it is easy to fill and maintain the unit. Being lower to the ground also allows the hose to reach into the camp kitchen when the trailer is parked close enough to the camp kitchen. The hose is long enough to use as a shower, but I can see the advantage of being able to stand under it when using it for that purpose. But with that comes the challenge of getting up there to fill it.
Last edited:
I’ve never been a big fan of propane camping gear because I don’t care for the small canisters. We did pick up a catalytic heater a few years back on a trip to Utah when temps at night were dipping in to the 20s. Then I discovered an adapter that allowed me to use a standard LP tank and my whole view has changed.

I tested it out on my heater using an 11 lb. tank and it worked like a champ. So now I’ve ordered a Colman propane camping stove and will be getting a propane tank mounting bracket to mount to the trailer.


I tested it out on my heater using an 11 lb. tank and it worked like a champ. So now I’ve ordered a Colman propane camping stove and will be getting a propane tank mounting bracket to mount to the trailer.

Last edited:


