I have been in the process of making additions to my Tundra since acquiring it in 2018. One of the "upgrades" was the installation of a P&P Engineering rear bumper with dual swing outs.
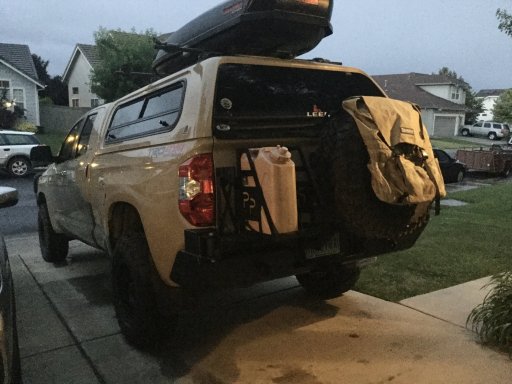
The only problem was the spare tire, when mounted, blocks the rear camera. P&P had included a camera relocation kit that is supposed to fit in the center of the tire, but there was no corresponding wiring, and the factory wiring was not long enough to move the OEM camera.
One of the suggestions on my build thread was to look at the Camera Source website as they had several plug and play options. Search results for: 'toyota tundra' There were two kit options that caught my eye - a license plate mount and a flush mount. Each were listed at $219.00, and each included "plug and play" wiring so no splicing/rewiring was required. They were apparently designed to be installed if you put a camper onto your Tundra. I liked the flush mount as I assumed it would look similar to the parking sensor when mounted in the bumper. A couple issues came to mind. The first was I could not find a suitable location to drill a hole mount the camera so the parking lines would mimmic those on the OEM camera. The second was I could not tell what the maximum thickness of the bumper could be for the clip on the barrel shaped camera to lock into place. I contacted the company, and they were very accommodating - to the point of going out into the shop and measuring the camera and clip for me. In the end it appeared as if the bumper plating was too thick for the clip. The second option was the license plate kit which included a license plate frame mount and a small "universal" mount. I decided this was the way to go.
About a week passed and the box arrived.
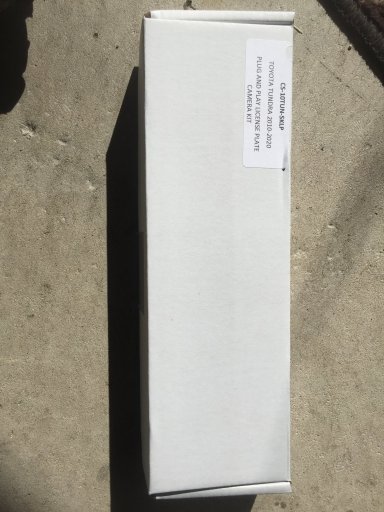
As advertised the box included the 6' wiring harness with a direct connection to the OEM harness, the camera, and the two mounts.
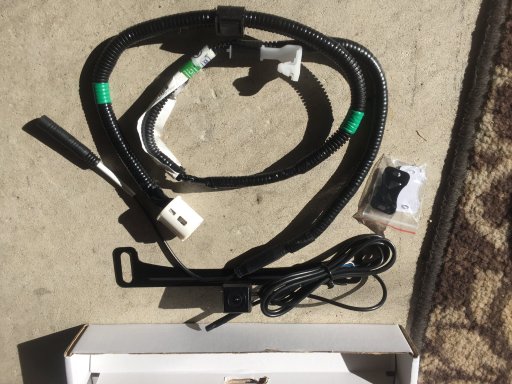
I thought about wiring the camera up to the center of the spare tire, but I didn't like the idea of the wiring attached to the arm that was constantly being opened and closed. I know there are many who would say there probably wouldn't be a problem, but I chose not to go that direction. The license plate option put the camera almost directly in line with the OEM camera, as well as, the view was directly in line with (and over) the hitch. My only complaint at this point was the metal license plate mount is a little thin. I understand they want the combination of the mount and the license plate to be as flush as possible, and I'm sure it will be fine, but I think a slightly thicker metal would have been better.
The license plate mount is about 6" long with a 1/2" protrusion in the center where the camera is mounted. The camera itself is about a 1" square cube. It is mounted to the center protrusion with a single threaded bolt so there is a little up and down adjustment to the camera view.
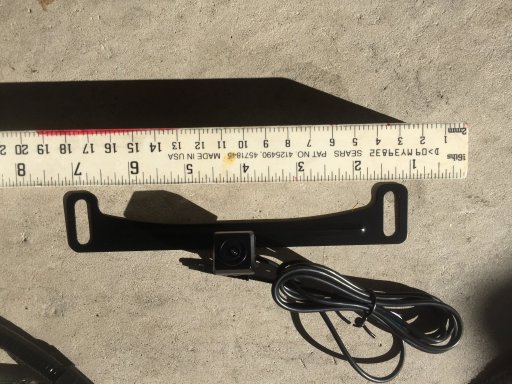
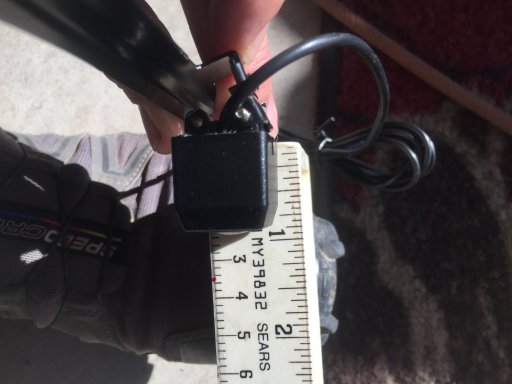
As you can see in the photograph the mount's holes are a slotted to allow for a little adjustment.
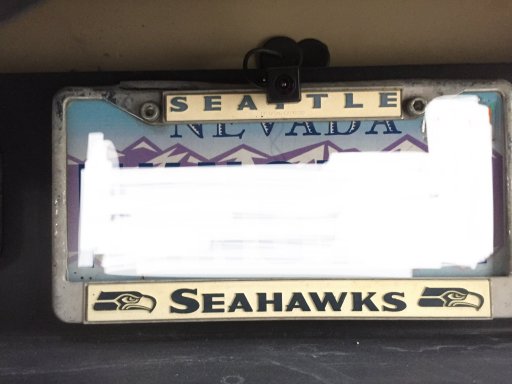
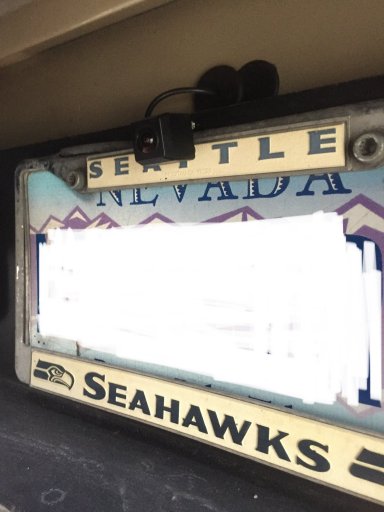
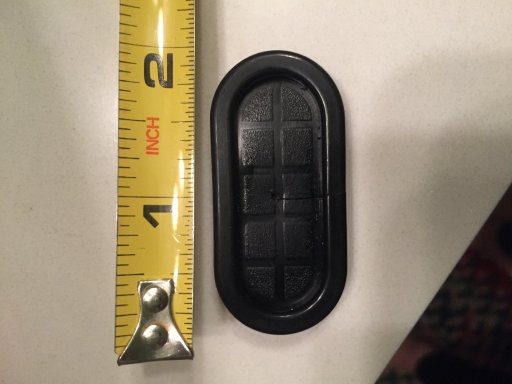
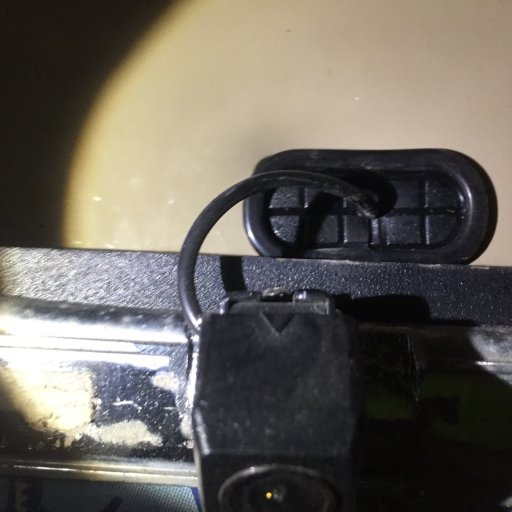
Installation was as simple as unplugging the factory wiring, and plugging the Camera Source wiring into the harness. That wiring is then plugged into the camera wire (almost like a small headphone plug). I added some heat shrink tubing over the harness and camera connection to give it just a little more weatherproofness. I ran the wiring through the small opening used for lowering the spare tire as I can no longer fit a full sized spare under the truck. Initially, I used a couple slightly modified round grommets to keep the wire in place (you can see them in a few of the pics), but I was able to locate some 2"x 3/4" oval rubber grommets on Amazon which fit the opening very well. I drilled a small hole in the grommet and then added a cut so I could put the camera wiring into the grommet. The grommet holds the wiring in place so it does not sag and rub against any of the metal.
There is a gusset on one of the swing outs which cuts off a little of the view, as well as the tire cuts off some of the upper view, but the overall image is not too bad (certainly better than not being able to see anything). I considered mounting the camera on the bottom of the license plate, but that would entail drilling additional holes in the bumper, and I like the placement of the camera on the upper portion as it is out of the way and fairly hidden from any "sticky hands" that might come along...
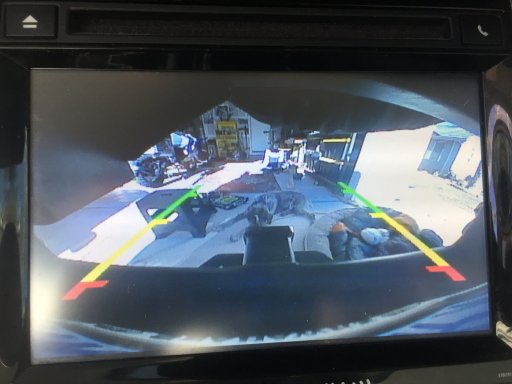
The lines on the screen are consistent with the lines of a parking space. I've determined that the 90 degree bend in the yellow line (where it meets the green part of the line) is what I use as a stopping point which still allows a walking space between a wall (or similar) and the spare tire mounted on the swing out. There are a couple wires which are intentionally sticking out in the wiring harness so you can cut them and therefore eliminate the lines if you wish. I wanted the lines so I covered the wires with some heat shrink wrap.
Overall, I would give this a strong 8 out of 10, with my only complaint being the thickness of the metal mounts (the universal mount is the same thin metal as the license plate), but this is only a preference issue, and I don't think it will be an issue in the long run.

The only problem was the spare tire, when mounted, blocks the rear camera. P&P had included a camera relocation kit that is supposed to fit in the center of the tire, but there was no corresponding wiring, and the factory wiring was not long enough to move the OEM camera.
One of the suggestions on my build thread was to look at the Camera Source website as they had several plug and play options. Search results for: 'toyota tundra' There were two kit options that caught my eye - a license plate mount and a flush mount. Each were listed at $219.00, and each included "plug and play" wiring so no splicing/rewiring was required. They were apparently designed to be installed if you put a camper onto your Tundra. I liked the flush mount as I assumed it would look similar to the parking sensor when mounted in the bumper. A couple issues came to mind. The first was I could not find a suitable location to drill a hole mount the camera so the parking lines would mimmic those on the OEM camera. The second was I could not tell what the maximum thickness of the bumper could be for the clip on the barrel shaped camera to lock into place. I contacted the company, and they were very accommodating - to the point of going out into the shop and measuring the camera and clip for me. In the end it appeared as if the bumper plating was too thick for the clip. The second option was the license plate kit which included a license plate frame mount and a small "universal" mount. I decided this was the way to go.
About a week passed and the box arrived.

As advertised the box included the 6' wiring harness with a direct connection to the OEM harness, the camera, and the two mounts.

I thought about wiring the camera up to the center of the spare tire, but I didn't like the idea of the wiring attached to the arm that was constantly being opened and closed. I know there are many who would say there probably wouldn't be a problem, but I chose not to go that direction. The license plate option put the camera almost directly in line with the OEM camera, as well as, the view was directly in line with (and over) the hitch. My only complaint at this point was the metal license plate mount is a little thin. I understand they want the combination of the mount and the license plate to be as flush as possible, and I'm sure it will be fine, but I think a slightly thicker metal would have been better.
The license plate mount is about 6" long with a 1/2" protrusion in the center where the camera is mounted. The camera itself is about a 1" square cube. It is mounted to the center protrusion with a single threaded bolt so there is a little up and down adjustment to the camera view.


As you can see in the photograph the mount's holes are a slotted to allow for a little adjustment.


Installation was as simple as unplugging the factory wiring, and plugging the Camera Source wiring into the harness. That wiring is then plugged into the camera wire (almost like a small headphone plug). I added some heat shrink tubing over the harness and camera connection to give it just a little more weatherproofness. I ran the wiring through the small opening used for lowering the spare tire as I can no longer fit a full sized spare under the truck. Initially, I used a couple slightly modified round grommets to keep the wire in place (you can see them in a few of the pics), but I was able to locate some 2"x 3/4" oval rubber grommets on Amazon which fit the opening very well. I drilled a small hole in the grommet and then added a cut so I could put the camera wiring into the grommet. The grommet holds the wiring in place so it does not sag and rub against any of the metal.


There is a gusset on one of the swing outs which cuts off a little of the view, as well as the tire cuts off some of the upper view, but the overall image is not too bad (certainly better than not being able to see anything). I considered mounting the camera on the bottom of the license plate, but that would entail drilling additional holes in the bumper, and I like the placement of the camera on the upper portion as it is out of the way and fairly hidden from any "sticky hands" that might come along...

The lines on the screen are consistent with the lines of a parking space. I've determined that the 90 degree bend in the yellow line (where it meets the green part of the line) is what I use as a stopping point which still allows a walking space between a wall (or similar) and the spare tire mounted on the swing out. There are a couple wires which are intentionally sticking out in the wiring harness so you can cut them and therefore eliminate the lines if you wish. I wanted the lines so I covered the wires with some heat shrink wrap.
Overall, I would give this a strong 8 out of 10, with my only complaint being the thickness of the metal mounts (the universal mount is the same thin metal as the license plate), but this is only a preference issue, and I don't think it will be an issue in the long run.

