Member III
I am terrible at taking pictures but I shall improve!
Hark, beyond this point lies a path of madness and chopping with very little consideration to the vehicle's value, or how it looks.
It all started with a 2000 Subaru Impreza OBS. I took this puppy out regularly to outdoors events to ferry people and gear to campsites in Washington. I have pictures somewhere of its stock appearance, but I cannot find them anywhere.
Probably my old phone.
Tragedy strikes. A pandemic. And I am bored. So the first thing I do.
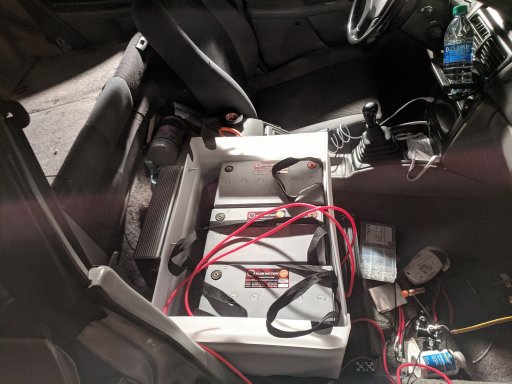
Eh what the hell, let's remove the passenger seat and throw in a few hundred amps worth of batteries.
I can't say I really had a good reason to do this, other than I wanted to have power to run my laptop and dick around away from the house. I was planning at this point to drive from Washington to Maryland, and the extra power would have been useful.
The whole setup was connected via an ignition-on relay from the alternator, through the firewall, and directly to the battery pack.
It worked pretty well!
Much, much later. I ended up removing the pack for where the offroad version of this build began...
Inspired by the number of build threads on doing a forester shock conversion of these subarus, and looking for something to wrench on, I picked up some ebay used shocks for pretty cheap and began the next adventure.
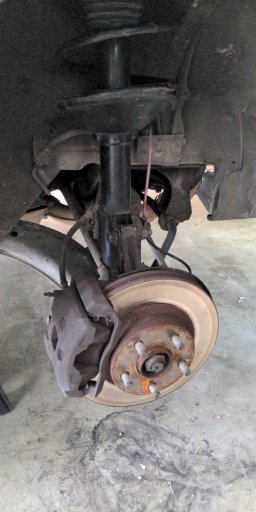
One front strut down. Thanks to how available the information is, this was actually REALLY simple, basically a bolt on job. I had to step on the control arm with my body weight to get it to match up to the strut, but I did get it in. Using just an angle grinder to (carefully) free the old brake line.
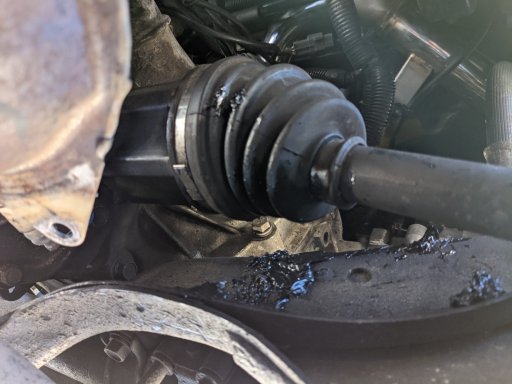
It's important to note you need to be careful that the wheel assembly doesn't tilt too much or the CV axle *will* slide out of the transmission, and it's a little annoying to jiggle back in. So don't let it tilt forward.
The back was slightly more annoying, in addition to needing to change the holes to match the forester pattern (which altogether wasn't too bad), just the whole control arm assembly is a bit more stiff. It did all bolt together in the end, but I needed my jack for a little extra muscle getting it all together.
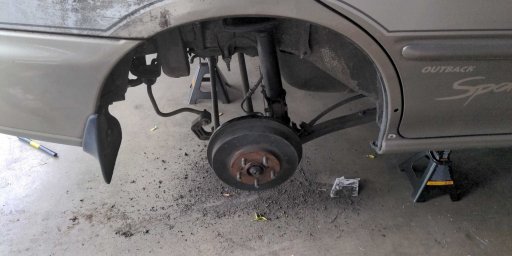
I was a little rough and ended up freeing some dirt from old adventures, too.
By this point the lift was complete and I wanted to see how big of tires I could fit on it.
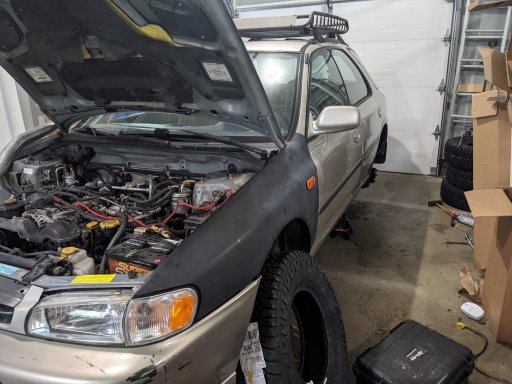
These are 28"ers. Also about this time I replaced the battery cables with thicker 0 gauge cables and connectors. If you were ever wondering why you might do something like that, it's because if you're putting more load on the car electronics between battery and ground, you're stressing that negative chassis ground. If you want an easy way to *really* make sure that isn't a problem, upgrade to the thickest wire you're comfortable working with, and the amps will pour freely. I also planned to eventually put more electronics on this thing. One day.
After deciding the 28s were too big, I put the stock tires on and went for a test drive.
I was a little underwhelmed with the results, and inspired by Tinker's build, I decided to just say fuck it and go the rest of the way.
Given by this point I was in the middle of moving, I didn't really have the tools and space necessary to do it myself. So I found a shop who was willing to do it while I continued home hunting. Mach 5 Performance in Sterling, VA ended up being willing to do the job, and they did awesome. Highly recommend these guys, they didn't just install the SJR lift, they also made sure the vehicle was road worthy which was a huge ease off my mind, as I was stupid preoccupied elsewhere.
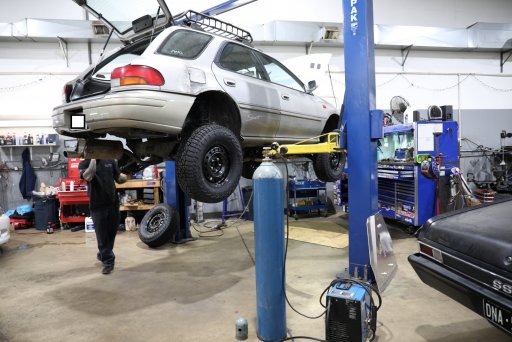
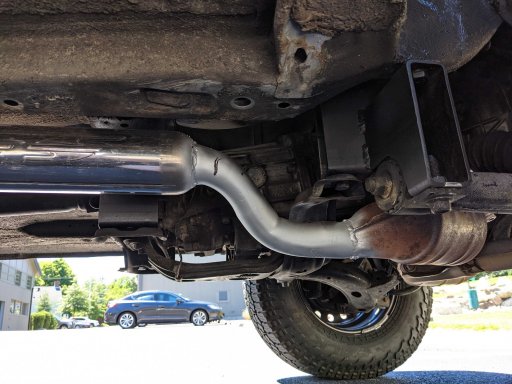
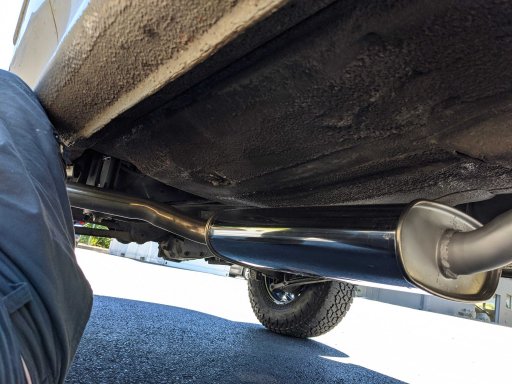
Exhaust is a bit goofy on a lift. The 28s finally fit! I did some cutting with the angle grinder on the arches before I brought it to them.
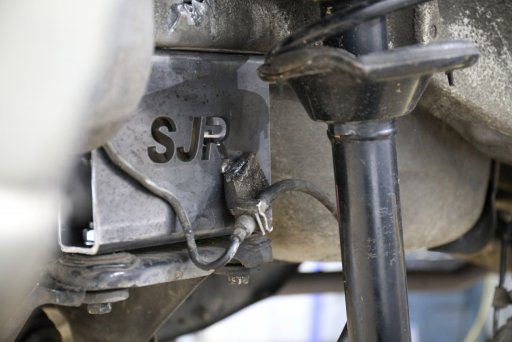
Brake clip weld to just keep it out of the way.
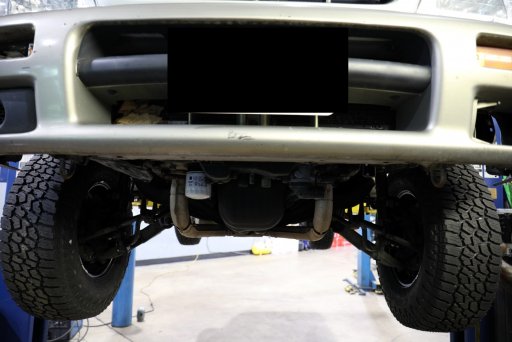
That is some travel. Also the oil filter has never been more accessible.
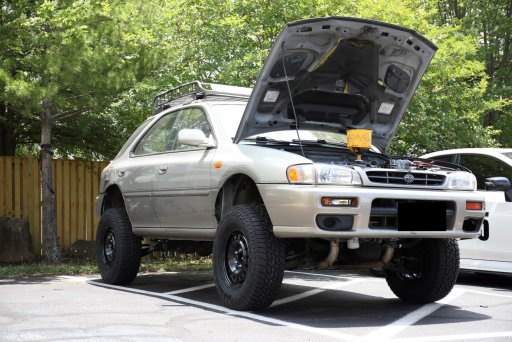
Looking slightly different than she did to begin with.
I've taken her out on the farm and a couple test gravel trails and so far there's a couple rough spots but she handles pretty well now. I feel like the wheels need a smidge more offset as they're too close to the struts in my opinion, and I haven't figured out what to do with the shifter yet.
All in all though, I am having way more fun with this configuration.
I can't wait to have my own shop again and to be able to wrench in a secure place, not just on the side of the road or whatever.
Hark, beyond this point lies a path of madness and chopping with very little consideration to the vehicle's value, or how it looks.
It all started with a 2000 Subaru Impreza OBS. I took this puppy out regularly to outdoors events to ferry people and gear to campsites in Washington. I have pictures somewhere of its stock appearance, but I cannot find them anywhere.
Probably my old phone.
Tragedy strikes. A pandemic. And I am bored. So the first thing I do.

Eh what the hell, let's remove the passenger seat and throw in a few hundred amps worth of batteries.
I can't say I really had a good reason to do this, other than I wanted to have power to run my laptop and dick around away from the house. I was planning at this point to drive from Washington to Maryland, and the extra power would have been useful.
The whole setup was connected via an ignition-on relay from the alternator, through the firewall, and directly to the battery pack.
It worked pretty well!
Much, much later. I ended up removing the pack for where the offroad version of this build began...
Inspired by the number of build threads on doing a forester shock conversion of these subarus, and looking for something to wrench on, I picked up some ebay used shocks for pretty cheap and began the next adventure.

One front strut down. Thanks to how available the information is, this was actually REALLY simple, basically a bolt on job. I had to step on the control arm with my body weight to get it to match up to the strut, but I did get it in. Using just an angle grinder to (carefully) free the old brake line.
It's important to note you need to be careful that the wheel assembly doesn't tilt too much or the CV axle *will* slide out of the transmission, and it's a little annoying to jiggle back in. So don't let it tilt forward.
The back was slightly more annoying, in addition to needing to change the holes to match the forester pattern (which altogether wasn't too bad), just the whole control arm assembly is a bit more stiff. It did all bolt together in the end, but I needed my jack for a little extra muscle getting it all together.

I was a little rough and ended up freeing some dirt from old adventures, too.
By this point the lift was complete and I wanted to see how big of tires I could fit on it.

These are 28"ers. Also about this time I replaced the battery cables with thicker 0 gauge cables and connectors. If you were ever wondering why you might do something like that, it's because if you're putting more load on the car electronics between battery and ground, you're stressing that negative chassis ground. If you want an easy way to *really* make sure that isn't a problem, upgrade to the thickest wire you're comfortable working with, and the amps will pour freely. I also planned to eventually put more electronics on this thing. One day.
After deciding the 28s were too big, I put the stock tires on and went for a test drive.
I was a little underwhelmed with the results, and inspired by Tinker's build, I decided to just say fuck it and go the rest of the way.
Given by this point I was in the middle of moving, I didn't really have the tools and space necessary to do it myself. So I found a shop who was willing to do it while I continued home hunting. Mach 5 Performance in Sterling, VA ended up being willing to do the job, and they did awesome. Highly recommend these guys, they didn't just install the SJR lift, they also made sure the vehicle was road worthy which was a huge ease off my mind, as I was stupid preoccupied elsewhere.

Exhaust is a bit goofy on a lift. The 28s finally fit! I did some cutting with the angle grinder on the arches before I brought it to them.

Brake clip weld to just keep it out of the way.

That is some travel. Also the oil filter has never been more accessible.

Looking slightly different than she did to begin with.
I've taken her out on the farm and a couple test gravel trails and so far there's a couple rough spots but she handles pretty well now. I feel like the wheels need a smidge more offset as they're too close to the struts in my opinion, and I haven't figured out what to do with the shifter yet.
All in all though, I am having way more fun with this configuration.
I can't wait to have my own shop again and to be able to wrench in a secure place, not just on the side of the road or whatever.


