Member III
Last month I was at an event with my friends and one of the guys brought an ammo can fire pit. It was a bit of a hit and someone was going to be selling them at the event. We go talk to this vender and UGH. Needless to say no-one bought one. Back at camp some of the guys wanted to build their own. I have a couple of 50 Cal ammo cans laying around and enough fittings so, I made one and decided to post it in case some else was thinking of it.
Fortunately I went through my "Propane Fire Pit" learning curve a few months ago so this was going to be easy.
On this build there are a few diffrent ways to do it. Mine uses parts that can be left out if wanted. I'll go over the variations in the build.
One thing I want to point out is, almost every DIY style propane fire pit, has a sooty smoke coming off the flames. This is because propane needs quite a bit of air mixed in or it wont burn clean. These air mixers are found on stoves and lanterns. I have one on my fire pit and my ammo can fire pit.
On the size of pipe, I chose 1/2 inch because I had some laying around. You can go 3/8 if you want, but I think 1/2 inch is as big as you want
Part list
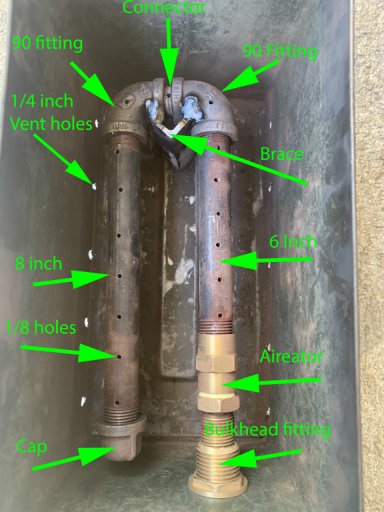
6" black gas pipe (1/2)
8" black gas pipe(1/2)
2- 90's. black gas pipe (1/2)
1 end cap. black gas pipe (1/2)
1 thread black gas pipe (1/2) this connects the 90's.
Air mixer (optional)
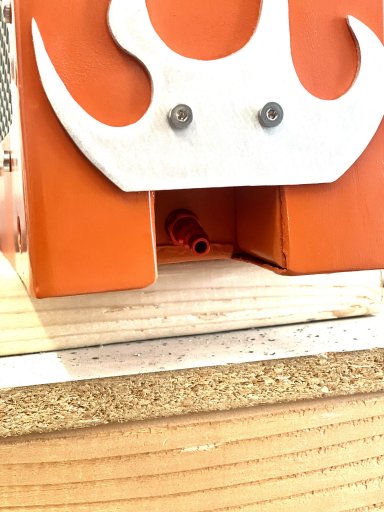
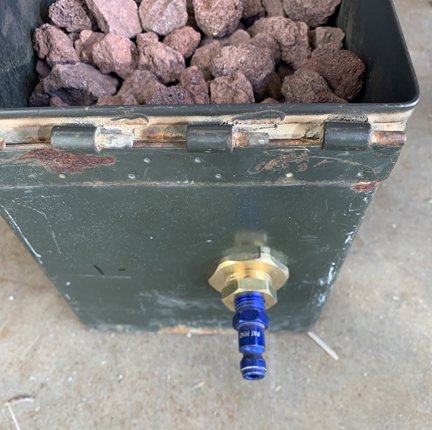
Bulkhead fitting (optional) Theres diffrent ways to do this. I chose these. Their designed for aquariums, don't use the rubber washers.
Reducer. (I had this already. The link is if you want to run a 1/4 npt fitting like I did)
Regulated hose. If you choose the correct hose, you don't need the adapter below.
Flair adapter. I already had one of these. the hose I got didnt have an NPT on the end. this is why I needed it.
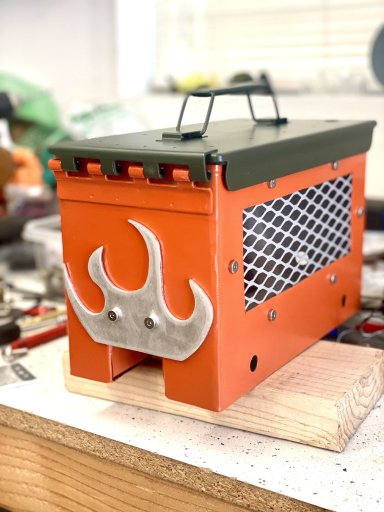
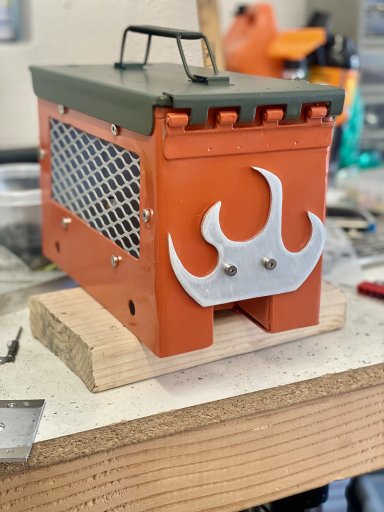
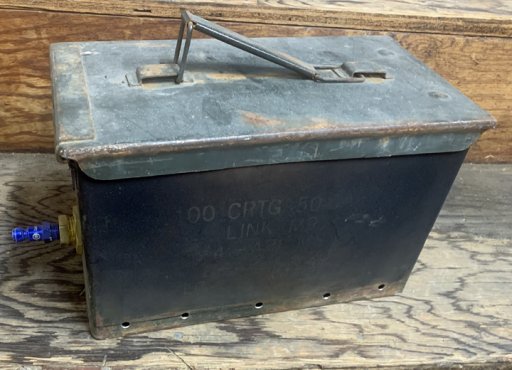
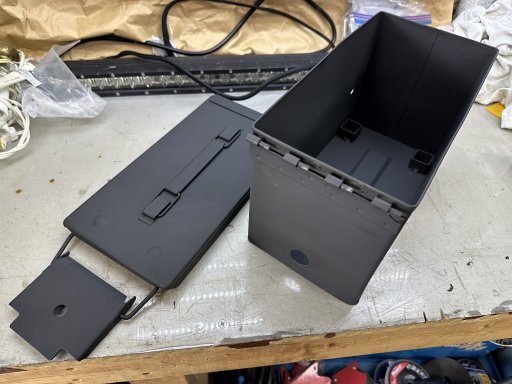
50 Cal Ammo Can. No link, if you buy a plastic one, I want to see the video when you test it.
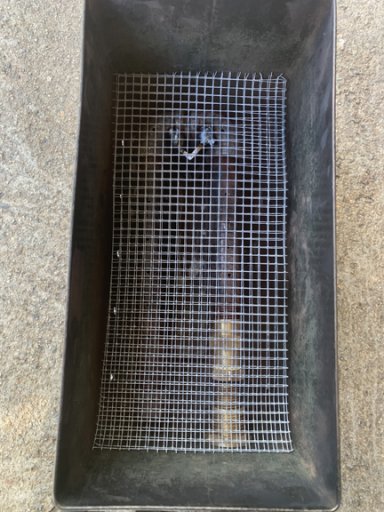
Stainless mesh screen. Home depo. vent screen.
Lava rock (optional)
Here is it layed out. The holes are 1/8 inch. You see at one end I welded a brace. I didn't like leaving the end unsupported. You could do this with a single pipe if instead of a "U" like I did if you wanted. You notice the holes are not very straight. I drilled some at an angle but it didn't make any real difference. At the bottom you see some air holes. I did this without air holes because I've seen videos where people don't put in holes. In the pictures below, you will see the difference.
Pic of my quick release fitting. Standard air fitting
Here it is with the screen
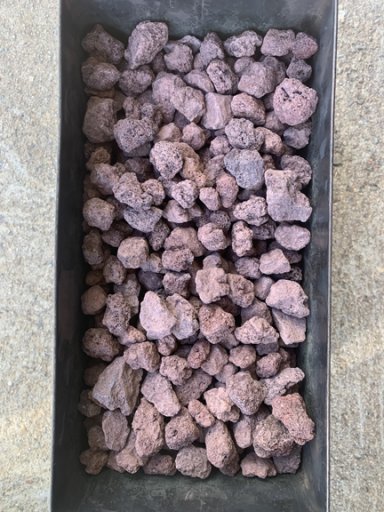
2 inch of lava rock. I have a ton left over BTW
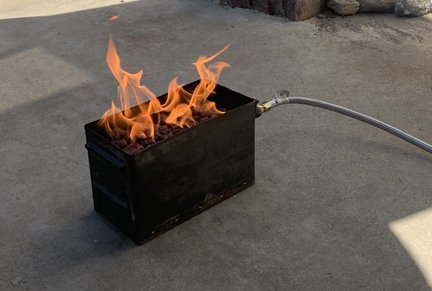
So now we hook it up and add fire. This is turned down with a breeze pushing the fire. It was a bit bright out so it was hard to get a good picture. The flame completely filled the box and will go about a foot higher if I turned it up.
The next pictures are with no breather holes and one with no regulator. I didn't get a pic without the air mixer. So no soot pic.
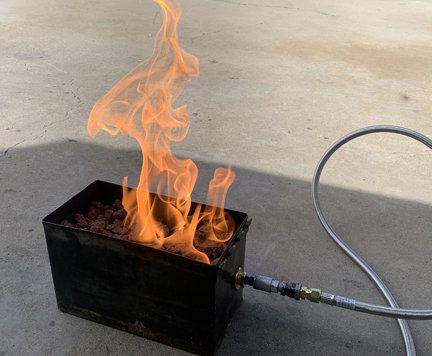
Here you see the fire on one side. It would jump back and forth rarely filling the box. Needs a bit more air.
This next one is unregulated with my tank valve barely open.
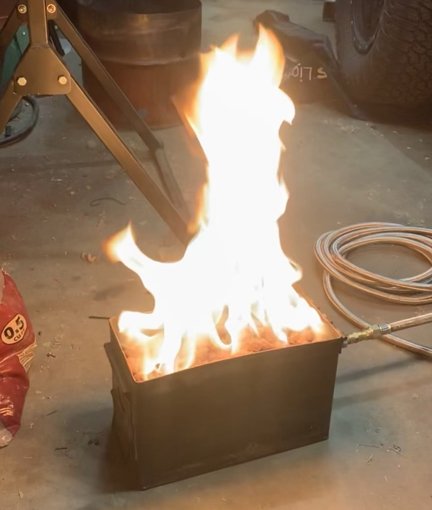
This was as low as I could get it. Opening the valve farther got it to jump to about 6 foot. Your call on that one.
Final thoughts
These work well if you only have a couple of people. We had one under a 270 degree awning with the walls on. Keeping the flame at minimum kept it nice and toasty in there with 30 degree outside. If you did one tube and not the U shape I did, you would drop the amount of propane. less holes will do the same. I strongly recommend an air mixer.
The lava rocks stay hot for about an hour also.
Fortunately I went through my "Propane Fire Pit" learning curve a few months ago so this was going to be easy.
On this build there are a few diffrent ways to do it. Mine uses parts that can be left out if wanted. I'll go over the variations in the build.
One thing I want to point out is, almost every DIY style propane fire pit, has a sooty smoke coming off the flames. This is because propane needs quite a bit of air mixed in or it wont burn clean. These air mixers are found on stoves and lanterns. I have one on my fire pit and my ammo can fire pit.
On the size of pipe, I chose 1/2 inch because I had some laying around. You can go 3/8 if you want, but I think 1/2 inch is as big as you want
Part list
6" black gas pipe (1/2)
8" black gas pipe(1/2)
2- 90's. black gas pipe (1/2)
1 end cap. black gas pipe (1/2)
1 thread black gas pipe (1/2) this connects the 90's.
Air mixer (optional)
Bulkhead fitting (optional) Theres diffrent ways to do this. I chose these. Their designed for aquariums, don't use the rubber washers.
Reducer. (I had this already. The link is if you want to run a 1/4 npt fitting like I did)
Regulated hose. If you choose the correct hose, you don't need the adapter below.
Flair adapter. I already had one of these. the hose I got didnt have an NPT on the end. this is why I needed it.
50 Cal Ammo Can. No link, if you buy a plastic one, I want to see the video when you test it.
Stainless mesh screen. Home depo. vent screen.
Lava rock (optional)
Here is it layed out. The holes are 1/8 inch. You see at one end I welded a brace. I didn't like leaving the end unsupported. You could do this with a single pipe if instead of a "U" like I did if you wanted. You notice the holes are not very straight. I drilled some at an angle but it didn't make any real difference. At the bottom you see some air holes. I did this without air holes because I've seen videos where people don't put in holes. In the pictures below, you will see the difference.
Pic of my quick release fitting. Standard air fitting
Here it is with the screen
2 inch of lava rock. I have a ton left over BTW
So now we hook it up and add fire. This is turned down with a breeze pushing the fire. It was a bit bright out so it was hard to get a good picture. The flame completely filled the box and will go about a foot higher if I turned it up.
The next pictures are with no breather holes and one with no regulator. I didn't get a pic without the air mixer. So no soot pic.
Here you see the fire on one side. It would jump back and forth rarely filling the box. Needs a bit more air.
This next one is unregulated with my tank valve barely open.
This was as low as I could get it. Opening the valve farther got it to jump to about 6 foot. Your call on that one.
Final thoughts
These work well if you only have a couple of people. We had one under a 270 degree awning with the walls on. Keeping the flame at minimum kept it nice and toasty in there with 30 degree outside. If you did one tube and not the U shape I did, you would drop the amount of propane. less holes will do the same. I strongly recommend an air mixer.
The lava rocks stay hot for about an hour also.
Last edited: