2021 Jeep Gladiator - 3.0L Turbo EcoDiesel - overland build

  • HTML tutorial

Cobblecrazy

Rank V
Launch Member

Enthusiast III

1,721
Reno
A number of years ago we purchased one of the first Jeep JK's. I loved the way it "felt" when I sat behind the driver's seat for the first time. The JK had a lift done by the dealership, and other than a Ursa Minor top, I didn't do much to make it exploration ready. We had some issues along the way that mostly centered around the electrical system. In the end I decided to return to a Toyota, but I always had a fondness for the Jeep. Fast forward to now.

I learned the Jeep JL (basically like my JK) was being outfitted with an EcoDiesel engine. Curious I went to the local dealership and test drove one of the 2021 models. I liked it, but I wasn't "in love". At the time I also learned the Gladiator (JT) had the same EcoDiesel engine - the same engine used in the RAM 1500. Although there are many similarities in the JL and the JT, when I slipped in behind the wheel I felt at home. As I pulled out of the dealership lot, I heard the EcoDiesel come to life, and I was hooked.

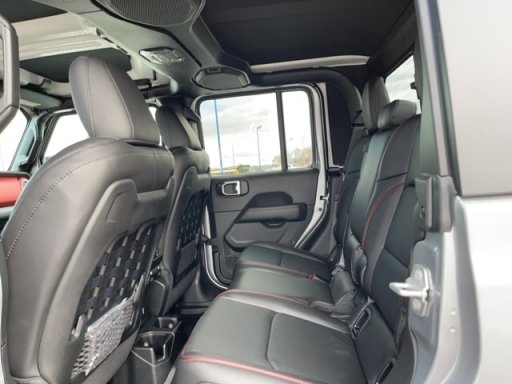
For me, I had some criteria that needed to be met. Although I was happy with my Tundra, it was a big truck and that meant some limitations off road. I was looking for something a little smaller, but also wanted something that could tow our camper (with the capacity of towing something a little bigger if we decided to step up in size). The JT EcoDiesel lists a mid 6000 lb. rating, and the factory tow package comes with a Class IV receiver. The MPG of my Tundra would get into the teens, and I have seen low 20's (mostly flat, or downhill constant freeway speed), but I was seeing a constant 12 mpg around town as of late. The JT EcoDiesel was boasting an impressive high 20's highway, and low 20's city, with a combined of 24 mpg. Since it's just my wife, the dog, and myself, the passenger hauling wasn't a major thing, but we occasionally have others along so I wanted a comfortable place for them to sit. The back seat of the JT is not large, but two adults can comfortably sit there, and (with the right body type) a third adult would fit as well. The center portion of the rear seat folds down into an armrest/cup holder so that's a bonus. I would say the rear is not as wide as the Tundra (specifically the Double Cab model), but a little bigger than the Tacoma Double Cab. The rear seats have storage underneath, and behind, and the seats fold up and down depending on what you might need.

Mostly what I was looking for was a vehicle that right off the lot seemed to have "it". I, like most people, enjoy personalizing my vehicles, but there is also something to be said for driving off the lot and straight out into the outdoors.

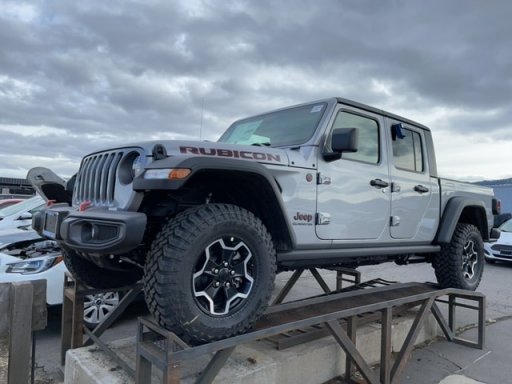
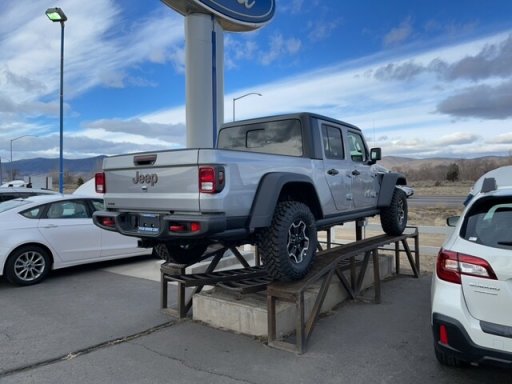
So I'll begin by an introduction. It is a 2021 Jeep Gladiator Rubicon powered by a 3.0L Turbo EcoDiesel engine, and Jeep's 8 speed automatic transmission. The stock suspension on the Rubicon model is slightly taller than the the basic model, and it comes with Fox 2.0 shocks front and rear. Heavy Duty Dana 44 wide axle front and rear. Wildpeak 33" mud terrain tires.
6463c4b5ad37058d27bd052280ee5156x.jpg

130249ed346a75295a1bd0eecd7b2c58x.jpg

There are steel "rock rails" running along the cab and the corners of the bed.

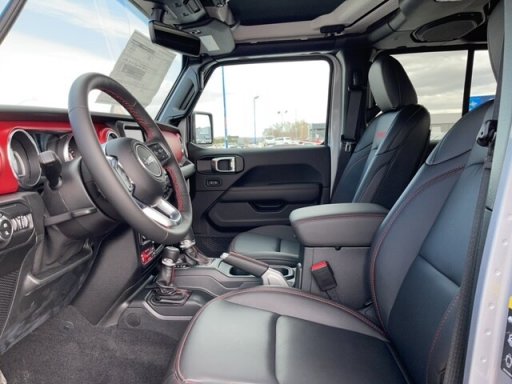
It has the leather interior complete with heated seats (and a heated steering wheel - a first for me).
2ff8893b5e206b7fcd936736b3f690a5x.jpg

427f766d56b6d9564a4ac32fa86f5752x.jpg

There is the customary USB connectors on the back of the center console, but there is also a regular plug with a 400w inverter as well.

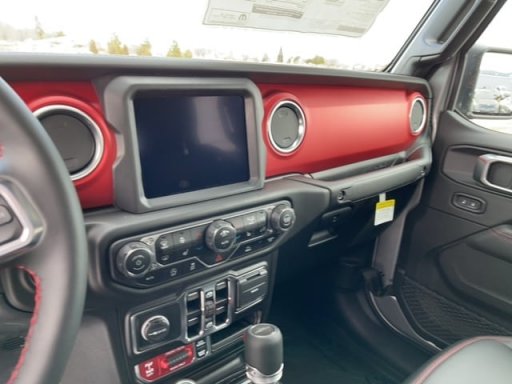
Many of the JT/JL's were spec'd out with the 7" touch screen, but that model uses the Apple/Android CarPlay for it's navigation. I wanted the actual satellite navigation, and luckily this one was outfitted with the 8.4" radio and premium audio system.
9460c59b7a94f719009f8da9858aa6bcx.jpg

You also might notice in this picture that there is a selector switch for factory front and rear lockers (the red panel). Just beside that is an electronic sway bar disconnect for additional articulation, and an "Off-Road Plus" selector for certain terrain situations.

A deal was done, and I said goodbye to my trusty Toyota, and I became a Jeep owner once more...
 
  • Like
Reactions: Scottjeep

Cobblecrazy

Rank V
Launch Member

Enthusiast III

1,721
Reno
I've done plenty of builds to this point. I've made mistakes from time to time, and added (or removed) things I second guessed myself later on. I am hoping to be better this time.

First, I think we all have a vision of how we want something to be in it's "final" form. I began making a list of items, trying to separate the needs and the wants, and also trying to prioritize the way I was going to proceed.

While I was making those lists I was also doing searches on the best items in each of the categories. I am a fan of truck shells. I know many who "off road seriously" do not like the fiberglass shells as they do not take to the harsh beatings of some of the trails out there. I will be succinct in this statement. This is an overland/exploration vehicle build. I enjoy dirt roads (some technically challenging) that get me to the trails where I mountain bike, camp, trail run, and fly fish. I like the shell for lockable storage, a camping platform (the JT's 5' bed will pose some challenges, but I already have solutions), and when others are along there is a secure/covered place for my dog to ride comfortably.

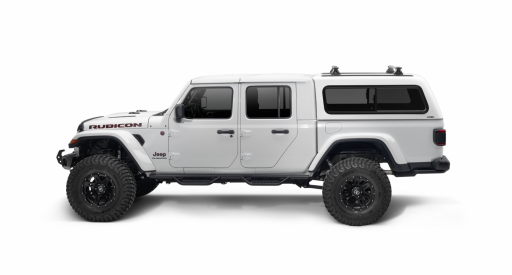
When I was on the A.R.E. shell website, I found a picture of a JT Gladiator with their CX shell. I loved the lines, and this will be the inspiration for my particular build. Here is the picture (the difference is mine is silver not white).

Screen Shot 2021-05-08 at 8.44.52 PM.png

I ordered the A.R.E. shell pretty much as seen in this photo. In the past I've opted for the windoors, but with the smaller bed the vented windoors were not an option. Again, since I have my dog back there sometimes, and I sleep there sometimes, I needed the venting. Additionally, with such a short bed, I felt it wasn't as big of a deal as it was in my 6.5' Toyota Tundra bed. I did the carpet lining, a single LED light and the Yakima tracks for all the Yakima stuff I already own.

Due to a shortage of materials the shell companies are seeing a long wait time. I was quoted about 15 weeks. Not ideal, but I can adjust...

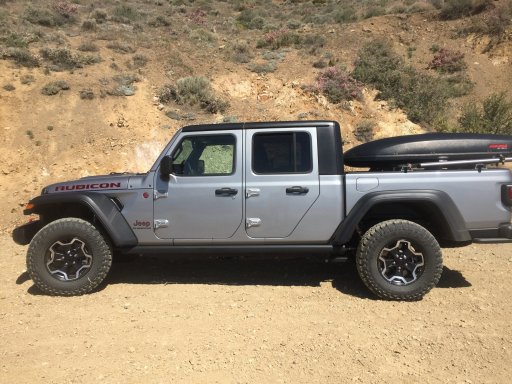
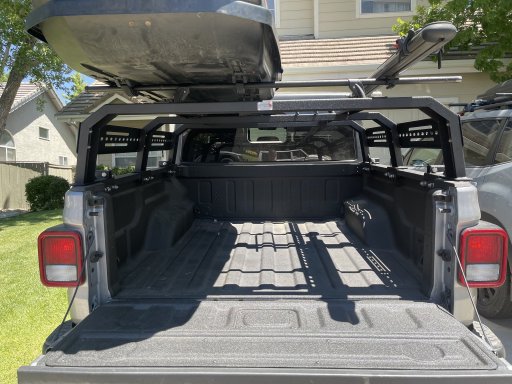
As I mentioned I have quite a lot of Yakima stuff in the garage. I had a bedrail system from the Tundra build that would work with the JT's bed as well. I had a Yakima top box that would act as my secure storage for now (it hangs over the tailgate a little, but not bad), and I could also mount 2 bike mounts on the cross bars if I didn't want to use my Kuat hitch mounted bike rack.

IMG_9851.JPG

I've since moved the top box over to the driver's side and the bike mount to the passenger side. Since the box is mostly behind the driver's side seats I can still see quite a bit behind me in the rear view mirror.

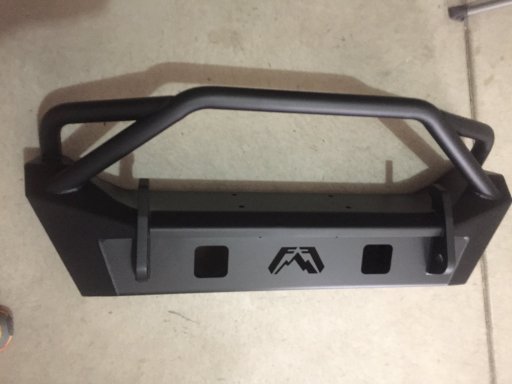
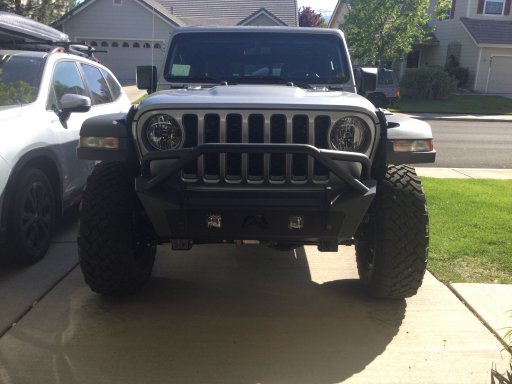
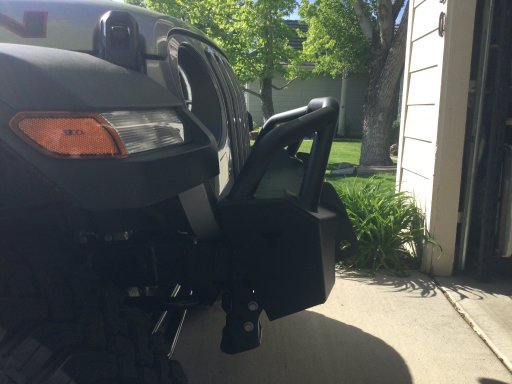
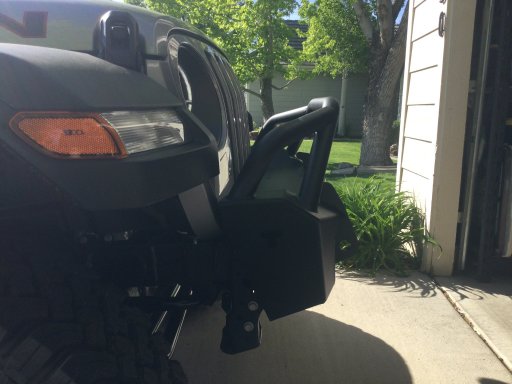
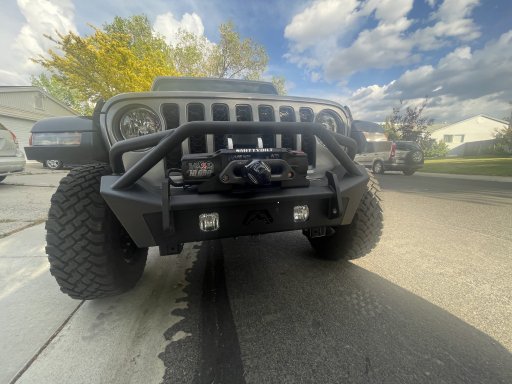
I spent quite a bit of time looking at the various bumpers out on the market. My JT came with the basic factory plastic front bumper. I kept my Smittybilt X2O 10K winch from my Toyota, so I needed to get a bumper that was winch ready. I had always liked the FabFours stuff, and I decided on their stubby bumper. About $550

IMG_9858.JPGIMG_9861.JPG

It uses the factory fog lights, you could upgrade to a square/round LED aftermarket light later down the road. For my purposes I decided the factory ones will do for now.

The removal of the factory bumper is pretty straight forward. A few bolts on either side, and disconnect the fog light harness, and the bumper comes right off. The fog lights come out fairly simple, and there are several panels you need to remove to get to the harness, but, again, pretty easy.

The FabFours instructions are easy to follow (pictures mostly), and there's not really much to it. I did run into a couple things I thought were worth mentioning. First, they tell you to remove the factory skid plate, but it neglects to say you need to remove the bracket as well since it interferes with the bottom of their bumper. As such you cannot re-use the factory skid plate (which sucks because the Rubicon one was a nice steel one). FabFours offers a bolt on lower protection for an additional $200. I have one on order, but it hasn't arrived. The second item deals with the installation of the fog lights.

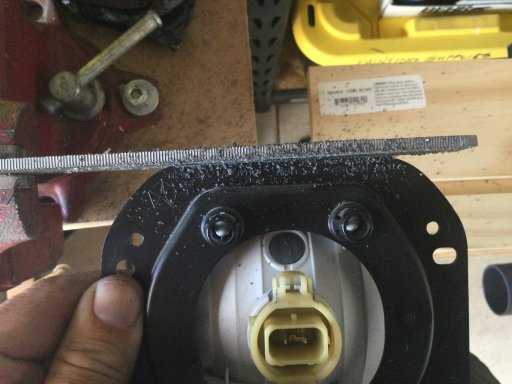
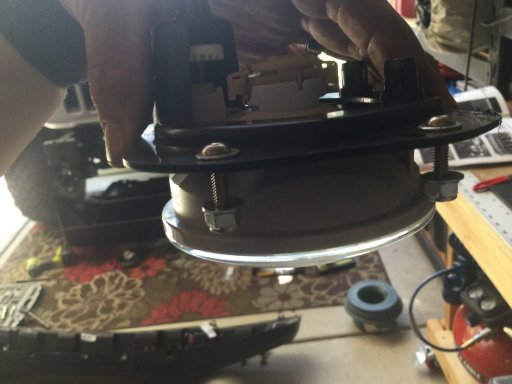
First, I found the upper portion of the plastic frame for the fog lights interferes with being able to line up the holes on the mounting brackets built into the bumper. I clamped a file into my vise and ran the housing back and forth until the holes lined up. Again, not hard, just a little time consuming.

IMG_2232.JPG

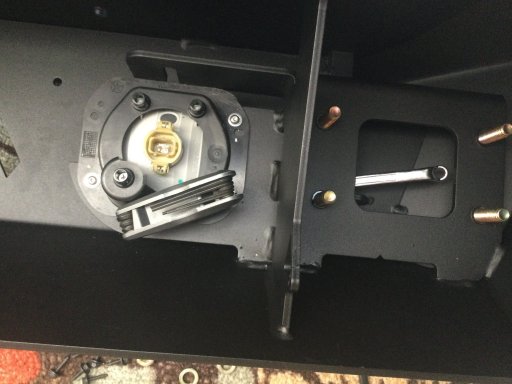
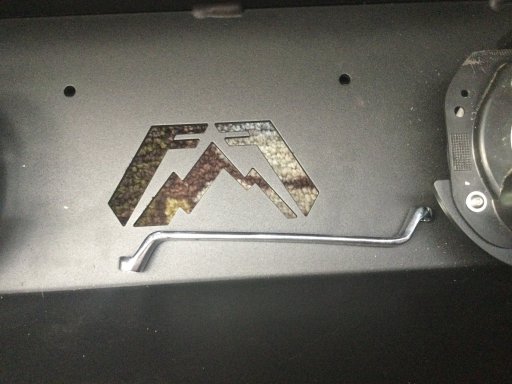
Second was tightening down the bolts was a little tricky as you had to blindly come in from the side and kind of feel around until you could get the wrench on the nut. I found an offset wrench worked best for the task.

IMG_2235.JPGIMG_2236.JPG

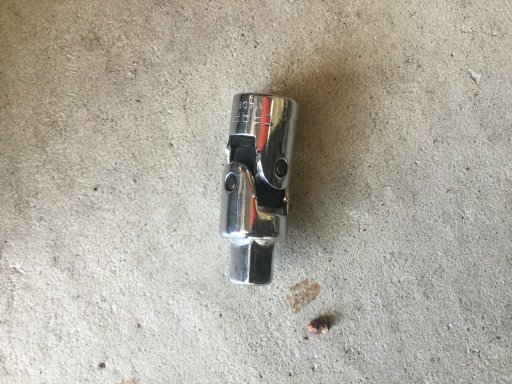
Lastly, getting your hands in to place the nuts and washers on the main bolts was tight to say the least. I was able to get the washers on by hand, but I had to place the nut in the socket and use and extension to get them threaded on by hand. When it came time to get them tightened down it helped to have an articulating socket extension, a couple different sized extensions and an impact wrench to snug them down.

IMG_2237.JPG

I'd say it was around an hour from start to finish. I like how it turned out.

IMG_2239.JPGIMG_2240.JPG

I have test fit the winch, and it looks good. I was a little concerned with a top mount style (instead of the partially recessed ones) as air flow is always a concern - especially for a Diesel engine - but I don't think it will be an issue. I have to get some protective wire wrap before I can run the cables into the engine compartment and to the battery.

There is a small "lip" just above the fog lights that runs between the two shackle points. It's at a slight angle, and I think it will be a good place to put a pair of 6" LED lights I had lying around. They will be out of the way of the winch line, and do not pose any additional air flow issues, so I think I'll give them a shot.

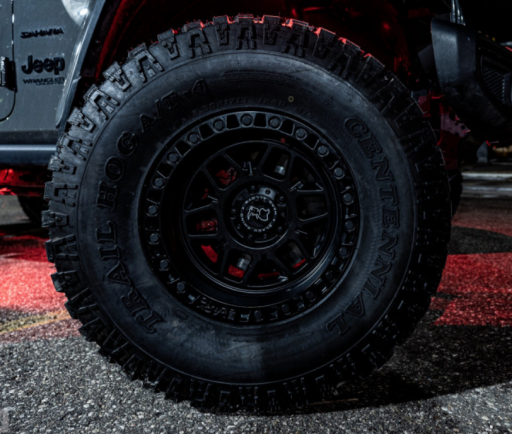
Today I ordered up a set of Black Rhino Kelso 17x9 wheels with a 0 offset. It should move the wheels out a little, but not too far. Eventually I'd like to go to a 315x70x17 - basically a 34x12.4 - but we'll give these 33" Wildpeaks a go for the time being.

Screen Shot 2021-05-14 at 11.48.40 PM.png
 

Attachments

OTH Overland

Local Expert Washington, USA
Member
Investor

Trail Blazer III

4,847
Camano Island, WA, USA
First Name
Dave
Last Name
Ballard
Member #

20527

Ham/GMRS Callsign
N7XQP
Service Branch
Fire/EMS/SAR
Looking forward to your build, We went out and test drove a couple of JT's today, just need to find one with the Rubicon trim and the diesel, that the dealers do not want way more than MSRP for.
 
  • Like
Reactions: Scottjeep

Cobblecrazy

Rank V
Launch Member

Enthusiast III

1,721
Reno
Looking forward to your build, We went out and test drove a couple of JT's today, just need to find one with the Rubicon trim and the diesel, that the dealers do not want way more than MSRP for.
Thanks. I'm hoping to be "done" by the fall. The biggest question right now is suspension. Mopar makes a really nice 2" basic lift specifically designed for the additional 400 lbs. of the diesel engine, and still spec'd out with Fox shocks. Depending on where you get it, the lift ranges from $1450-1650. Most of the install videos I've seen, they have been getting around 2 1/2" of initial lift with it settling down over time. I wish Mopar/Fox would offer different "stages" like the Icon lifts. I like the Fox 2.5 remote res shocks with the adjusters, especially in the rear as we have a 2000lb travel trailer we use pretty regularly. It would be nice to be able to adjust for the additional weight, but soften the ride when we take off from camp. Downside is a pair is about as expensive as the whole Mopar 2" kit.

I was lucky to find the JT I purchased. We were headed off on a trip a few days after I test drove the first diesel JT. I wanted to place a hold on it and get things going while we were traveling, but the dealership wouldn't do it. They said the diesel was "too popular" so they weren't taking deposits on that model. That one sold a few days into our trip, and the sales guy we dealt with said it would take him 18-22 weeks to get another one. He also said the other Jeep dealers they normally can trade with wouldn't give up one on their lot. I have two dealers within 30 miles, and the other dealership didn't have one. They could order one, but they wouldn't get it for 2 or 3 months. The dealership I bought from was only 70 miles away and they took a refundable deposit over the phone while we were traveling, and we finalized everything when we got back from our trip (with a few phone calls/e-mails along the way).

If I were to make a suggestion to mother Jeep it would be to spec out the Rubicon with the same 2.5 Fox shocks they put on the Mojave and perhaps progressive springs. I know the Mojave is supposed to be for fast desert travel, and the Rubicon is supposed to be spec'd for the technical trails, but having done a number of builds I think I can say both would benefit from the beefier shock. The factory Fox's and springs on the Rubicon are nice, but I could see how they could become at their limit if you went full "overland" without swapping anything out.
 
  • Like
Reactions: Scottjeep

Cobblecrazy

Rank V
Launch Member

Enthusiast III

1,721
Reno
Got the Smittybilt winch installed today. There’s not much room in the engine bay with the diesel, but I was able to run the wires up the passenger side of the grill and engine compartment. The positive wire was just long enough to reach the terminal.

E9E40C7E-FC81-4BC0-A7CD-EF61535120DB.jpeg

Next step is to determine if i’ll do some auxiliary lights. I may have mentioned it before, but I have a set of 6” round LEDs that I used initially on my Tundra. They put out about 4500 lumens each. There’s limited space on the stubby bumper, and I want to make sure they won’t interfere with the winch line.
 
Last edited:

Cobblecrazy

Rank V
Launch Member

Enthusiast III

1,721
Reno
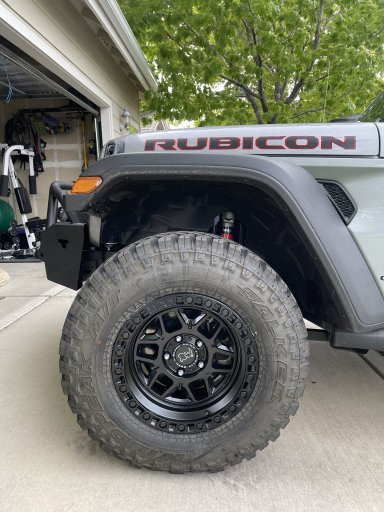
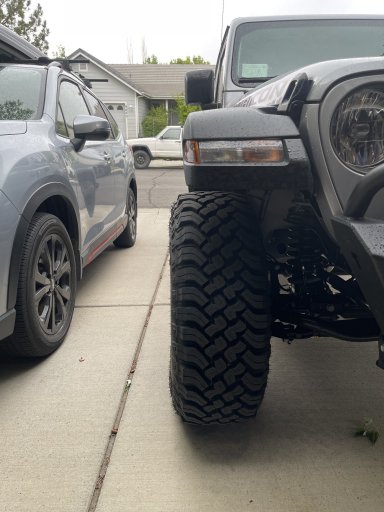
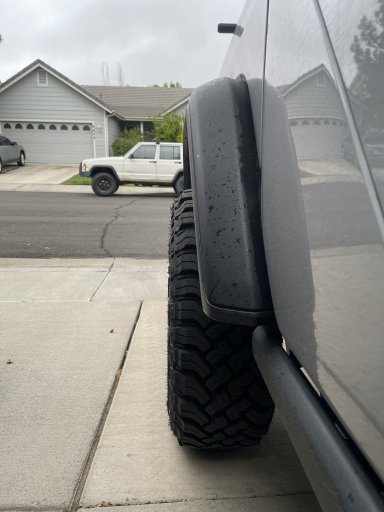
Got the Black Rhino Kelso wheels installed today.

tempImage6vxkB9.jpg

The stock Jeep wheels were 17x7.5's with a +44.45 offset. The new wheels are 17x9.5 with a 0 offset. The tires sit just slightly outside the fenders giving it a little wider stance.

tempImagepV8aNV.jpgtempImagef4AzEL.jpg

My plan is to upgrade to either a 35.12.5, or a 315x70 (both about a 34.5), at some point. Even on stock suspension I think there would be no problem with rubbing, but my plan is to go around a 2" lift later this year.
 

AjumMac

Rank 0

Contributor I

60
Maryland, USA
First Name
Adam
Last Name
McDermott
Great thread, love seeing what you have going on! You said you did order the bed cap? I'm excited to see it if I read that right.
 
  • Like
Reactions: Scottjeep

Cobblecrazy

Rank V
Launch Member

Enthusiast III

1,721
Reno
Great thread, love seeing what you have going on! You said you did order the bed cap? I'm excited to see it if I read that right.
Thanks. Yes, got the ARE shell ordered. I think the conservative estimates put it in around late Aug. or early Sept. I've had thoughts about going with a Softopper instead as I've seen a few on the Gladiator, and I like how it fits on the bed of the truck. I could pair it with the Decked bed storage system, and it would be easy to put up, or take down if I needed to haul something big in the bed of the truck (the Decked system takes about 15-20 minutes to take out). At this point I still like the advantages of the hard shell so I'm sticking with my original plan.
 
  • Like
Reactions: AjumMac

Cobblecrazy

Rank V
Launch Member

Enthusiast III

1,721
Reno
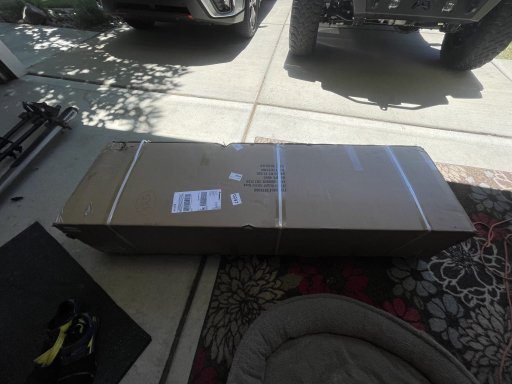
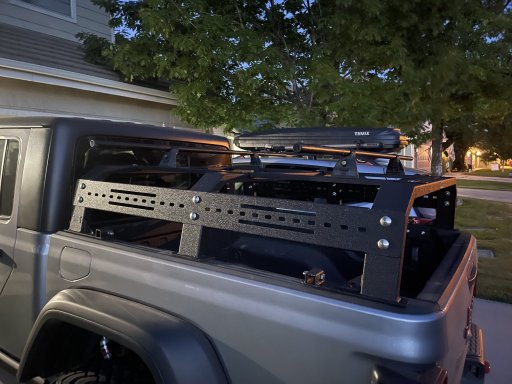
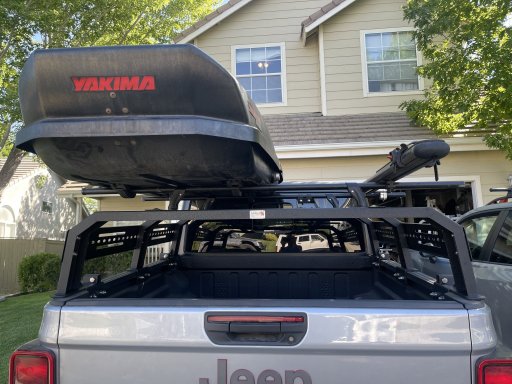
Seeing as my shell won't be done until the end of Summer, I had to make a decision. My Yakima bedrack was functional, and since I already had it, I have made it work. I did have some issues of trying to fit a few larger items in the bed of the truck without having to take the rack (or just the top box) off. I decided to get a bed half rack. I liked the Fishbone Off-road rack as it came with the side mounts that some of the other companies only offer at an additional cost. Took a few days to get, but the Fed Ex guy finally arrived...

The packaging from the company is top notch, and I didn't find any damage that you sometimes encounter when shipping. The kit doesn't have instructions, but their website has a good PDF and a video for installation. The only thing is my included hardware had lock washers and nuts instead of the Nylock nuts you see in the pics/video. I think they could do a little better job on including some photos of the way the carriage bolts and carriage washers are supposed to be placed (and where), but it was pretty intuitive.

tempImageXgeyLb.jpg

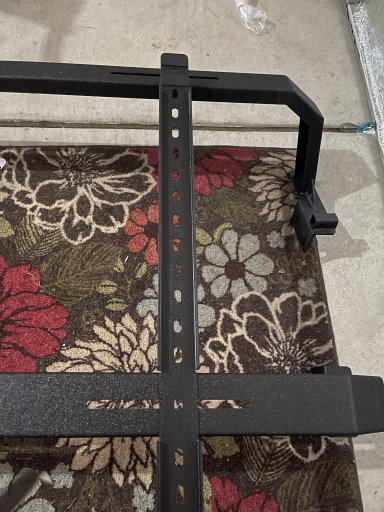
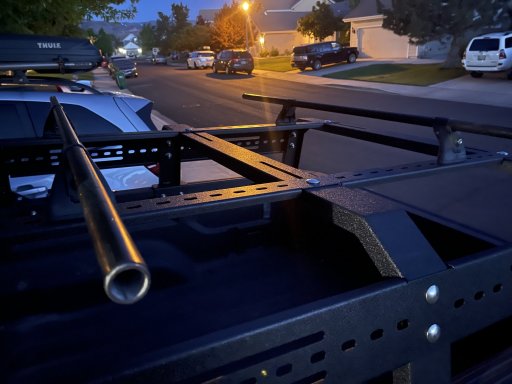
The system includes three cross members, two upper "flat" bars, and two side panels. I had previously watched a few install videos so I was fairly comfortable on what went where. I test fit the parts on the garage floor. In the photo the "flat" bar is actually sitting upside down as I was putting on the included padding where metal meets metal, but it gives and idea of how many potential mounting points there are. Additionally you can see the cross members have a slot so the upper bars can be adjusted depending on the width of what you have. You can also purchase additional upper bars which I would assume increase the rigidity of the system as well as having more places to attach things.

tempImageCHmVEX.jpg

I didn't take photos of putting nuts and bolts together as it's pretty basic. It seemed to fit nice onto the Jeep.

tempImageKvBNbN.jpg

It might be hard to see, but I mounted my Yakima racks onto the upper bars. The holes on the upper bars allowed for the bolts on the Yakima base plates to mount without additional drilling. I made about 5" long plates for the underside of the upper bars from a 2" wide metal piece I had, and I used that as a sort of large "washer" for the base plates bolts to be mounted to.

At the front, and rear, of the bedrail you can see 1" square "mounting" points welded to the bases of the rack. The only thing it says in the videos is these are mounting points for future accessories. I'm assuming a bike mount along the side, or even something that goes into the bed. I could see using it for a mid level tray, or something similar.

tempImage0BGeXp.jpg

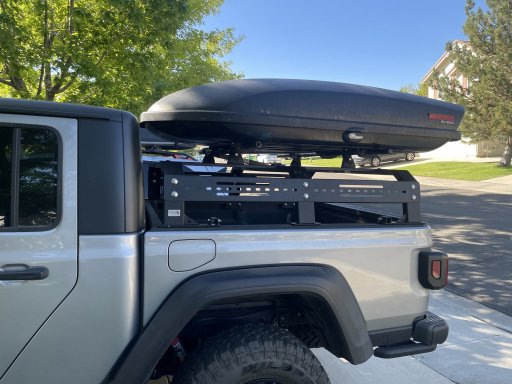
At this point I've mounted my top box and one bike mount to the Yakima bars.

tempImageW2eFP0.jpg

The top of the cargo box sits a little above the cab, but still aerodynamic.

tempImagei2pBVO.jpg

The rack certainly gives me more useable cargo space, and it allows me to see out the back better than I could with the Yakima bed rack.

tempImage4qsDaF.jpg
 
  • Like
Reactions: Scottjeep

Cobblecrazy

Rank V
Launch Member

Enthusiast III

1,721
Reno
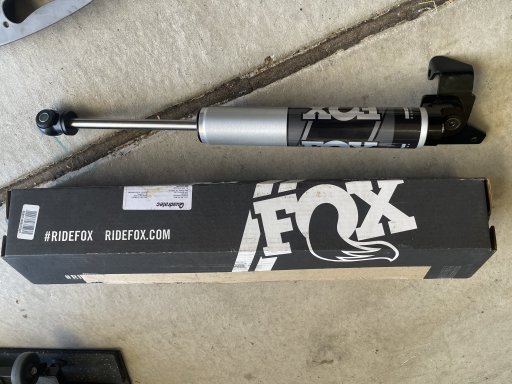
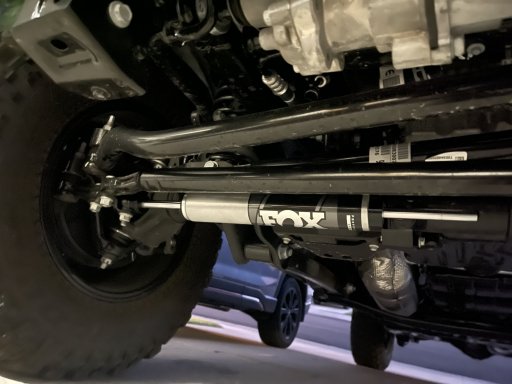
Game changer...That's really the first thing that comes to mind. Many - myself included - have experienced "loose" or a "wonder" in the steering of their Jeep. There have been posts about getting steering boxes replaced (some by a recall), or doing other more costly modifications, some with success, some not. I would have to say the introduction of this through shaft steering stabilizer has had an immediate improvement in the handling of the Gladiator.

The install was fairly easy. Tools needed were limited to a ratchet, 18mm socket, a 13mm ratcheting wrench, a hex head wrench and a torque wrench (I had one more tool that I'll discuss a little more in detail). The Fox stabilizer comes with a mount which replaces the factory mount. There are 3 - 13mm bolts. One of the bolts is easy to get to and the other two are a bit more tricky - partially blocked by the track bar. Adding to the adventure of getting tools in to the bolts (without removing the other suspension parts) is these two bolts have loctite so you need a little more leverage to break them free. I didn't have a long handle wrench, or a cheater bar, so I ended up tapping on the end of my ratcheting wrench a couple times which worked perfectly. Once they were spinning they came out fast just remember to stop using the ratcheting end and switch to the open end before you can't take the wrench off the bolt as it will get sandwiched against the bar. The 18mm bolt is a carriage bolt so all you need is to unscrew the nut (a tip - after you break the nut free you need to put a little pressure down on the top of the bolt as it liked to jump out of it's notch as you were unscrewing the nut). Prior to installation, the Fox mount attaches to the Fox stabilizer by two hex head bolts. Pretty simple. Installation of the Fox stabilizer took about 5 minutes, and most of that was just fiddling with the upper (passenger side) bolt as it was a little tricky holding on to everything with one hand and screwing the bolt in with the other. The final product looks good.

tempImagetxpm1j.jpg

I did a quick lock to lock steering check to make sure the shaft didn't come into contact with any other parts. Afterwards, I did a short drive through the neighborhood, and I could already notice a "stiffer" feel to the steering.

Today, I did a mixed terrain 120 mile drive up into the mountains. The drive included 70mph freeway driving (some with considerable side winds), twisty paved mountain roads, and a short bit of mildly technical dirt roads. I have done this out and back (turn for turn) with the stock stabilizer (and with almost the same weather conditions), and I can say without a doubt the steering felt more planted to the road. Previously I experienced a slight "drifting", or "lightness", to the steering - especially in the side wind - and this was all but gone. I know part of the "drift" some experience can be attributed to the mud terrain tires/tire pressure, but I can say that all those factors were exactly the same with the stock stabilizer and the Fox stabilizer. I wasn't doing high speeds on the dirt/rocky roads, but, again, it was exactly the same with both stabilizers, and I found harder hits were minimized by the new stabilizer.

At $289, I think the results make this arguably the best bang for your buck upgrade. Of note: there is a "race series" Fox through shaft stabilizer with an external reservoir and a 24 click stiffness adjuster that is also a direct bolt on. At about $430 the cost is still pretty low, and it might work better for those who go a little more extreme than I plan on doing.
 
Last edited:
  • Like
Reactions: Scottjeep

Cobblecrazy

Rank V
Launch Member

Enthusiast III

1,721
Reno
For those thinking of changing out their steering stabilizer on the Jeep JT (Gladiator), or the JL, I thought this was an interesting video.
 
  • Like
Reactions: Scottjeep