2016 GMC Canyon trail build

  • HTML tutorial

RJCanyon

Rank V
Member

Member III

2,766
California, USA
First Name
Bobby
Last Name
Horne
Member #

19131

And here is the final product! I'm really happy with the way it turned out. Now onto the important stuff...tires, I went with the Milestar Patagonia MT in 265/70R17 and let start by saying they absolutely rub. these tires due to the aggressive style are some of the largest 265/70R17 i've seen, it rubbed on the waffle and is REALLY close to the pinch weld in certain positions, less than finger width at its closest point (i'm going to have to cut it to feel comfortable).

now onto where they DON'T rub. they clear the frame, sway bar and upper control arms by miles in all directions.

my ultra on-the-spot fix was to completely delete the waffle and zip tie the fender well cover and to be honest it actually looks ok and gives me heaps of clearance, I will likely just leave it deleted as half ass as it may sound, aesthetics don't really concern me.

Final measurements:

Front: (taken from ground through center of wheel to fender)
36 7/8 inches

Rear:
37 7/8 inches

Tow Hitch:
17 1/2 inches

Rear bumper steps:
20 inches

View attachment 131082
View attachment 131083
View attachment 131084
View attachment 131085
View attachment 131086
View attachment 131087
View attachment 131088
Nice truck, RJ. All my trucks have been Chevy up until my current, 2014 GMC Sierra. Love it, and if I were going to go midsize, I thought I would go Canyon. I just wish there was a Canyon zr2!
Me too! I tried to make mine as “ZR2” as I could haha
 

Boostpowered

Rank VI

Member III

4,879
Hunt county, TX, USA
First Name
Justin
Last Name
Davis
Member #

14684

Neat tool — any chance it can show 4x4 status?
Probably not ive never seen it gm has that on the dash
Wow. More info than you can shake a stick at!
Yep there are way more gauges for differnt things, multiple pages for gauges, different themes etc. Also resets fault codes after you fix a problem without having to go to a dealership.
 
  • Like
Reactions: RJCanyon

Pathfinder I

1,212
Canada
First Name
Craig
Last Name
PereferNotToSay
Probably not ive never seen it gm has that on the dash
I’m one of the unlucky ones that only has the indicator on the dial — I have the all terrain package but no light on the dash, no display, etc. I know I can move the 4x4 dial or install a light in the cluster but a plug and play option that would display on a screen would be nice. Ah well! A minor complaint on an otherwise excellent little truck
 

Boostpowered

Rank VI

Member III

4,879
Hunt county, TX, USA
First Name
Justin
Last Name
Davis
Member #

14684

I’m one of the unlucky ones that only has the indicator on the dial — I have the all terrain package but no light on the dash, no display, etc. I know I can move the 4x4 dial or install a light in the cluster but a plug and play option that would display on a screen would be nice. Ah well! A minor complaint on an otherwise excellent little truck
Yeah the only sensors you can see are the ones gm allows you too see. Its pretty much everything but 4x4 status. Latest updates on the app I use has offroad inclinometers and g force readings.
 

Boostpowered

Rank VI

Member III

4,879
Hunt county, TX, USA
First Name
Justin
Last Name
Davis
Member #

14684

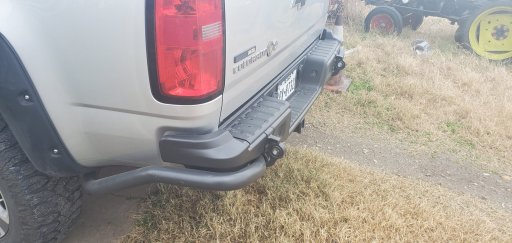
New update on my dv8 bumper, I'm not getting one the place I ordered from said it had one in stock when I ordered then tried to charge me then said they don't have any and dv8 has a couple month lead time. So I just went a step or 10 up and ordered the aev rear bumper today, I won't have to make my own tubing now so I guess it all worked out.
 
  • Like
Reactions: ChasingOurTrunks

Boostpowered

Rank VI

Member III

4,879
Hunt county, TX, USA
First Name
Justin
Last Name
Davis
Member #

14684

Ok here is the low down on the aev rear bumper. Its real nice but if you decide to get one be sure you have at least 4 friends to help or get real good at lifting nearly 200lbs with one hand and turning a wrench with the other, I don't have friends so it was one hell of a struggle but I got it done took me from 3pm to 7pm to get the old bumper and the tow bar off, drill holes and get new one on.


20210117_104542.jpg
 

RJCanyon

Rank V
Member

Member III

2,766
California, USA
First Name
Bobby
Last Name
Horne
Member #

19131

New update on my dv8 bumper, I'm not getting one the place I ordered from said it had one in stock when I ordered then tried to charge me then said they don't have any and dv8 has a couple month lead time. So I just went a step or 10 up and ordered the aev rear bumper today, I won't have to make my own tubing now so I guess it all worked out.
Awesome!!
 

RJCanyon

Rank V
Member

Member III

2,766
California, USA
First Name
Bobby
Last Name
Horne
Member #

19131

Ok here is the low down on the aev rear bumper. Its real nice but if you decide to get one be sure you have at least 4 friends to help or get real good at lifting nearly 200lbs with one hand and turning a wrench with the other, I don't have friends so it was one hell of a struggle but I got it done took me from 3pm to 7pm to get the old bumper and the tow bar off, drill holes and get new one on.


View attachment 184185
im jealous
 

Boostpowered

Rank VI

Member III

4,879
Hunt county, TX, USA
First Name
Justin
Last Name
Davis
Member #

14684

im jealous
Don't be yours is cool too I would have had the dv8 if they would have been in stock.

Did you have to remove the tow bar too to install your bumper and does yours use 8 or 4 bolts to hold the bumper? The aev was 18 bolts in total and had to drill 4 holes in the frame for the bed bar mounts. And if you were to install the aev without a tow bar it would be a lot weaker, the tow bar slides into the mounts and makes it solid tubing all the way around.

Way harder to install the aev than the midwest overland industries center bumper with a 13k winch on it.
 

RJCanyon

Rank V
Member

Member III

2,766
California, USA
First Name
Bobby
Last Name
Horne
Member #

19131

im jealous
Don't be yours is cool too I would have had the dv8 if they would have been in stock.

Did you have to remove the tow bar too to install your bumper and does yours use 8 or 4 bolts to hold the bumper? The aev was 18 bolts in total and had to drill 4 holes in the frame for the bed bar mounts. And if you were to install the aev without a tow bar it would be a lot weaker, the tow bar slides into the mounts and makes it solid tubing all the way around.

Way harder to install the aev than the midwest overland industries center bumper with a 13k winch on it.
The DV8 used the same 4 mounting locations as the factory bumper for the brackets. The brackets then used 4 mounting locations to attach the bumper. The tow bar did not need to be removed. I had the install complete in about an hour. Would have been faster if GM didn’t use red loctite on the bolts haha.
 

Boostpowered

Rank VI

Member III

4,879
Hunt county, TX, USA
First Name
Justin
Last Name
Davis
Member #

14684

The DV8 used the same 4 mounting locations as the factory bumper for the brackets. The brackets then used 4 mounting locations to attach the bumper. The tow bar did not need to be removed. I had the install complete in about an hour. Would have been faster if GM didn’t use red loctite on the bolts haha.
Yeah those bolts were hard to get off mine had tiny rocks in the threads too that made the most god awful noise every couple turns
 
  • Like
Reactions: RJCanyon

RJCanyon

Rank V
Member

Member III

2,766
California, USA
First Name
Bobby
Last Name
Horne
Member #

19131

Its been awhile since I've updated but I have a few things ive done and full front suspension coming soon!


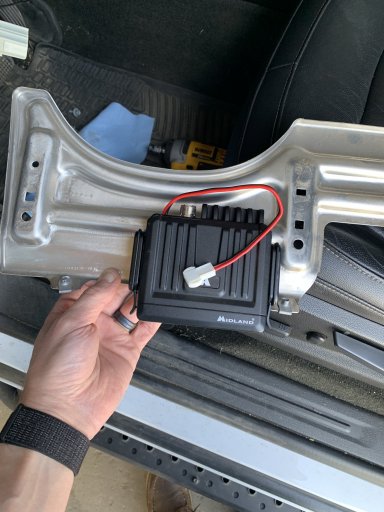
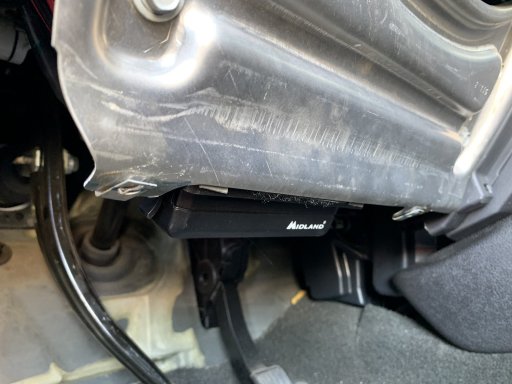
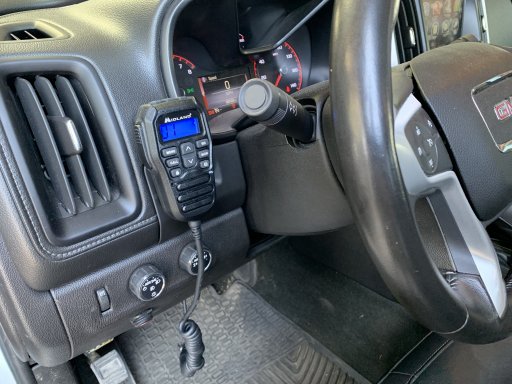
Today I installed a GMRS radio setup, I put in the Midland MXT275 MicroMobile. I like this unit a lot because all of the controls are on the mic and the unit itself can be stowed away. I put it under the kick panel and attached to the metal shield. It came out pretty clean and not noticeable but the front of the unit is fully accessible without having to remove anything. I also built my own harness for it with an inline bladed fuse because the original comes with a glass fuse but I carry extra bladed ones in my truck and wanted it the same.

IMG_1049 (1).jpg
IMG_1053.jpg
IMG_1054.jpg

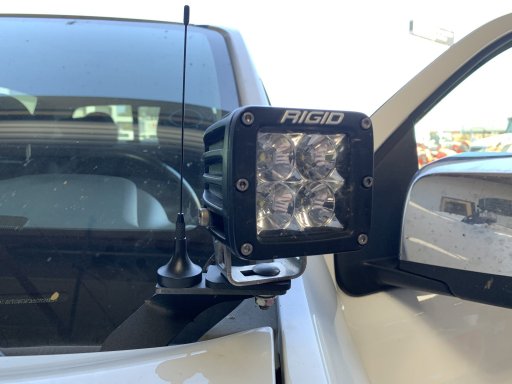
I built a small bracket that attached to my CBI ditch light bracket for the antennae and routed it through the fender and the side of the dash behind the doors weather stripping.

IMG_1055.jpg

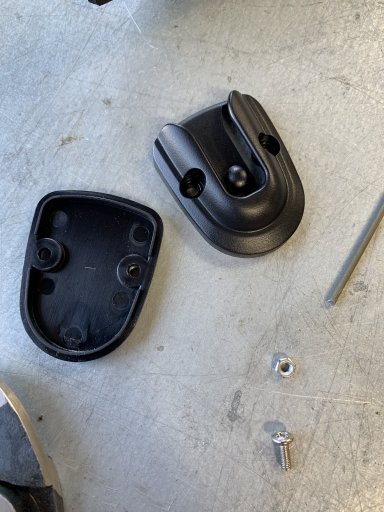
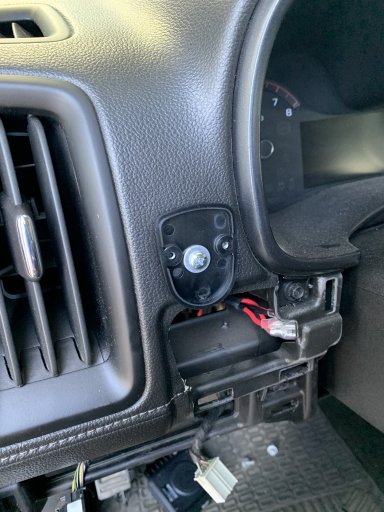
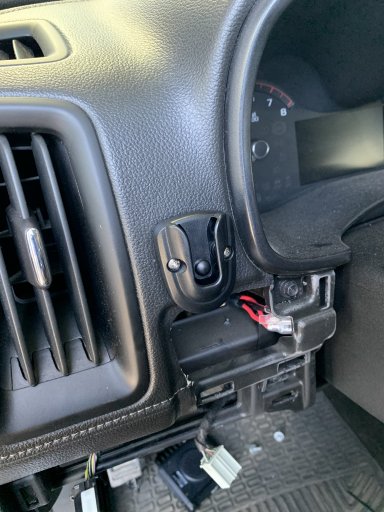
Then came time for the mic mount to be mounted, the GM twins really have almost no flat spots and the material the dash is made out of does not accept adhesive very well. Midland includes a decent mount but is adhesive only so I pulled it apart and drilled a hole into it and into the dash so I could hard mount it with a small nut and bolt. worked out really well and its very solid.

IMG_1050.jpg
IMG_1051.jpg
IMG_1052.jpg

Here is the "almost" final product. I really like how it turned out and cant wait to test it out on the trails.

IMG_1057.jpg

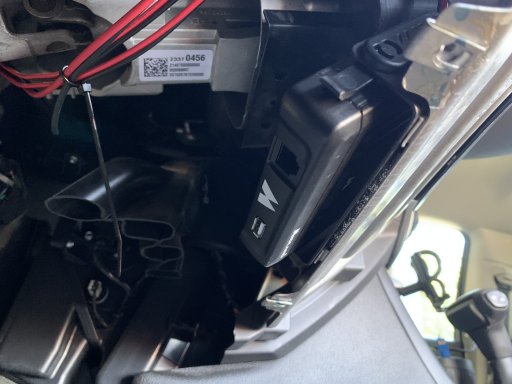
I say "almost" final because i don't want to plug the mic directly into the unit as it leaves the cable pretty close to my feet when driving. I already have Midland's mic extension but I'm going to purchase an RJ45 coupler and install it into the dash in a more convenient location that moves the cable out of the way.
 

RoarinRow

Rank V
Launch Member

Member III

2,771
Elk Grove, CA, USA
First Name
Rolando
Last Name
Nispiros
Member #

17011

Ham/GMRS Callsign
KN6JJS
Its been awhile since I've updated but I have a few things ive done and full front suspension coming soon!


Today I installed a GMRS radio setup, I put in the Midland MXT275 MicroMobile. I like this unit a lot because all of the controls are on the mic and the unit itself can be stowed away. I put it under the kick panel and attached to the metal shield. It came out pretty clean and not noticeable but the front of the unit is fully accessible without having to remove anything. I also built my own harness for it with an inline bladed fuse because the original comes with a glass fuse but I carry extra bladed ones in my truck and wanted it the same.

View attachment 197782
View attachment 197783
View attachment 197784

I built a small bracket that attached to my CBI ditch light bracket for the antennae and routed it through the fender and the side of the dash behind the doors weather stripping.

View attachment 197785

Then came time for the mic mount to be mounted, the GM twins really have almost no flat spots and the material the dash is made out of does not accept adhesive very well. Midland includes a decent mount but is adhesive only so I pulled it apart and drilled a hole into it and into the dash so I could hard mount it with a small nut and bolt. worked out really well and its very solid.

View attachment 197786
View attachment 197787
View attachment 197788

Here is the "almost" final product. I really like how it turned out and cant wait to test it out on the trails.

View attachment 197789

I say "almost" final because i don't want to plug the mic directly into the unit as it leaves the cable pretty close to my feet when driving. I already have Midland's mic extension but I'm going to purchase an RJ45 coupler and install it into the dash in a more convenient location that moves the cable out of the way.
Nice install. I like how it's tucked nicely underneath.
 
  • Like
Reactions: RJCanyon

Kevinista

Rank V
Launch Member

Enthusiast III

2,487
Obetz, OH 43207, USA
First Name
Kevin
Last Name
CRESS
Member #

20012

Ham/GMRS Callsign
KF5GEC
Its been awhile since I've updated but I have a few things ive done and full front suspension coming soon!


Today I installed a GMRS radio setup, I put in the Midland MXT275 MicroMobile. I like this unit a lot because all of the controls are on the mic and the unit itself can be stowed away. I put it under the kick panel and attached to the metal shield. It came out pretty clean and not noticeable but the front of the unit is fully accessible without having to remove anything. I also built my own harness for it with an inline bladed fuse because the original comes with a glass fuse but I carry extra bladed ones in my truck and wanted it the same.

View attachment 197782
View attachment 197783
View attachment 197784

I built a small bracket that attached to my CBI ditch light bracket for the antennae and routed it through the fender and the side of the dash behind the doors weather stripping.

View attachment 197785

Then came time for the mic mount to be mounted, the GM twins really have almost no flat spots and the material the dash is made out of does not accept adhesive very well. Midland includes a decent mount but is adhesive only so I pulled it apart and drilled a hole into it and into the dash so I could hard mount it with a small nut and bolt. worked out really well and its very solid.

View attachment 197786
View attachment 197787
View attachment 197788

Here is the "almost" final product. I really like how it turned out and cant wait to test it out on the trails.

View attachment 197789

I say "almost" final because i don't want to plug the mic directly into the unit as it leaves the cable pretty close to my feet when driving. I already have Midland's mic extension but I'm going to purchase an RJ45 coupler and install it into the dash in a more convenient location that moves the cable out of the way.
Thanks for the install pictures!
 
  • Like
Reactions: RJCanyon

RJCanyon

Rank V
Member

Member III

2,766
California, USA
First Name
Bobby
Last Name
Horne
Member #

19131

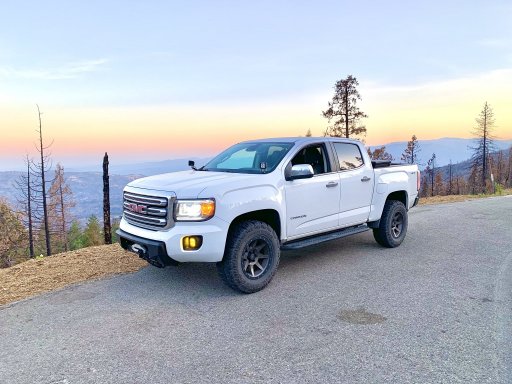
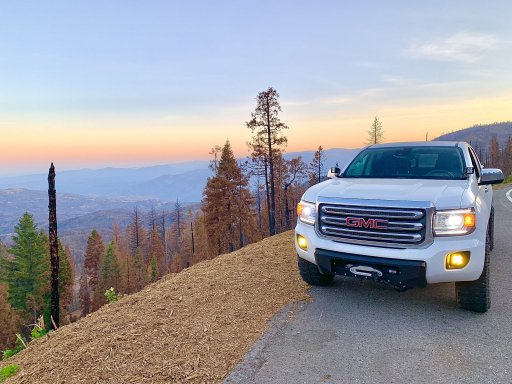
A couple updated shots of the Canyon as she currently sits. I am currently in possession of a set of Peak coilovers set to 3" with HD springs, Camburg UCAs, diff drop, extended end links and sway bar relocation but due to being in between homes at the moment and living in Shaver lake for the time being the install is gonna have to wait.:sunglasses:

IMG_1145.jpg
IMG_1146.jpg
 

Boostpowered

Rank VI

Member III

4,879
Hunt county, TX, USA
First Name
Justin
Last Name
Davis
Member #

14684

A couple updated shots of the Canyon as she currently sits. I am currently in possession of a set of Peak coilovers set to 3" with HD springs, Camburg UCAs, diff drop, extended end links and sway bar relocation but due to being in between homes at the moment and living in Shaver lake for the time being the install is gonna have to wait.:sunglasses:

View attachment 200306
View attachment 200307
It's only a 4 hour job if you've got the tools and don't goof off.
 
  • Like
Reactions: RJCanyon