2003 Grand Cherokee Laredo

  • HTML tutorial

JimBill

Rank V
Member
Investor

Advocate I

2,268
San Benito County, CA, USA
First Name
James
Last Name
Madison
Member #

18747

Eastern Oregon trip part 2- Vehicle performance under max load-

The internet of things likes to say get the v8 WJ for the power. Especially if you load up or tow. I agree, but not for the standard logic that the motor is more powerful. It is all in the transmission.

I was near max weight, and at highway speeds the 5-6 speed transmission with the double overdrive and half gear?? programing worked wonders. Only rarely did I have to kick back down to 1:1 drive, the slight downshifting of the overdrives usually was enough to keep 60-70 MPH on the freeway grades. The 6 cylinder gets a 3+OD trans, and if OD doesn't hold it you are in 1:1, or worse yet 2nd gear (my Tahoe suffers the same, my old 5 speed Silverado with the little 4.8 would walk the 5.3 Liter Tahoe all day under load or in elevation). I was following a 2 door Jeep with that set up and he was miserable trying to not drop off to 50 at the top of each grade. The only time I hit full throttle was on I-80 trying to keep 70 MPH+ on the steepest. And we also hit near 10,000 feet elevation in Oregon, and I never felt I lacked the grunt to do whatever speed I wanted to do. The 4.7 also has a 4 cylinder power curve to me, but it likes to rev. Get the rev's up and she goes like hell.

Now trailering- The little 1/4 ton trailer is a perfect fit for the WJ. With the 1" sway bar on the rear of the WJ it tracked beautifully. No pushing or pulling the rear end around. I had the weight just forward of the trailer wheels, favoring tongue weight and the pintle hitch rarely made a sound. This trailer pulled incredibly well, other than sometimes feeling like you left the e-brake on I would forget it is there. I could have not asked for a better handling setup. Yet, I learned I HATE pulling a trailer, no matter how perfect, off road on trails. Turning around, maneuvering around obstacles, constantly having to pay attention to it was not a joy to me. But on the highway, no problem since it was so easy to tow and handled so perfectly.
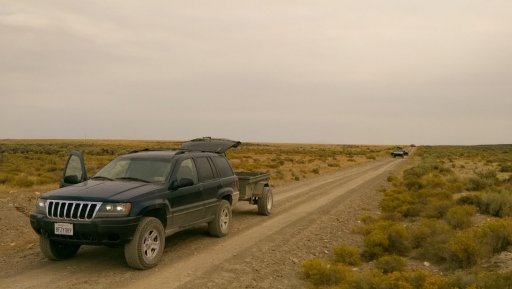
trailer.jpg

Did I mention it pulled so well I would almost forget it is there? On a tight switch back we came to a halt as a buddy was shifting his transfer case. He was having issues and backed up trying to get it to release. I had to suddenly back up to not get hit, and with the trailer already on a tight turn I instantly jack knifed it. Sacrificed the quarter panel. Well, it now is officially a trail rig. At least the window and tail light were undamaged. And yes, I hated pulling the trailer before this happened.
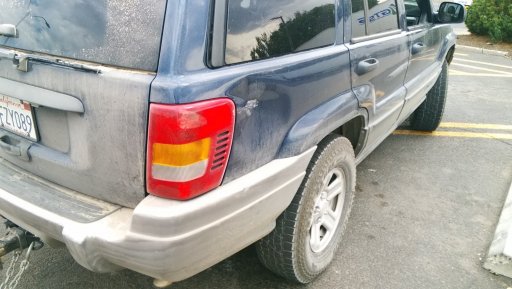
Dent.jpg
 
  • Like
Reactions: Arailt

tjZ06

Rank V
Launch Member

Advocate I

2,268
Las Vegas/Palo Alto
First Name
mynameisntallowed
Last Name
Adams
Member #

20043

Just completed a trip to Eastern Oregon. The trip was an 8 day softroading excursion hoping to do a defined route. There were a lot of issues that forced us to adjust the trip on the fly, but that's part of the fun. This post is about load out and gross vehicle weight.

I was going to take the Tahoe, but ended up taking the WJ and a borrowed Canadian 1/4 ton military trailer. We had a full load out for 8 days (food and all), and expected to put in some serious miles and time between fuel and supply stops. So I had the usual tent, air mattress, sleeping bags, tools, mess kit, 12 volt fridge, privacy shelter, loo, and so on. But also had 7.5 gallons fuel, 10 gallons water, and a 850 pound trailer.

I knew form experience I would be pushing max vehicle weight, therefor the need for the trailer (well mostly for the bulk, but yeah). My WJ has a max of 5500 pounds, and it works out to about 1000 pounds of payload. Let's say I am an over large person, and me and my passenger take up half that. That gives us 500 or so pounds to work with.

Somewhere near Burns Oregon I stopped at an unmanned scale. The WJ weighed 5400 pounds and the trailer weighted 950 pounds. So the WJ was near max with us, our load, and the tongue weight of the trailer. The trailer, minus tongue weight, only burdened about a hundred pounds extra. So ignoring fitting 10 pounds of potatoes in a 5 pound bag, without the trailer we would have been at max vehicle weight.

Bear in mind my WJ is a stock based rig so far, with no rock sliders, steel bumpers, winch, or heavy rims/tires. Although I find the WJ fun to drive grocery getting, incredible on the trails, and otherwise a great vehicle, it does not have enough payload capacity to be an expedition vehicle. And if you are adding armor and other fun stuff, it is a better rock crawling toy and weekender than expedition vehicle. My Tahoe would have been a much better fit for this run (but it is sidelined waiting a front end rebuild).

View attachment 168258
Great post... I suspect I'll be at GVWR with my rig itself and me in it now... certainly over with a full camping load-out.

-TJ
 

tjZ06

Rank V
Launch Member

Advocate I

2,268
Las Vegas/Palo Alto
First Name
mynameisntallowed
Last Name
Adams
Member #

20043

Eastern Oregon trip part 2- Vehicle performance under max load-

The internet of things likes to say get the v8 WJ for the power. Especially if you load up or tow. I agree, but not for the standard logic that the motor is more powerful. It is all in the transmission.

I was near max weight, and at highway speeds the 5-6 speed transmission with the double overdrive and half gear?? programing worked wonders. Only rarely did I have to kick back down to 1:1 drive, the slight downshifting of the overdrives usually was enough to keep 60-70 MPH on the freeway grades. The 6 cylinder gets a 3+OD trans, and if OD doesn't hold it you are in 1:1, or worse yet 2nd gear (my Tahoe suffers the same, my old 5 speed Silverado with the little 4.8 would walk the 5.3 Liter Tahoe all day under load or in elevation). I was following a 2 door Jeep with that set up and he was miserable trying to not drop off to 50 at the top of each grade. The only time I hit full throttle was on I-80 trying to keep 70 MPH+ on the steepest. And we also hit near 10,000 feet elevation in Oregon, and I never felt I lacked the grunt to do whatever speed I wanted to do. The 4.7 also has a 4 cylinder power curve to me, but it likes to rev. Get the rev's up and she goes like hell.

Now trailering- The little 1/4 ton trailer is a perfect fit for the WJ. With the 1" sway bar on the rear of the WJ it tracked beautifully. No pushing or pulling the rear end around. I had the weight just forward of the trailer wheels, favoring tongue weight and the pintle hitch rarely made a sound. This trailer pulled incredibly well, other than sometimes feeling like you left the e-brake on I would forget it is there. I could have not asked for a better handling setup. Yet, I learned I HATE pulling a trailer, no matter how perfect, off road on trails. Turning around, maneuvering around obstacles, constantly having to pay attention to it was not a joy to me. But on the highway, no problem since it was so easy to tow and handled so perfectly.

View attachment 168276

Did I mention it pulled so well I would almost forget it is there? On a tight switch back we came to a halt as a buddy was shifting his transfer case. He was having issues and backed up trying to get it to release. I had to suddenly back up to not get hit, and with the trailer already on a tight turn I instantly jack knifed it. Sacrificed the quarter panel. Well, it now is officially a trail rig. At least the window and tail light were undamaged. And yes, I hated pulling the trailer before this happened.

View attachment 168277
Bummer on the damage. Really glad to hear how well the 4.7 performed. I have the same feeling about 4.7 WJs vs. 4.0s. Neither are rocket ships, but the torque of the 4.7 is very noticeable, although at a bit higher RPM than one might expect. It's hard to imagine the 330 lb-ft (4.7 HO) NOT being noticeable vs. 230 (4.0). Still, it's really the transmission that makes it all work, and in fact shine. The 545RFE is a bit of an odd-ball with 6 actual ratios as you pointed out, but it uses a different 2nd gear for up-shifts (leaving 1st) than down-shifts (leaving 3rd). But the important thing for freeway time are the 2 ODs at .75:1 and .67:1 technically 4th and 5th. Along with 3rd being 1:1 you have nice small splits of .25 and .08 between the top 3 gears (1 - 0.75 - 0.67) so you always have the "right" highway gear, and on the rare occasion it needs 2nd it drops into 2nd "Prime" which is closer to 3rd, 3rd again being 1:1 but 2nd Prime being 1.50 (vs. 1.67 standard 2nd) to make only a 0.50 jump from 3rd to 2nd Prime instead of a 0.67 jump from 3rd to 2nd. Why not just make it a TRUE six speed, with 4th as a 1:1 and more even spacing all through 1-3... well eventually they did with the 68RFE but it's Chrysler, they had to be special. Still, I think it' a GREAT trans for the WJ and super well-matched to the 4.7 and the overall GVWR of the rig. Remember, Hemi RAMs used the 545RFE as well with much higher HP, Torque and GVWRs and even in those trucks they're known as reliable.

Anyway, great report on how it drove, glad all your work on the sway bars worked out. I really hope to avoid a trailer for Overlanding... Overlanding is my answer to overly-complicated RV + trailer + (non-street-legal) toys trips. I'm just going to have to learn to pack lighter!

-TJ
 
  • Like
Reactions: JimBill

JimBill

Rank V
Member
Investor

Advocate I

2,268
San Benito County, CA, USA
First Name
James
Last Name
Madison
Member #

18747

Bummer on the damage. Really glad to hear how well the 4.7 performed. I have the same feeling about 4.7 WJs vs. 4.0s. Neither are rocket ships, but the torque of the 4.7 is very noticeable, although at a bit higher RPM than one might expect. It's hard to imagine the 330 lb-ft (4.7 HO) NOT being noticeable vs. 230 (4.0). Still, it's really the transmission that makes it all work, and in fact shine. The 545RFE is a bit of an odd-ball with 6 actual ratios as you pointed out, but it uses a different 2nd gear for up-shifts (leaving 1st) than down-shifts (leaving 3rd). But the important thing for freeway time are the 2 ODs at .75:1 and .67:1 technically 4th and 5th. Along with 3rd being 1:1 you have nice small splits of .25 and .08 between the top 3 gears (1 - 0.75 - 0.67) so you always have the "right" highway gear, and on the rare occasion it needs 2nd it drops into 2nd "Prime" which is closer to 3rd, 3rd again being 1:1 but 2nd Prime being 1.50 (vs. 1.67 standard 2nd) to make only a 0.50 jump from 3rd to 2nd Prime instead of a 0.67 jump from 3rd to 2nd. Why not just make it a TRUE six speed, with 4th as a 1:1 and more even spacing all through 1-3... well eventually they did with the 68RFE but it's Chrysler, they had to be special. Still, I think it' a GREAT trans for the WJ and super well-matched to the 4.7 and the overall GVWR of the rig. Remember, Hemi RAMs used the 545RFE as well with much higher HP, Torque and GVWRs and even in those trucks they're known as reliable.

Anyway, great report on how it drove, glad all your work on the sway bars worked out. I really hope to avoid a trailer for Overlanding... Overlanding is my answer to overly-complicated RV + trailer + (non-street-legal) toys trips. I'm just going to have to learn to pack lighter!

-TJ
No doubt the V8 power helps, especially the HO. But as you mentioned it really does not come on until after 3k rpm. By 4k all 8 squirrels are in full adrenaline. But the transmission REALLY matches the power band well. Very different experience than the old torquey V8s and 3 speeds I grew up with. Stay tuned, I have a bit to say about the cooling system (and more faulty new parts....). Not sure if my engine will live very much longer.....
 

JimBill

Rank V
Member
Investor

Advocate I

2,268
San Benito County, CA, USA
First Name
James
Last Name
Madison
Member #

18747

Well I see I never got around to writing up the Oregon Trip cooling system mishaps. A number of life events happened since my August post and are still ongoing. OB and my Gun Club responsibilities have been a low priority. Life is ongoing but I think I am winning at the moment.

Back to the Oregon adventure last year- all this happened during the red flag heat wave and our trip was cut short due to the entire west coast lighting on fire while we were out in the sticks. While driving to, pulling the trailer up Hwy 80 in fair mid-morning heat, the temp wanted to climb at speed. Slowed for traffic or stopping at a rest stop, and the temp would pull back down. Heading out of Reno and up 395, some grades had the same issue. So I had to watch it and keep the speeds down. It was solid triple digit temps and I was running between 205 and 220.

We made it to Burns and the next day went up into the Malheur Nat'l Forest. No issues as the speeds were cruising to crawling. The next day we headed down to Frenchglenn and then up to Steens Mountain. It was 110+ heading out of Frenchglenn and slowly working up to the mountain. Even crawling, I was fighting temps big time and kept stopping and watering the radiator. At about 245 degrees I was about to call it, and popped the hood. The mechanical fan was idling and should have been screaming! Being stressed and pissed off, I grabbed the fan with the engine running and it stopped dead in my hands. The new fan clutch was dead. Yet another defective new part.

In all this, except under extreme conditions, the stock electric fan did keep me going. Sometimes at higher temps than I would like, but manageable. So it did work per my plan. But not enough to manage a full load, 110F+ temps, and a grade. But watering the radiator, no ac, and crawling, we made it to enough altitude for cooler outside temps and all was manageable.

We camped that night on the other side of Steens mountain, with plans to head to Alvord desert the next day. Luckily one of our camping neighbors had just returned from there, and convinced us it was a blast furnace so don't bother. And while we were on Steens mountain overlooking the Alvord, we saw a nice dust storm roll through below. There was no way for me with no working fan clutch.

The next morning I headed to Burns again, bought the tools needed to remove the fan clutch, and ordered a new one. It was due in the following morning. While waiting for our friends to arrive later in the day, while parked at the nice park in town in the shade, I pulled the fan clutch and found the valve frozen. I was able to play with it and unfreeze it. Reinstalled everything and we were good to go. I didn't ruin the trip for the guys, another in the party had an eye problem and needed to come in and see an eye doctor. And register his kids for school. And a few other things.

Now, as it turns out my vintage Norcold Fridge took a crap as well the day before. So we found a good cooler and also a recycler to take the fridge. All before the crew got into town.

We camped once again in the Malheur forest that night, and watched the lighting fly around us. This is the night Oregon ignited. The next morning we picked up my part and headed south trying to stay out of the heat and in front of the fires. With a working fan clutch, I had no other cooling issues the remainder of the trip.

But...there is a but....
 
Last edited:

JimBill

Rank V
Member
Investor

Advocate I

2,268
San Benito County, CA, USA
First Name
James
Last Name
Madison
Member #

18747

And all these months later the engine feels no worse for wear after the heat torture on the Oregon trip. But overall there is a deficiency in the cooling system.
At high speed and on a grade it just does not keep up. I believe this all to be a pressure problem in the engine compartment.

The front end shape forces a lot of air under the vehicle, so a low pressure area is not present at speed. The 99-01 fan shrouds exit really high in the engine compartment due to the mechanical fan location, and exits into a crowded engine compartment. There is a large area on the fan shroud on the lower half that is just solid with no vents. I believe the torturous path upward and then out and the lack of a low pressure draw does not let enough air flow through the stock radiator to keep up at speed.

I do plan on purchasing and installing a 2 row aluminum, it is on the list. Second, the big twin fan shroud I had in my Chevelle had 2 rubber panels that would open up when there was positive pressure in the fan shroud. I need to fabricate the same sort of thing on my WJs shroud. tjZ06 just mentioned about these vents on his build thread as well, as the vents are incorporated on his aftermarket shroud setup. I hope doing so, along with an increased capacity radiator, does the trick.

If not then there are two other tricks. Make a kydex air dam (with quick fittings) to force more air into the radiator, and less under the car (add air dam removal to disconnecting and airing down routine), and add hood vents to relieve positive pressure under the hood. Or just live with it. The hottest I have gotten since then was 215 on a 108 degree day as it is now.

Edit: Was rear ended in Santa Nella a little over a month ago. The Toyota Sequoya that hit me ate my trailer hitch pretty good. It rode over his bumper and into his grill, and lifted and leapfrogged me into the intersection. Thankfully there was nobody in front of me and I had just taken my foot off of the brake. After finally getting it inspected, no damage whatsoever to the subframe or crumple areas. The hitch took it like a boss. Just some witness on the bumper skin that was likely already there from the previous owner. So I get a new skin out of the deal anyway. What a PITA.
 
Last edited:

JimBill

Rank V
Member
Investor

Advocate I

2,268
San Benito County, CA, USA
First Name
James
Last Name
Madison
Member #

18747

This weekend did a little corrective maintenance. The drivers door window regulator took a dump. I've replaced the 3 others over time and had the part. Nothing too exciting but that is now replaced.

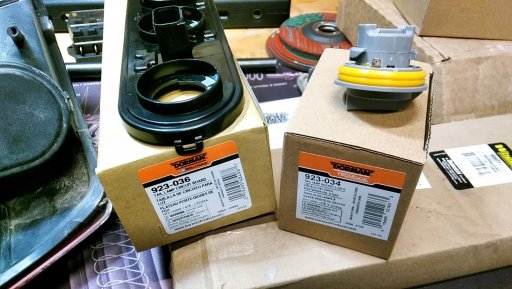
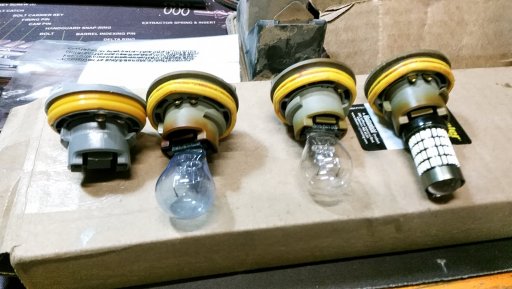
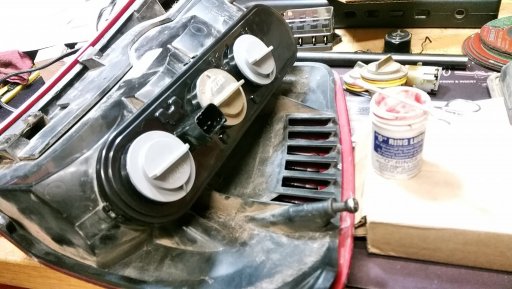
Late last week it was noticed my passenger tail light would go out when I hit the brake. I played with it a bit and it appeared something in the connector or circuit board took a dump. The connector looked fine. The tail light was already a junkyard pick, so rather than replace it with another 20 year old one I replaced the circuit board. The "upgraded" circuit board and sockets are available from Dorman for an extremely reasonable price. All works well now. The only trick is to use a heat gun to soften the adhesive to pry the old board off, and O ring lube really helps with installing and servicing the bulb sockets. Picture below shows the part numbers.

Replaced 2 sockets, the burned one and another that fell apart on removal. At this point will just order enough to replace them all. Lastly, with cheap LEDs out there, there is no excuse not to have the brightest LED back up bulbs on the block.

P_20210403_142621_LL.jpg

P_20210403_142721_LL.jpg

P_20210403_143634_LL.jpg
 

tjZ06

Rank V
Launch Member

Advocate I

2,268
Las Vegas/Palo Alto
First Name
mynameisntallowed
Last Name
Adams
Member #

20043

This weekend did a little corrective maintenance. The drivers door window regulator took a dump. I've replaced the 3 others over time and had the part. Nothing too exciting but that is now replaced.

Late last week it was noticed my passenger tail light would go out when I hit the brake. I played with it a bit and it appeared something in the connector or circuit board took a dump. The connector looked fine. The tail light was already a junkyard pick, so rather than replace it with another 20 year old one I replaced the circuit board. The "upgraded" circuit board and sockets are available from Dorman for an extremely reasonable price. All works well now. The only trick is to use a heat gun to soften the adhesive to pry the old board off, and O ring lube really helps with installing and servicing the bulb sockets. Picture below shows the part numbers.

Replaced 2 sockets, the burned one and another that fell apart on removal. At this point will just order enough to replace them all. Lastly, with cheap LEDs out there, there is no excuse not to have the brightest LED back up bulbs on the block.

View attachment 193804

View attachment 193805

View attachment 193806
Interestingly my driver's door window regulator just went out too. I had replaced it a few years ago, but just got a cheap Rock Auto unit. Got a Mopar this one time, hopefully it lasts a bit longer this time. Good info on the tail lights, I'm sure that'll be in my future too (as I prefer to leave the stock lights front and rear, vs. the "modern" aftermarket replacements that have LED strips and stuff to mimic modern vehicles, even WK2s).

-TJ
 

JimBill

Rank V
Member
Investor

Advocate I

2,268
San Benito County, CA, USA
First Name
James
Last Name
Madison
Member #

18747

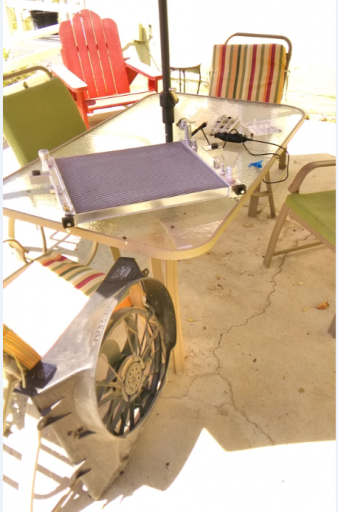
I didn't think I would be back into it so soon, but the Oregon trip cooling issues from last fall had to be addressed. Later this month we have plans to head to Bishop area for a long weekend of exploring so now is the time. This weekend addressed 3 annoyances with the WJ. Installed a 2 row all aluminum radiator to address the extreme condition overheating issue, trimmed the front bumper for max flex tire interference, and changed up the front disconnect system due to hardware interference.

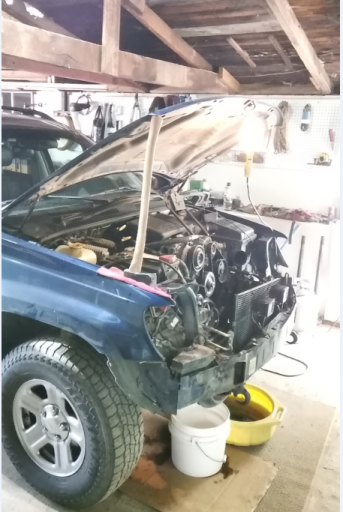
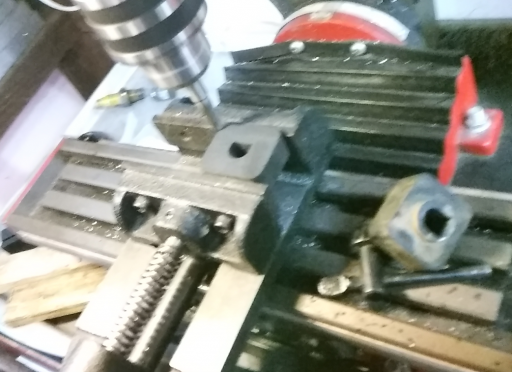
Focusing on the radiator, it was far from a casual remove and replace. It was WJ inspired, and almost fit! FYI- new hood struts are now added to the list, and a boys size axe is perfect length by the way. The drain petcock arrived broken. I could not match the threads to metric or standard, so picked up a 1/4 pipe brass petcock and intended to drill and tap to make it fit. Strangely, it screwed all in perfect, so whatever it was shipped with was wrong to begin. For the transmission cooler fitting adapters, I milled 2 flats on each so I could use a wrench to tighten (forgot to take picture). Radiator now prepped for fitting.

1.PNG 2.PNG

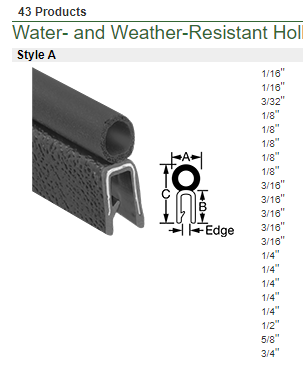
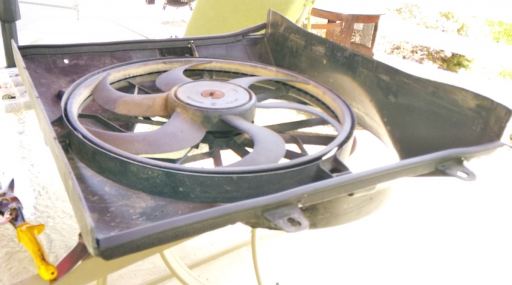
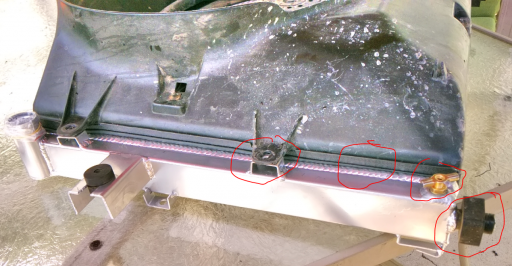
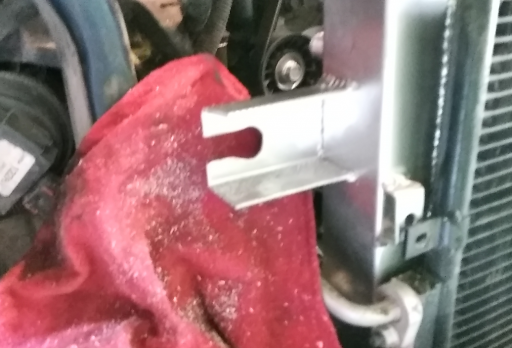
The '99 fan shroud was perfect height and fit well on the top and bottom of the radiator, but the mounting tabs sat high so there were gaps on the sides. The mounting tabs were also just off enough so the bolt holes were not close. Luckily, a little dremmel work to the fan shroud tabs and mounting was solved. For the gap, I stole rubber seals from a window insert I use to winterize my old home. Careful trimming and I was able to make it work. The seal is available from McMaster-Carr, when I get time I can figure out the part number I used and order some more.

2.1.PNG 2.2.PNG
3.PNG

Test fitting the radiator, it sat very high. The main mounting tabs were off quite a bit. Noting how far off the lower pads were, I machined 3/8 inch off each pad. Better fit, one mount lined up. The second mount was welded on a little tweaked, so I had to machine the slot to let the rubber isolator sit a little lower.

4.PNG 5.PNG

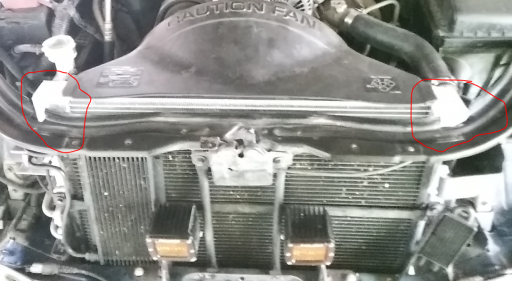
And finally, the expected clearancing of the radiator support to accomodate the higher and square shaped tanks.

6.PNG

I trimmed the top seal and buttoned it up. Everything fits snug. The 99 transmission cooler hard lines caused issue, the one running from the cooler to the top port on the radiator required careful stretching to make everything thread up and seal. I did have to replace the lower fitting O ring as well, it was weeping pretty good and I found a lower soft line weeping as well. All in all this was a project, turning a 2 1/2 hour job into about 8 hours.

Driving around town I notice my electric fan coming on constantly, and the temp gauge oscillating on either side of thermostat opening. The probe is acting slightly different, and picking up heat a little better, and triggering right at thermostat opening. Next weekend I will get in and fine tune the fan controller.
 
Last edited:

JimBill

Rank V
Member
Investor

Advocate I

2,268
San Benito County, CA, USA
First Name
James
Last Name
Madison
Member #

18747

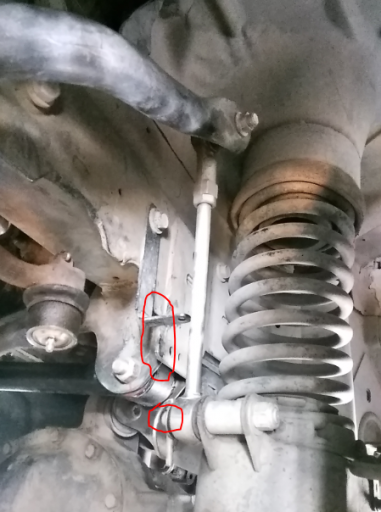
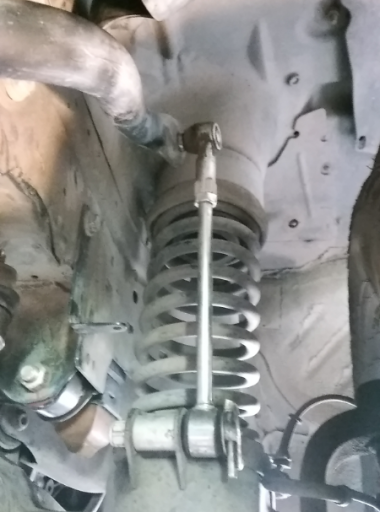
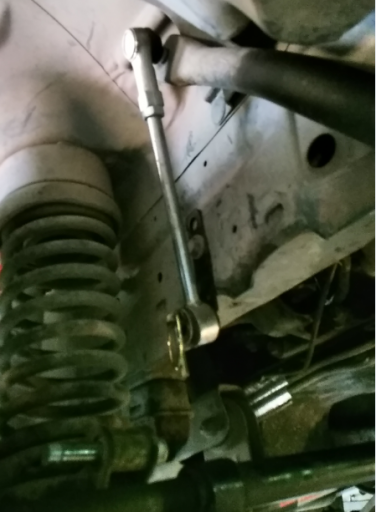
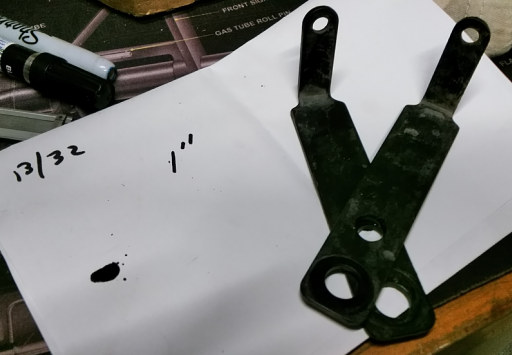
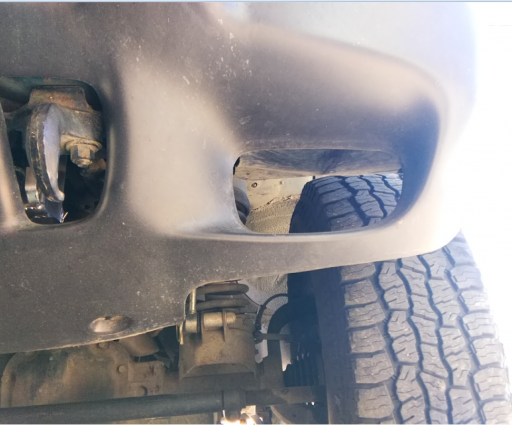
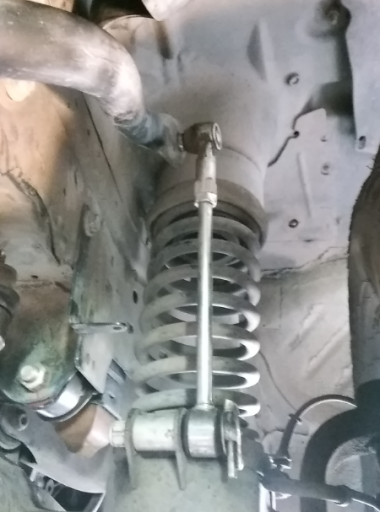
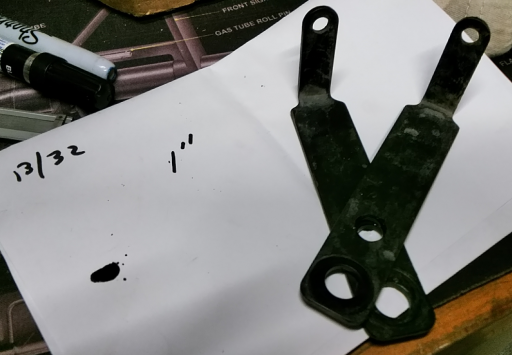
With the windshield washer bottle relocated and the factory fog lights cut out, there was tire rub only at full front tire stuff when disconnected. Also at full flex, the quick disconnect pin on the drivers side was riding up the track bar bracket and putting the system in a bind. Lastly, when the front bar was disconnected the passenger side retaining bracket was getting bent up from the steering linkage. I lost a few clips along the way from this as well.

9.PNG

I've been mulling over how to deal with the pin hitting the bracket for some time. The easiest solution finally came to me- flip the discos to the outside. And while working this, the solution to the brackets was evident as well. There was room so I simply drilled them to sit higher, using an appropriate sized drill for the bolt size (unlike the manufacturer).

10.PNG 12.PNG

11.PNG

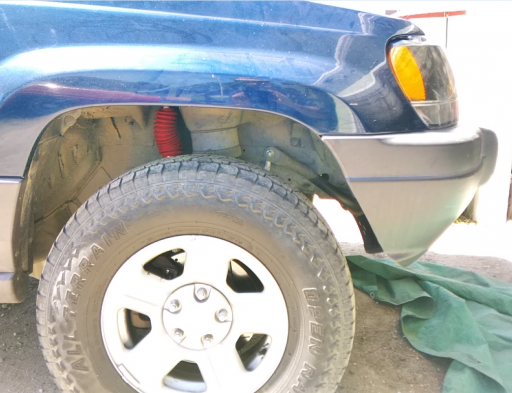
The front bumper skin trim goal was to take just enough to do the job. I can take more in the future when I lift it and upsize the tires, but this will do for now.

7.PNG
8.PNG
 

Attachments

  • Like
Reactions: MrWilsonWJ

JimBill

Rank V
Member
Investor

Advocate I

2,268
San Benito County, CA, USA
First Name
James
Last Name
Madison
Member #

18747

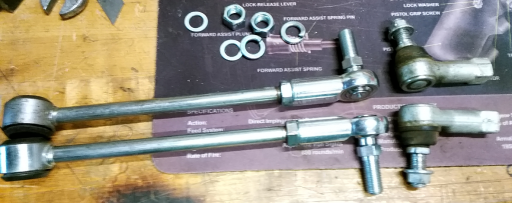
Last night played a little more with the front quick disconnect system. Upgraded the the top joints to a stouter ball joint linkage.
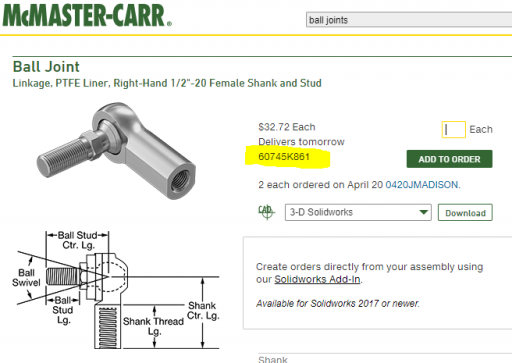
The base kit I have is the Rough Country kit. The shaft is threaded 1/2-20 and I found a much more robust ball joint from McMaster-Carr. Search "Ball Joint Rod Ends" and "Ball Joint Linkages" and they probably have a flavor that works for you. I went for a teflon lined socket and will see how they hold up.
The 1/2-20 shaft fits the sway bar hole much better than the undersized Rough Country unit and also it sits about a 1/4 inch shallower to the sway bar, allowing that little bit extra clearance from a fully stuffed tire turned to full lock. I'll take what I can get. Moving the disconnects outboard last weekend gave a little better on road feel, and upgrading the upgraded end links last night added a tad more. The disco length was previously 11 inches, which was too long. They are now set at 10 inches and the improvement in sway bar angle may be the root of the improvement.
The discos are still too long, I am not quite back to the 30 degree stock sway bar angle. Next is to take a die, add threads, and cut an inch off the shafts and set center to center length to 9". To Be Continued...

FYI- Assemble with a little anti-seize. I originally didn't and regretted it when I removed the original ball joints. Corrosion made employing a vice necessary.

End Links Updated.PNG

Ball Joint.PNG

Update 5/6/2021
Threaded and cut links and set discos to 9 inch center to center (was 10, was was 11).
As a reference the internet of misinformation said "Fat Bob's Garage recommends 9" length for 2 - 3 inch lift". Legitimacy of comment/source not fact checked but length was checked on vehicle.
Best on road feel on my vehicle was at 10 inches center to center for the front discos. So going back to 10 inches and calling it good for now. Clearances all work out nicely at 10" length as well on my setup.
None of this with the discos mounted outboard will work well with stock offset wheels. Anything bigger than a 245/70-16 will likely rub at full lock when connected.
 
Last edited:

MrWilsonWJ

Rank V
Launch Member

Member III

1,691
Kennewick, WA
First Name
Dustin
Last Name
Wilson
Member #

23384

Last night played a little more with the front quick disconnect system. Upgraded the the top joints to a stouter ball joint linkage.
The base kit I have is the Rough Country kit. The shaft is threaded 1/2-20 and I found a much more robust ball joint from McMaster-Carr. Search "Ball Joint Rod Ends" and "Ball Joint Linkages" and they probably have a flavor that works for you. I went for a teflon lined socket and will see how they hold up.
The 1/2-20 shaft fits the sway bar hole much better than the undersized Rough Country unit and also it sits about a 1/4 inch shallower to the sway bar, allowing that little bit extra clearance from a fully stuffed tire turned to full lock. I'll take what I can get. Moving the disconnects outboard last weekend gave a little better on road feel, and upgrading the upgraded end links last night added a tad more. The disco length was previously 11 inches, which was too long. They are now set at 10 inches and the improvement in sway bar angle may be the root of the improvement.
The discos are still too long, I am not quite back to the 30 degree stock sway bar angle. Next is to take a die, add threads, and cut an inch off the shafts and set center to center length to 9". To Be Continued...

FYI- Assemble with a little anti-seize. I originally didn't and regretted it when I removed the original ball joints. Corrosion made employing a vice necessary.

View attachment 197153

View attachment 197154

Update 5/6/2021
Threaded and cut links and set discos to 9 inch center to center (was 10, was was 11).
As a reference the internet of misinformation said "Fat Bob's Garage recommends 9" length for 2 - 3 inch lift". Legitimacy of comment/source not fact checked but length was checked on vehicle.
Best on road feel on my vehicle was at 10 inches center to center for the front discos. So going back to 10 inches and calling it good for now. Clearances all work out nicely at 10" length as well on my setup.
None of this with the discos mounted outboard will work well with stock offset wheels. Anything bigger than a 245/70-16 will likely rub at full lock when connected.
You mentioned 30 degrees for the sway bar, is that a measurement you took before starting the lift process? I have been wondering what that angle should be since I never took one before I lifted mine. I've been playing around with different lengths for my discos to find a happy spot where it handled best, might have to try setting it to 30 and see how it does.
 

JimBill

Rank V
Member
Investor

Advocate I

2,268
San Benito County, CA, USA
First Name
James
Last Name
Madison
Member #

18747

[/QUOTE]
You mentioned 30 degrees for the sway bar, is that a measurement you took before starting the lift process? .[/QUOTE]

Mine had the budget boost when I bought it so the reference was lost. I thought extend the links by the same as the lift. Worked fine for the back but they were too long in the front. Different pivot point so the math changes.
Found 30 degrees stated in numerous postings, and had my nephew check his stock 04. He found it to be approx 30 degrees.
Setting the front to the right length greatly helped the overall feel. Yesterday hit the off road park and everything clears now when disconnected, and just did a 200 mile round trip half 2 lane curvy and half highway. Much better! Setting the front bar right greatly reduced the need for the stiff rear. I have settled to the stock spaghetti bar in the back and at this lift am happy with it.
 
  • Like
Reactions: MrWilsonWJ

MrWilsonWJ

Rank V
Launch Member

Member III

1,691
Kennewick, WA
First Name
Dustin
Last Name
Wilson
Member #

23384

You mentioned 30 degrees for the sway bar, is that a measurement you took before starting the lift process? .[/QUOTE]

Mine had the budget boost when I bought it so the reference was lost. I thought extend the links by the same as the lift. Worked fine for the back but they were too long in the front. Different pivot point so the math changes.
Found 30 degrees stated in numerous postings, and had my nephew check his stock 04. He found it to be approx 30 degrees.
Setting the front to the right length greatly helped the overall feel. Yesterday hit the off road park and everything clears now when disconnected, and just did a 200 mile round trip half 2 lane curvy and half highway. Much better! Setting the front bar right greatly reduced the need for the stiff rear. I have settled to the stock spaghetti bar in the back and at this lift am happy with it.
[/QUOTE]
Thanks for the reply. Not only did I forget to take the measurement before making changes to my suspension, but mine also had a BB on it when I bought it. I'll try it at 30 and see how it feels. After my last round of changes I lessened the angle of the bar and have to rear bar on, it actually feels better than at 3" with the stock rear bar.
 

JimBill

Rank V
Member
Investor

Advocate I

2,268
San Benito County, CA, USA
First Name
James
Last Name
Madison
Member #

18747

850 mile round trip last weekend. Worked our way over Sonora Pass (HWY 178), down HWY 395, played in the Buttermilk area, Bishop area, and Bridgeport area. Returned through Lake Isabela (HWY 178).
Nice shakedown after the radiator swap and front disconnect reconfiguration.

With a full load out Sonora pass was brutal (high altitude and extreme grade up and down). If you want to torture test your rig that is the place. But over the trip a large number of grades were driven putting the WJ in mid-high RPM, slow speed, and load. This is where it has always crept up in temperature to 210 and beyond. This trip had absolutely none of this behavior. Granted it was cold out (eventually snowing on us the next day), but outside temp has not mattered in the past on the engine heat up. The present configuration kept the temp gauge at or near thermostat opening the entire trip. The configuration is an eBay 2 row radiator, 99 shroud and electric fan, 99 5 blade fan and clutch.

Other than the increased capacity of the radiator, the other difference is reassigning the duties of the two fans. Previously the electric fan was triggered to be primary cooling and the mechanical clutch fan secondary for high load. But the electric fan coming on first screwed with the heat signal going to the clutch fan spring. The mechanical was kicking in too late and too little, even with the spring tab bent to lengthen the spring for lower engagement temperature.

The system is now set up where the mechanical fan clutch engages first. With the modified spring, the clutch starts to work the fan before I see almost any movement on the temp gauge. Running the vehicle with the electric fan turned off for a few weeks shows the mechanical fan, when engaging early enough, can work on it's own in everyday conditions. So I set the electric fan to trigger on after the clutch fan has started to do it's thing. I only heard the electric come on here and there, and again witnessed very little movement in the temp gauge the entire trip. No bouncing off of or passing the 210 mark even once. It will be interesting to see how it behaves in extreme conditions AND extreme temps later this year.

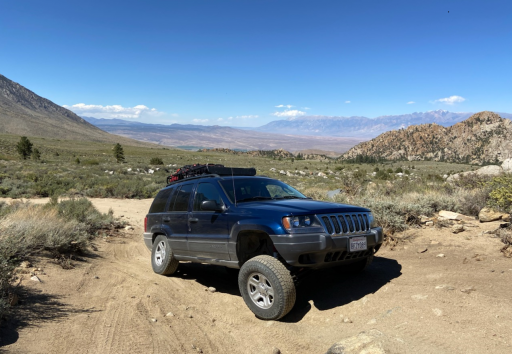
Also the sway bar setup on road, with full load out, was fine. Stock hollow bar in front and stock rear bar. Worked well enough that at this lift height I now have no plans to change the setup. As far as the quick disconnect reconfiguration and front bumper trimming, I had no metal to metal contact or tire rubbing. So good to go with 245/75-16s.

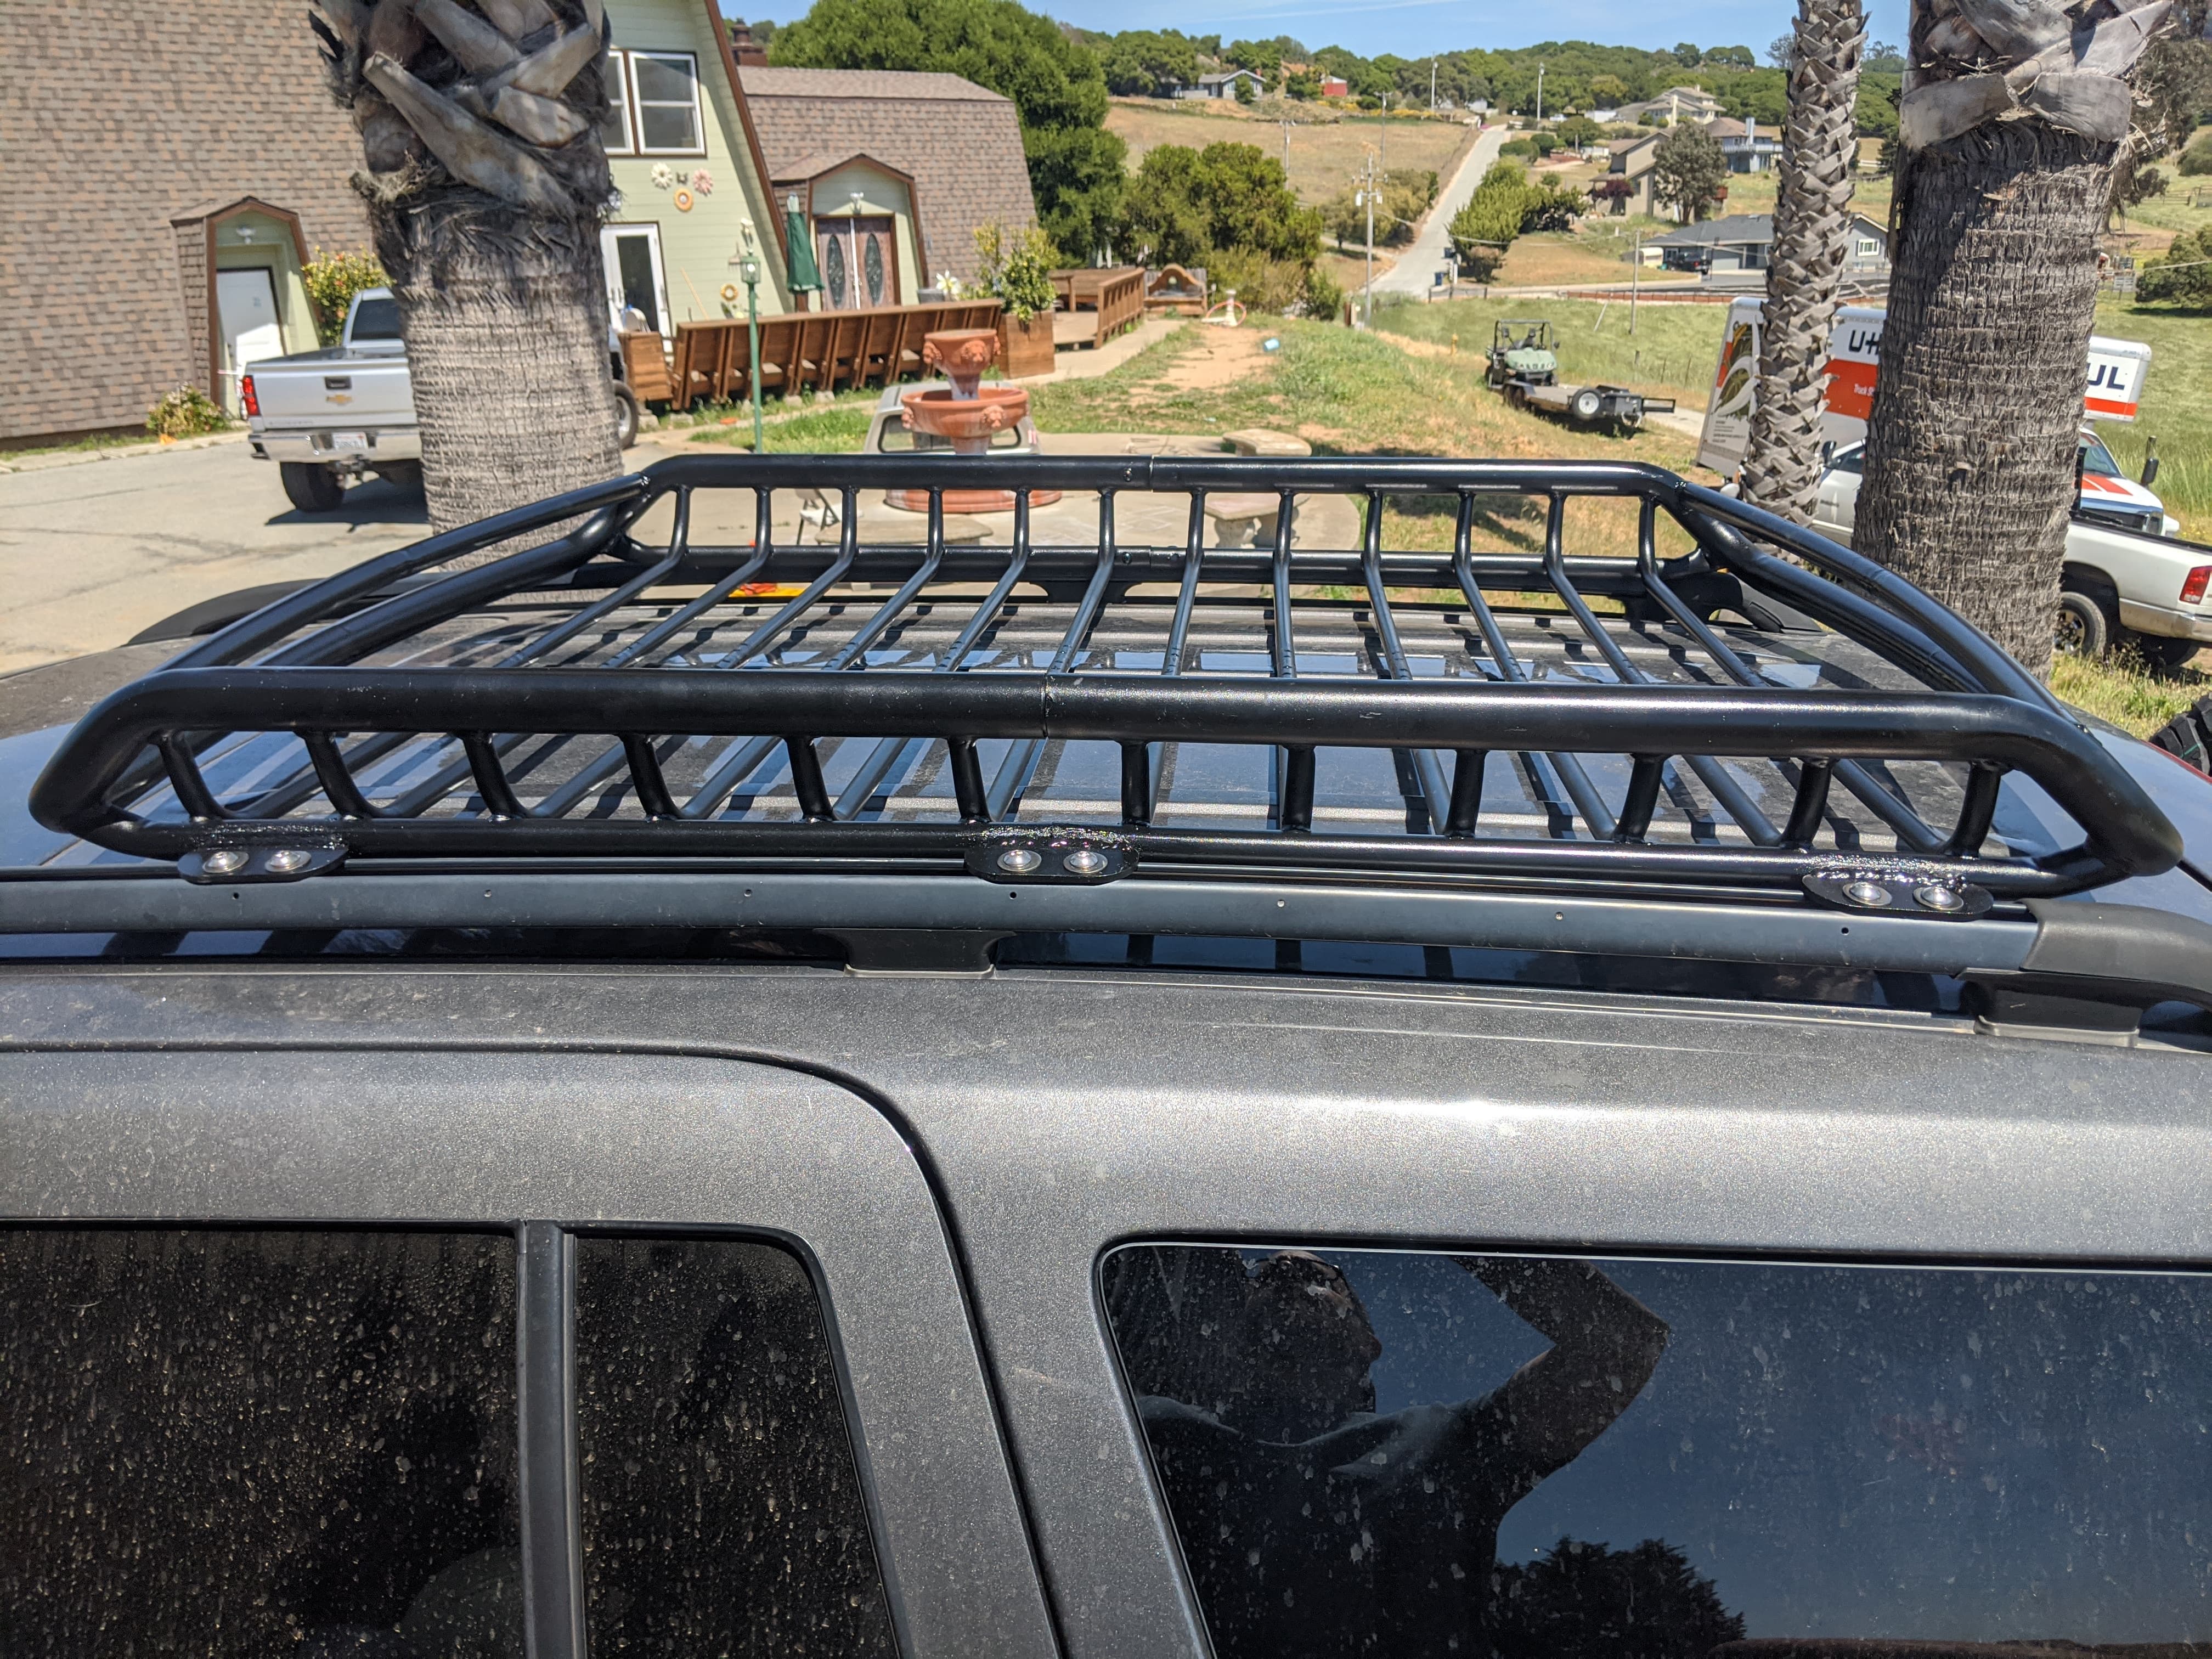
Only lesson learned is the stock roof rack crossbar locking detents are very inadequate. I sheared off all 4 and had the roof rack slide around. Not sure when as there were no hard mishaps. A little rope on either side tying the rack to the center pillar on the factory rails held things in place for the rest of the trip, but a new hard mounted cross bar strategy is needed.

1621958077844.png
 
Last edited:

tjZ06

Rank V
Launch Member

Advocate I

2,268
Las Vegas/Palo Alto
First Name
mynameisntallowed
Last Name
Adams
Member #

20043

850 mile round trip last weekend. Worked our way over Sonora Pass (HWY 178), down HWY 395, played in the Buttermilk area, Bishop area, and Bridgeport area. Returned through Lake Isabela (HWY 178).
Nice shakedown after the radiator swap and front disconnect reconfiguration.

With a full load out Sonora pass was brutal (high altitude and extreme grade up and down). If you want to torture test your rig that is the place. But over the trip a large number of grades were driven putting the WJ in mid-high RPM, slow speed, and load. This is where it has always crept up in temperature to 210 and beyond. This trip had absolutely none of this behavior. Granted it was cold out (eventually snowing on us the next day), but outside temp has not mattered in the past on the engine heat up. The present configuration kept the temp gauge at or near thermostat opening the entire trip. The configuration is an eBay 2 row radiator, 99 shroud and electric fan, 99 5 blade fan and clutch.

Other than the increased capacity of the radiator, the other difference is reassigning the duties of the two fans. Previously the electric fan was triggered to be primary cooling and the mechanical clutch fan secondary for high load. But the electric fan coming on first screwed with the heat signal going to the clutch fan spring. The mechanical was kicking in too late and too little, even with the spring tab bent to lengthen the spring for lower engagement temperature.

The system is now set up where the mechanical fan clutch engages first. With the modified spring, the clutch starts to work the fan with before I see almost any movement on the temp gauge. Running the vehicle with the electric fan turned off for a few weeks shows the mechanical fan, when engaging early enough, can work on it's own in everyday conditions. So I set the electric fan to trigger on after the clutch fan has started to do it's thing. I only heard the electric come on here and there, and again witnessed very little movement in the temp gauge the entire trip. No bouncing off of or passing the 210 mark even once. It will be interesting to see how it behaves in extreme conditions AND extreme temps later this year.

Also the sway bar setup on road, with full load out, was fine. Stock hollow bar in front and stock rear bar. Worked well enough that at this lift height I now have no plans to change the setup. As far as the quick disconnect reconfiguration and front bumper trimming, I had no metal to metal contact or tire rubbing. So good to go with 245/75-16s.

Only lesson learned is the stock roof rack crossbar locking detents are very inadequate. I sheared off all 4 and had the roof rack slide around. Not sure when as there were no hard mishaps. A little rope on either side tying the rack to the center pillar on the factory rack held things in place for the rest of the trip, but a new hard mounted cross bar strategy is needed.

View attachment 199550
Glad to hear your most recent cooling mods, flipping duties, did the trick (at least so far). Also, the rig is looking great in that pic!. For the roof rack issue, we used these: 99-04 Grand Cherokee (WJ) Roof Rail Light Mounting Tabs #WJLB4 welded directly to my roof rack (which we sectioned and sleeved to narrow it about an inch and tuck it down as low between the factory roof rails as possible). All-in-all it worked out really great, and seemed to stiffen the whole assembly up (when you pull on any part of the rack or rails the whole Jeep moves, before the factory rails would flex all over, particularly if I grabbed on one to climb up on the sliders or something).

Sectioning rack:


Welding on tabs:


We kept it ~1/2" off the roof at the tightest spot to allow for some flex without contacting the roof:


EDIT: I guess I should post these pics in my thread...

-TJ
 

JimBill

Rank V
Member
Investor

Advocate I

2,268
San Benito County, CA, USA
First Name
James
Last Name
Madison
Member #

18747

Glad to hear your most recent cooling mods, flipping duties, did the trick (at least so far). Also, the rig is looking great in that pic!. For the roof rack issue, we used these: 99-04 Grand Cherokee (WJ) Roof Rail Light Mounting Tabs #WJLB4 welded directly to my roof rack (which we sectioned and sleeved to narrow it about an inch and tuck it down as low between the factory roof rails as possible). All-in-all it worked out really great, and seemed to stiffen the whole assembly up (when you pull on any part of the rack or rails the whole Jeep moves, before the factory rails would flex all over, particularly if I grabbed on one to climb up on the sliders or something).
-TJ
Thanks for the tip on the brackets! I definitely need to do something different for mounts. The rack looks great, I like the very low positioning. We are finding EVERYTHING on these rigs eventually ends up custom to work and fit just right! Even my my VIAIR pump air chuck sucks, so just bought a better chuck end to graft in. And the power cable needs to be longer and the air line shorter.....and on and on it goes.
 

JimBill

Rank V
Member
Investor

Advocate I

2,268
San Benito County, CA, USA
First Name
James
Last Name
Madison
Member #

18747

Nothing new on the WJ since the May trip a few posts ago. Life gets in the way.

Keeping the Tahoe and Trailblazer on the road is a challenge in itself (doing rack and pinion on trailblazer now).
Working on the house I bought this springtime, it was built in 1948 and needs everything. Currently in process of replacing windows a few at a time.
Had major back surgery in June, and trying to catch back up at work after 6 1/2 weeks off.
Not quite up to driving lengthy wash boarded roads or cobblestone trails yet, but getting there by employing first class physical therapy.

The good news (for me at least) is it's still running and daily driving, and the house is a daily adventure in it' own right.

This WJ thread To Be Continued ......when life, time, and finances all open up a little allowance for it. Cheers!

Sunset.jpg
 

JimBill

Rank V
Member
Investor

Advocate I

2,268
San Benito County, CA, USA
First Name
James
Last Name
Madison
Member #

18747

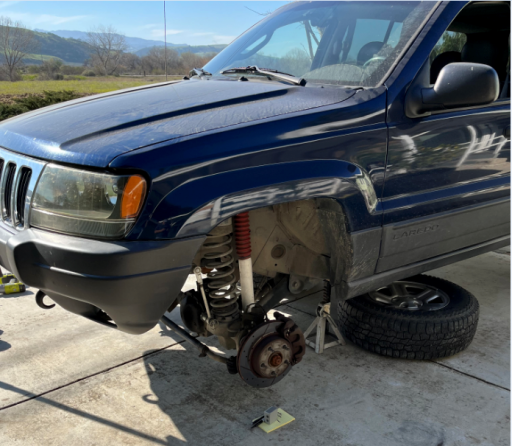
Next month I have a trip to Utah so finally time to give the WJ some attention. It has been pulling to the right increasingly over the last year.
Ball joints and the like felt fine, and no unibody frame damage found or suspected, it all pointed to the original high mile control arm bushings finally giving up.
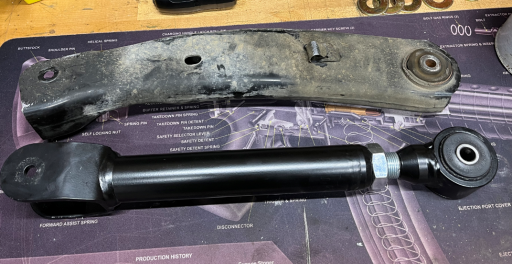
Wanting better than stock (adjustability) and reliability, I ordered and received a front set of Core 4x4 control arms with Clevite bushings and a pair of bushings for the top.

And so the decent into the rabbit hole began.

Took measurements of control arm lengths and put the angle finder on just about everything. Luckily also had my last alignment sheet so I knew where I started.
Set up the adjustable arms to my best guess lengths. One of the lower arm bushings had a malformed sleeve, Core 4x4 promptly sent me a replacement. No complaints.

On tear down found both lower front bushings collapsed back and both bushings on the upper right side torn pretty well. As expected, install was the usual. When reconnecting the track bar found that at full droop the upper drivers side control arm will bind on the unibody frame. Also not terribly happy that once installed, good luck tightening the jamb nut on the uppers if they ever come loose. This appears to be consistent with all aftermarket adjustable control arms. So it goes.

First attempt had caster at approximately 7 degrees (to spec) at expense of pinion angle. It drove very straight, but found on a very potholed road I'd get flutter in the steering wheel. Then at 62 mph had the dreaded death wobble on a road I didn't expect it. Caster was at 4.4 degrees the last alignment, and the internet of things suggested 4.5 degrees was the best starting point for a lifted WJ. Reset the upper arm length and had the alignment checked. Now on target at 4.6 degrees and it feels a lot better. My pinion angle is now approximately 2.4 degrees and a lot happier as well.

I am happy with the specs and all tie rods, ball joints, and hubs are in great shape. With everything tightened up, I have a lot more road feel and now the shocks feel way too stiff. I feel every pothole and get a lot of steering feedback. The new bushings are definitely doing their job. Road testing showed no shimmy with the milder caster setting but I did have a moment of death wobble on a tight corner of a terribly torn up road (easy to find in this county).

Found slight movement in the track bar bushings, so new bolts, bushings, sleeves on order. As well as a KOR steering stabilizer. And to tame the tightness further, 4 new Bilstein shocks are on the way. Hoping that does the trick, Utah is a long drive to be nervous about death wobble. I will give up droop (shock specs) , and flex (all bushings will be tight, and the upper drivers side arm is expected to bind as the axle arcs over), but do not see an immediate way around it.

That dang track bar!!!! A while ago I upgraded to the 9/16" bolts, so I think my options are limited. The rub is to get it tight and stiff enough for a reliable road car, the bushings are so tight there is not enough flex to support articulation without serious stress to the system. And I have found the poly replacement bushings just don't last long enough to be practical and must be of such a hard durometer might as well be aluminum. Evidently the internet of misinformation agrees this is a common problem and one I was fighting before all this.

Replacing all bushings and hardware now should be fine for the trip, but experience says I will have slop in the track bar bushings before I hit Utah.
I'd like to try a Johnny joint on one end and a Clevite on the other, but having trouble finding either that fit the JKS trackbar and support 9/16" hardware. The rabbit hole goes deeper.

As a backup, the good old Tahoe is ready for the trip if need be. Nothing exciting on the pictures, just proof I was there.

1646065706557.png

1646065643712.png

1646065596114.png
 

JimBill

Rank V
Member
Investor

Advocate I

2,268
San Benito County, CA, USA
First Name
James
Last Name
Madison
Member #

18747

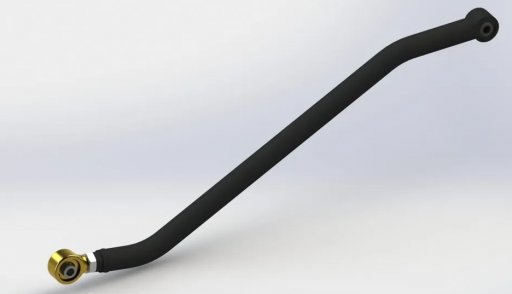
Heck with modifying the JKS bushings to actually work. Hopefully this does the trick, even though I'm throwing money at it I think this is the best setup I have found so far.
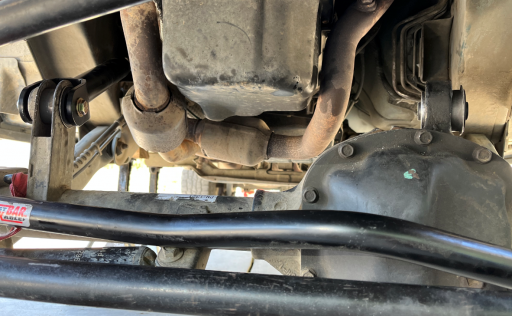
Trail Forged WJ Track bar. Johnny Joint + Trail Forged Better Bushing (both replaceable), for 9/16" hardware. Upsized but hollow bar, also stronger and lighter than the JKS.
Bolt in. Only other "mod" is I need to extend my bump stops by 1/4 inch minimum to keep the larger diameter bar out of my oil pan. Then again, it has already been self clearanced. Hmm.

1646074053302.png