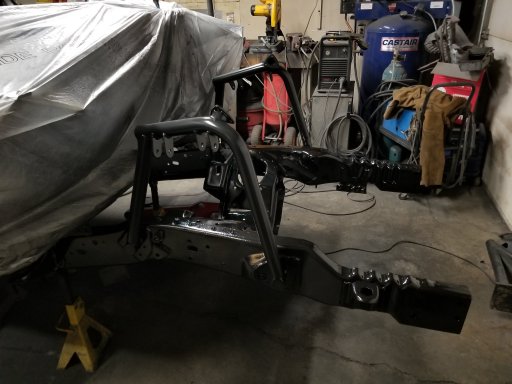
1984 Ford Bronco Project

  • HTML tutorial

Overland California

Rank V
Launch Member

Influencer II

2,335
San Jose, California
Member #

11850

Nope. Just added the tabs for the coilovers and limit straps.
Who made them? If you’re planning on bumping off the radius arm, you’ll want to double up those mounting ears as they tend to bend easily.

*EDIT* I see you’re running the solo kit. Definitely keep that radius arm platting in mind if you end up bumping there.
 
Last edited:

Enthusiast II

1,250
Hartford, SD
Who made them? If you’re planning on bumping off the radius arm, you’ll want to double up those mounting ears as they tend to bend easily.

*EDIT* I see you’re running the solo kit. Definitely keep that radius arm platting in mind if you end up bumping there.
Thanks. Haven't decided where to put the bump stops. Actually haven't bought any yet. But plan to eventually.
 

Enthusiast II

1,250
Hartford, SD
I decided to make the bumper I already built for the old bronco fit the new one. Instead of cutting apart the bumper I decided to modify the frame instead. I cut the outside of the frame off.

20210121_222704.jpg

I cut the new outer piece out of a 2x6 rectangle tubing 1/4 inch thick.

20210121_222731.jpg

Then I tacked them to the bumper and got it in position and level.

20210206_151033.jpg

Then I tacked the new frame section to the original frame and cut the tacks off the bumper.

20210206_151049.jpg

Then it was time to weld up the new outer frame section.

20210206_174841.jpg

On the inside I added some plating to reinforce the new part and angled it up to the old frame. Not sure if the angle will add much strength but it looked a lot cleaner than the squared off transition.

20210220_190349.jpg

Now time to make some holes for the bumper bolts to go through. I drilled 7/8 holes through both sides.

20210222_232838.jpg

20210222_232848.jpg

Cut down some tubing to make sleeves to pass through the frame and weld to both sides. For added strength and to reduce the holes down to the bolt size I wanted.

20210227_174229.jpg

Sleeves sitting in place.

20210227_174254.jpg

Welded up and ground down smooth.

20210227_180616.jpg

20210228_160501.jpg

Now to sand it all and clean it up for paint.
 

Enthusiast II

1,250
Hartford, SD
I got some more of the suspension but back in place. Managed to sneak out and get the front axle beams and radius arms installed.

20210306_221726.jpg


20210306_221740.jpg

I also managed to get the knuckles striped and cleaned up. All ready to paint.

20210308_143134.jpg

20210308_143139.jpg

Along with some cleanup of the front center section.

20210308_095841.jpg

And after some primer and more industrial paint.

20210308_172650.jpg

20210309_212147.jpg

Now to let some paint dry and bring home some ball joints.
 

Enthusiast II

1,250
Hartford, SD
Started working on getting the abs pump/module installed. But the bracket put the assembly too close to the shock hoop so the brake lines coming out the side wouldn't clear anymore. Time for some more cutting and welding.

20210413_225350.jpg

I cut the taps off and bolted them onto the pump and slid them over far enough to clear the shock hoop.

20210417_144031.jpg

20210417_144041.jpg

I tac welded them in place and then took it to the bench and reinforced the bracket and welded it back together.

20210417_162514.jpg

Then some grinding and some more paint and it was time to put it back in.

20210418_175316.jpg

Just realized I didn't take a picture of the side with the brake lines before I came inside.
 

Enthusiast II

1,250
Hartford, SD
New U-joints and some paint on the front axle shafts.

20210327_185818.jpg 20210327_185840.jpg

Also the front dust shields are pretty ruff and one was rusted through and unusable so I picked up some new ones and added some paint. Which probably won't last long.

20210323_185037.jpg 20210327_185829.jpg

Axle shafts and dust shields back where the belong.

20210413_230332.jpg

Cleaned up and painted the spindles and added new seals.

20210413_225359.jpg 20210413_225420.jpg

Spindles back on.

20210416_220606.jpg
 
  • Love
Reactions: M Rose

M Rose

Local Expert
Mod Team
Member

Advocate III

5,584
Northeast Oregon, United States
First Name
Michael
Last Name
Rose
Member #

20990

Ham/GMRS Callsign
W7FSB
Service Branch
US ARMY Retired
Great work on the old girl Dakota. I’m getting a lot closer to running again... just to have my daughter tell me she wants one now... so looking for another 3rd or 4th Gen.
 

M Rose

Local Expert
Mod Team
Member

Advocate III

5,584
Northeast Oregon, United States
First Name
Michael
Last Name
Rose
Member #

20990

Ham/GMRS Callsign
W7FSB
Service Branch
US ARMY Retired
Nice. Mine is already trying to claim mine and it's not even together yet. But today she did tell me she wants to build a dragster...
Yours too huh... she also found a 1940 Ford 2.5 ton farm truck she wants to “Rat” out... she needs a JOB...
 

Enthusiast II

1,250
Hartford, SD
Did this earlier this fall but have been busy lately. Cleaned up the engine and prepping for some fresh paint. only about 38,000 miles on it. So just some paint and updates.

20210424_154710.jpg

20210424_154731.jpg

Cleaned up and scuffed almost ready for paint.

20210424_203919.jpg

Fresh coat of primer and same black paint as the frame.

20210426_202108.jpg

20210426_202116.jpg

I know the valve covers look nasty. I have a plan for them too.

20210427_221724.jpg

Painted the hubs and transmission cross member while I was at it.
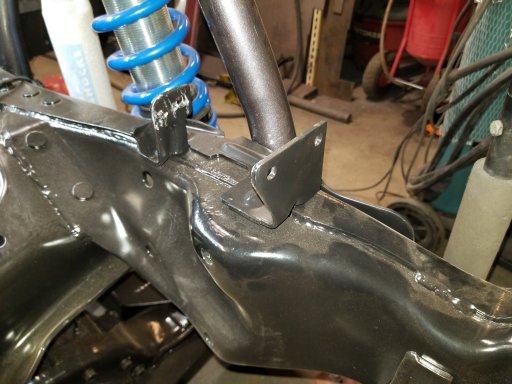
20210427_221717.jpg

20210915_202026.jpg
 
  • Like
Reactions: zgfiredude

Enthusiast II

1,250
Hartford, SD
Time for some work on the valve covers and some of the engine brackets. I cleaned them up good and then sandblasted them to clean the old corrosion and paint off. Then cleaned again and degreased.

20210511_191730.jpg

20210511_191734.jpg

Some primer on. I used a ppg epoxy primer that is made to stick to aluminum on these.

20210511_220919.jpg

20210511_220928.jpg

Then a Splash of the body color.

20210511_225225.jpg

20210511_225217.jpg

20210511_225233.jpg

20210511_225237.jpg

Then some time consuming tape work. That I forgot to take a picture of apparently. And some of the Color that we plan to use for the stripe. And some clear coat.

20210512_223931.jpg

20210512_223940.jpg

20210512_233313.jpg

20210514_065410.jpg

20210514_065428.jpg

It's looking a lot better now.
 
  • Wow
Reactions: zgfiredude

Enthusiast II

1,250
Hartford, SD
The wife came out to lend a hand getting the engine and trans bolted back together and resting in the bronco again.

20211204_173912.jpg

I'm glad to see it back where it belongs.

20211204_173921.jpg

Trans is still grungy but it is back in mainly for mock up and to hold engine in correctly. I plan to take care of some upgrades and refreshing on it too.

20220104_151330.jpg
 

Enthusiast II

1,250
Hartford, SD
Had a little time for the bronco again. Decided to sparay lizard skin sound deadener in the doors before closing up the openings I made for repairing the lower part of the doors.

20220316_095735.jpg

20220316_095739.jpg

While cleaning the area up to weld the pieces I cut out I got the bright idea to make it a removable panel so I have easy access to the doors internals. So my son and I drilled some holes and put some stainless steel riv-nuts in the doors.

20220320_152221.jpg

Then I cut out some panels to put on.

20220320_152241.jpg

I got some small stainless button head bolts to hold it on.

20220320_191344.jpg

Now time for some more sound deadener on the back side of the panels.

20220327_215703.jpg

And painted the other side of the panels the body color. They will be covered by the door panel so probably wasn't needed but seems more finished to me.

20220330_193846.jpg

20220330_193850.jpg
 
  • Like
Reactions: Sparksalot