05 Toyota Sequoia Overland Build

  • HTML tutorial

A-Aron

US Rocky Mountain Region Local Expert Utah
Launch Member

Off-Road Ranger I

3,394
Enoch, UT, USA
First Name
Aaron
Last Name
Tiede
Member #

15719

Ham/GMRS Callsign
KJ7LIJ
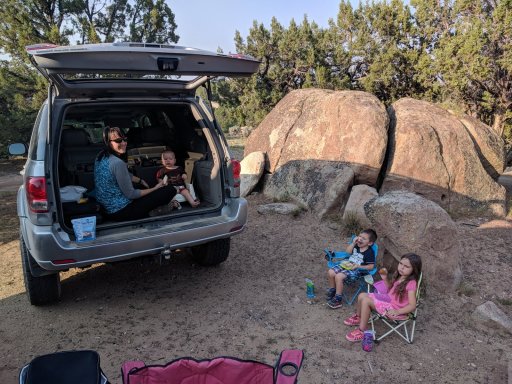
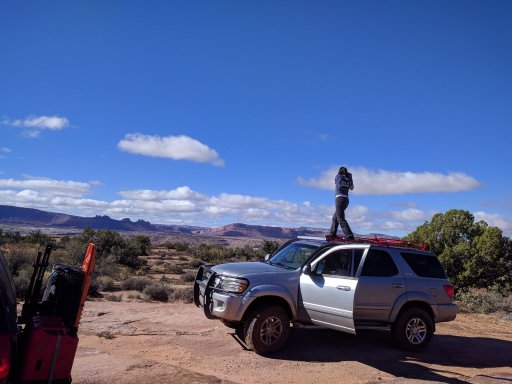
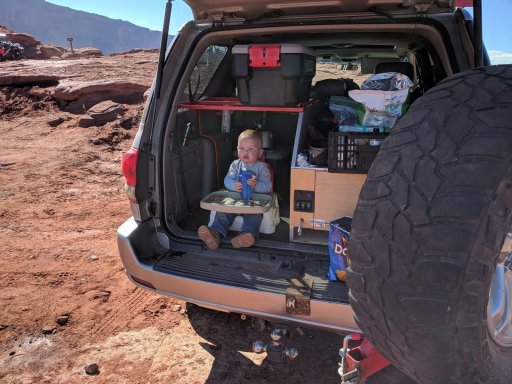
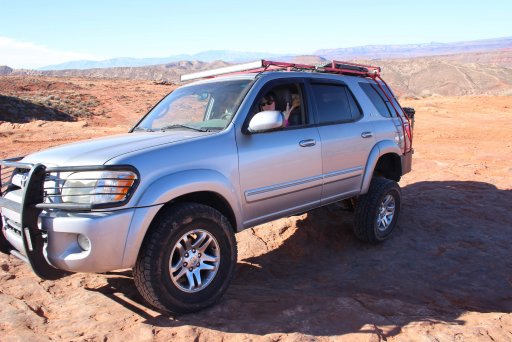
For me, "overlanding" is about exploring God's beautiful creations with my family and friends. Having a "built" vehicle can be a great advantage to access the places you want to explore, but it shouldn't limit your exploring. As a child we explored the national parks of Utah every summer as a family, we drove down miles and miles of dusty washboard roads, through canyons, over bridges, and through tunnels. We explored high mountains and sandy washes, paved or unpaved, we did it in our 4cyl 2.6 liter 1986 Dodge Caravan with wood panel siding and maroon cloth interior. Top speed was about 65, going down hill, we carried a huge plastic car top carrier full of our stuff and loaded down with my parents and us 4 kids. That.. was my first overland vehicle.. I inherited it in high school and continued its legacy until it died, it had a long productive life, and served our family well.

#1 - Budget - A lot of people see this as a limiting factor, and it can be, but the idea is to work with what your resources can feasibly maintain without adding stress. It is easy to get caught up comparing and coveting other's vehicles and gear, but it comes down to 1 thing.. what can you reasonably afford?

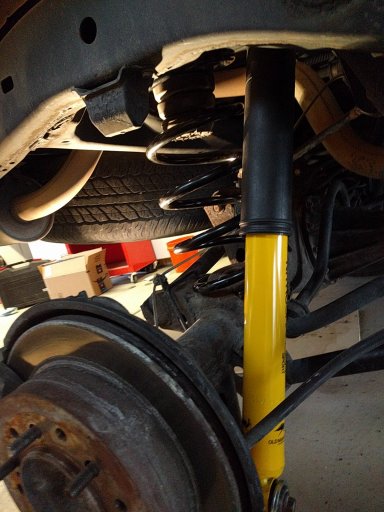
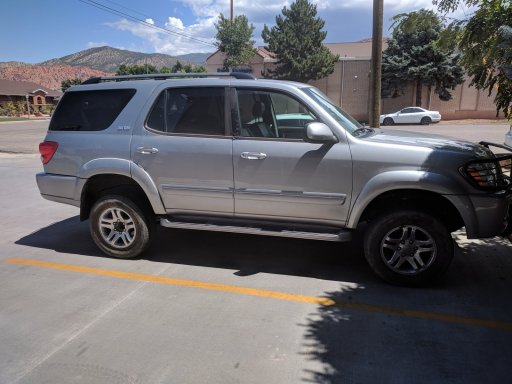
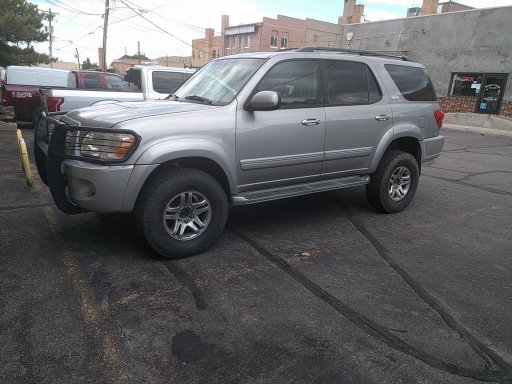
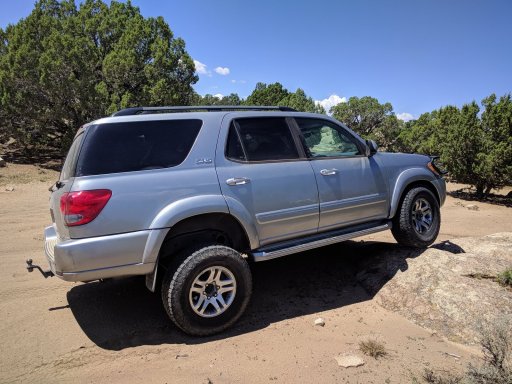
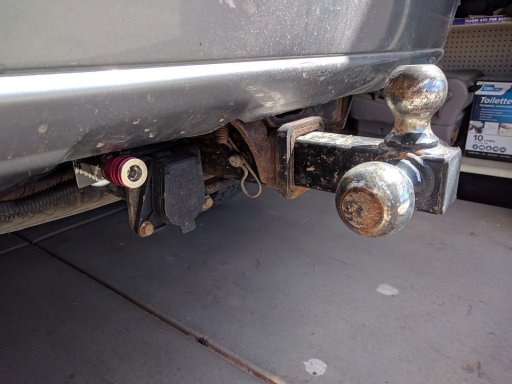
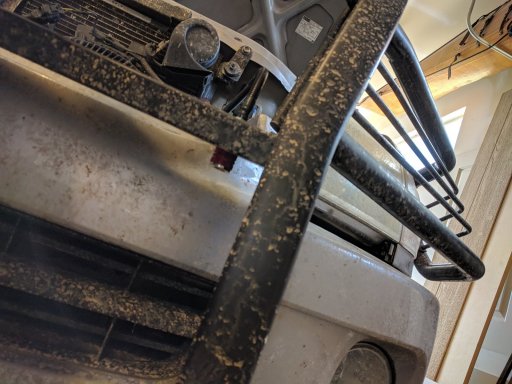
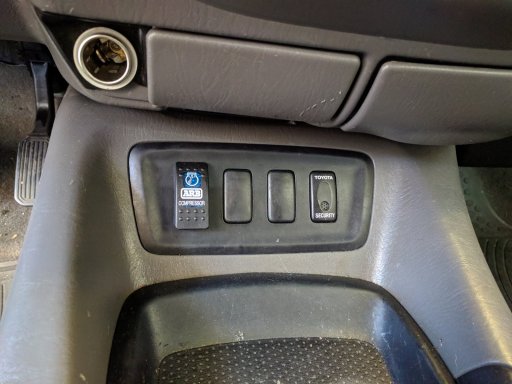
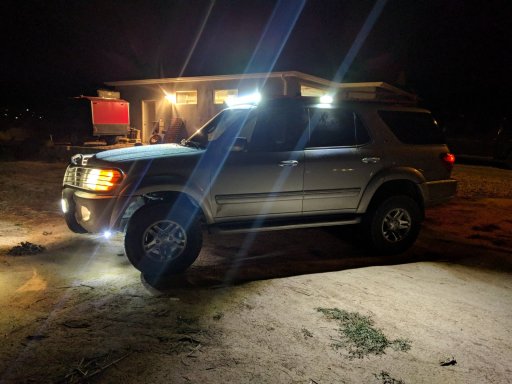
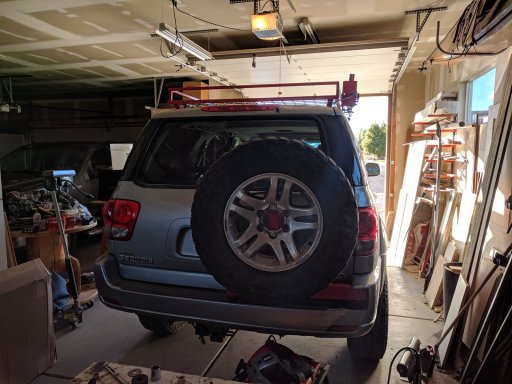
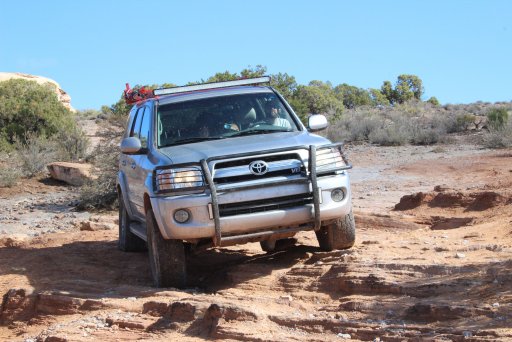
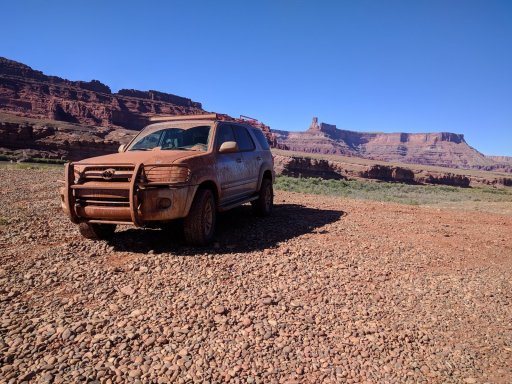
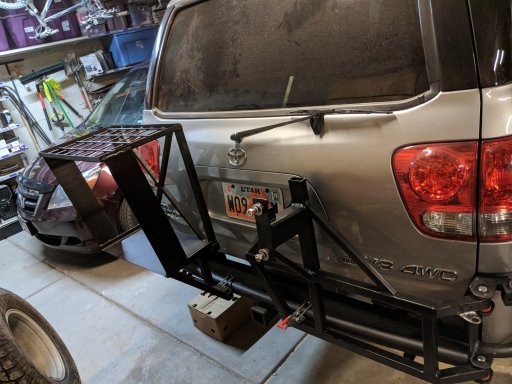
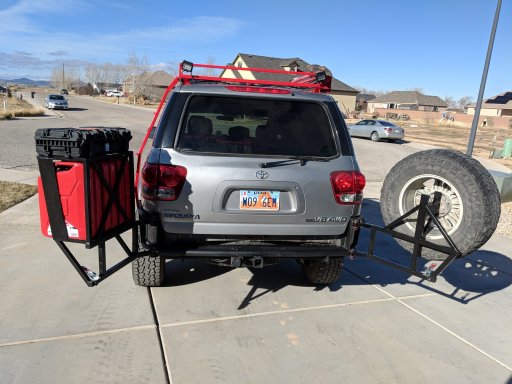
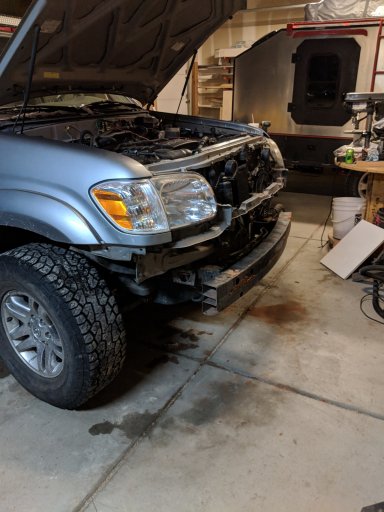
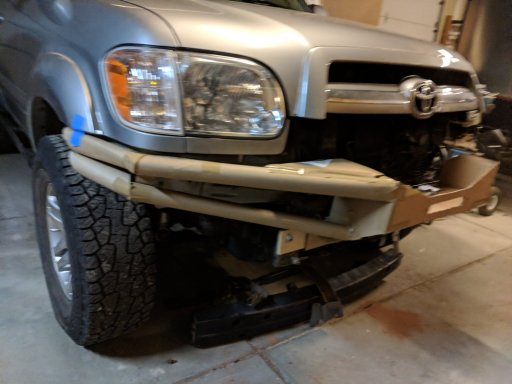
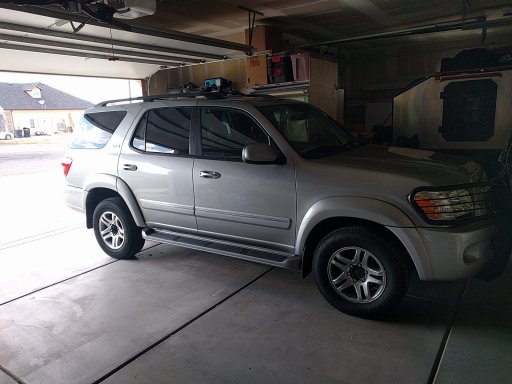
As my overland vehicle is not my daily driver, and solely serves the purpose of recreation, I didn't want to spend an outrageous amount of money on a vehicle that will likely see trail damage and modifications through out its life. "Wanda" as our Sequoia is now known, was a salvage/rebuilt vehicle.. I did see the original salvage auction photos and talk to the mechanic that repaired her, the stars aligned and I picked her up bone stock for a very reasonable price. When she arrived home, I immediately parked her in the garage and took some photos.
 

Attachments

A-Aron

US Rocky Mountain Region Local Expert Utah
Launch Member

Off-Road Ranger I

3,394
Enoch, UT, USA
First Name
Aaron
Last Name
Tiede
Member #

15719

Ham/GMRS Callsign
KJ7LIJ
#2 - Make and Model- I have owned a few Toyota vehicles in my life, I owned a 2005 Tacoma Double Cab TRD and a 2007 Tundra Crewmax a few years ago. I would have loved to keep them, but taking #1 into consideration, life circumstances warranted their sales. To be honest, I love Toyota vehicles, I have a Honda and a Ford, they are also both extremely reliable and low maintenance, but there is a special place in my heart for Toyota, and it was empty.
A few factors came into the selection of the Sequoia in no particular order:

A - 4 Wheel Drive - Toyota likes their off road legacy... they've equipped the Sequoia with push button 4 wheel drive, 4lo, a locking center differential and a 4:10 stock gear ratio.

B - Seating Capacity - Rated "full sized" the Sequoia can seat up to 8, albeit the 3rd row seat wouldn't accomodate with legs longer than a 12yr old comfortably, I have 3 kids.. in car seats, so the 2nd row needed to be wide enough to fit all 3, with some personal space, as I planned to remove the rear seat.

C - Power - I tow a 3000lb expedition trailer to accommodate some of the luxuries of life.. like a place to sleep off the ground, food, water, etc. V6 just wasn't in my wheelhouse.. Although I live life in the slow lane when traveling fully loaded, I want to be able to pass and not hold up traffic if the need arises.. The Toyota 2UZ-FE V8 Paired with a 5 Speed automatic transmission provides just the right amount of power and torque for our needs while staying quite enough for the little ones to nap and running extremely smooth.

D - Storage Capacity - we all know.. there is a lot of crap that we have to take with us, compound that with kids, and you get the need for something with lots of storage that is easily accessible. Throw in the fact that at 6'2" I can sleep inside with the center seat folded up if needed.. and the Sequoia is a winner.

E - Availability of after-market components - Toyota likes to make money... which means they like to re-use designs as often as they can. The Sequoia shares the entire front suspension of the Tundra, has a Tundra rear axle, but since people like to ride in comfort, they opted to use coil instead of leaf springs in the rear, and conveniently enough... the Landcruiser uses the same setup. The rest.. I can make, I'm pretty handy in the shop, so I'm not too concerned with aftermarket bumpers, racks, sliders.. etc. I'll just custom make those the way I want.

F - Capability - Kind of already covered this... Toyota

G - Reliability - Ditto - But more detailed.. the 2UZ-FE motor at 1 million miles scored a 99% when evaluated by engineers. Shared with many other Toyota and Lexus vehicles, it is one of the most reliable engines in history to date.

H - Uniqueness - I like to "build" things custom.. out of the ordinary. It is easy to buy fancy aftermarket parts for popular vehicles like Jeeps, 4 Runners, F-150s.. etc But when you are one of a kind, it makes you feel special. It is good to be different, branch out, and be unique.. so why not a Sequoia?

I - Physical Size - Gen 1 Sequoias are within a few inches in specifications, specifically wheelbase, of several of the most off road capable vehicles.. Landcruiser 100 Series and Jeep JKU. Width is another factor, and once again, the Sequoia is right on par with those same common off road vehicles.
 

A-Aron

US Rocky Mountain Region Local Expert Utah
Launch Member

Off-Road Ranger I

3,394
Enoch, UT, USA
First Name
Aaron
Last Name
Tiede
Member #

15719

Ham/GMRS Callsign
KJ7LIJ
OK... Now that is all out of the way.. We can get down to the nitty gritty of the build.. That is why you're here right? I just had to be clear.. a lot of thought went into the vehicle selection. I did research and consider Expedition.. Tahoe/Yukon.. Etc. But they didn't check all my boxes.

Moving on!!-------->

Suspension
Old suspension = gone, no reason to re-use old shocks or springs.. used vehicle, 170k miles.. time for replacement anyway.. and lets be honest.. spacer lifts just don't provide the ride quality, travel, load capabilities, and handling that I want in an overland vehicle.

I decided to go with the Bilstein 6112 Kit for the Tundra/Sequoia - Why? Bilstein has proven their performance with Toyota for several yrs (TRD go-to provider) was a factor, but mostly the shocks have a 60mm diameter piston, which provides a larger fluid reservoir than any other non-remote reservoir, along with a 18mm rod. - I like beefy! To keep my suspension from knocking around on components I also installed SPC upper control arms and extended the factory bump stops by stacking some washers (for now).

In the rear I went with tried and proven Old Man Emu. Known for their excellent off road suspension products, I researched and found that the OME 2860 Linear (progressive are a waste for overland loaded rigs) springs and OME 60071L Nitrocharger shocks provided the load capabilities I wanted (heavy.. but not super heavy) and I haul a trailer a lot of the time as well. This combo allows maximum rear axle flex/travel without the need to attach aftermarket spring retainers and keep things from coming apart on the trail. The slip yoke drive shaft adjusted nicely. Only had to use the sawzall once to cut out the old rear shocks..lol
IMG_20180810_230635.jpg IMG_20180811_102726.jpg IMG_20180814_221117.jpg IMG_20180815_174338.jpgIMG_20180815_183612.jpg
 

Cendee

SE Member Representative
Launch Member
Supporter

Influencer III

4,483
West Haven, UT, USA
First Name
Cendee
Last Name
Bjerregaard
Member #

16487

Lookin good. Getting ready to replace my shocks and springs tomorrow.
 

A-Aron

US Rocky Mountain Region Local Expert Utah
Launch Member

Off-Road Ranger I

3,394
Enoch, UT, USA
First Name
Aaron
Last Name
Tiede
Member #

15719

Ham/GMRS Callsign
KJ7LIJ
Wheels/Tires

Wheels.. important.. but not near as important as the tire.. I stayed with the good ole factory 17" alloy Toyota wheel. This may change in the future, as it is better to have a wheel with the correct off-set, than to run spacers. Budget determines the build, and.. Toyota makes a very strong and reliable wheel, I paired them with some 1.25" Hub-Centric spacers to keep the tires from rubbing on the new suspension components and added some Hankook Dynapro AT/M 295/70 r17 tires that I traded some work for.. not my first choice, but they have proven to be very reliable and sturdy tire. I run them regularly at 37 psi, and 15-18 Psi off road and have been quite satisfied with their performance thus far. They did require a little trimming on the back of the front fender area.. mostly just grinding down the pinch weld and taking off the front mud flaps.

STOCK Tires:IMG_20180817_133414.jpg

HANCOOK 34"
IMG_20180817_155609.jpg
 

A-Aron

US Rocky Mountain Region Local Expert Utah
Launch Member

Off-Road Ranger I

3,394
Enoch, UT, USA
First Name
Aaron
Last Name
Tiede
Member #

15719

Ham/GMRS Callsign
KJ7LIJ
OUTFIT.. Process started....
EXPLORE.. Took the fam out for a picnic at our local rock crawling spot..had to "break in" the suspension. We had a blast and did a little breaking in as well. Results: Impressed!IMG_20180818_141307.jpg IMG_20180819_183037.jpg
 

A-Aron

US Rocky Mountain Region Local Expert Utah
Launch Member

Off-Road Ranger I

3,394
Enoch, UT, USA
First Name
Aaron
Last Name
Tiede
Member #

15719

Ham/GMRS Callsign
KJ7LIJ
Back to Outfitting..
Next project was some interior storage/organization and an ARB CKMA12 on board high-output Air compressor.
Compressor was a need because my trailer runs air springs and I want the ability to run them from the rig instead of going back to the trailer to monitor them.
Details about the trailer can be found here: https://www.overlandbound.com/forums/threads/family-overland-trailer-build-a-aron.21407/


You'll find that I don't like to purchase for things I can do or build myself. I find great enjoyment and accomplishment from designing and building my own accessories and equipment.

I installed the compressor as high as possible in the engine compartment and ran 1/4" DOT nylon airlines to the front and rear bumpers. Makes it nice for airing up and/or hooking up the trailer. I didn't like the idea of popping the hood every time I air up, although if you do, it is a good chance to do a visual check on things.

IMG_20180908_150611.jpg IMG_20180908_150657.jpg IMG_20180908_150623.jpg IMG_20180908_154504.jpg

The rear seats came out on day one.. SO MUCH SPACE! Unfortunately.. lots of space + no standard of organization = Chaos
Storage needed to accommodate a few things:
1 - Stuff that is Always in the rig (unless its being used) First aid kit, Tools, Extra fluids, jumper cables, tarp, Duct tape.. etc etc. = Big Ole drawer with a small removable part for the little things.
IMG_20180924_230908.jpg
2 - Water - I like to keep at least 5 gallons of water with me (5 people @ 1 gallon per day) - the little kids warrant the need to wash.. they love the dirt and rocks, so I decided on a 5 gallon water tank with a 12v pump and sprayer. It makes it so much easier to clean up and fill water bottles, etc when the water comes with pressure.. Our ancestors lived without water pressure so we wouldn't have to..
IMG_20180924_230753.jpg

3 - Emergency - We keep 2 small Action Packers - 1 has a change of clothes for everyone (usually pajamas) and a large blanket, the second has enough food (mostly freeze dried) and water to prepare said food for 2 meals for the family, a backpacking stove, mess kit, and snacks/treats to keep spirits up in the case we get stranded. Oh.. and a 2'x4' Table... so handy!!
IMG_20181004_224604.jpg
4 - Empty space for stuff. Gotta have space to pack our stuff.. kids need lots of stuff, I can fit everything I need for a week in a backpack. I don't have to though, Wanda has a huge rear end with space enough for all our crap.. flip one of the seats down.. and I (6'2" 235 lbs) can sleep comfortably in the back. Most of the time we pack all we can in the trailer, but on day trips.. and when I go solo.. its nice to have space to pack stuff inside. I settled on a platform/rack combination that allows various different arrangements of gear, and could allow for 2 people to sleep inside or be hauled on stretchers if the worst happened.

5- Power- Water pump, cell phones, tablets, heated blankets.. they require power. I have 2 18ah 12v AGM batteries wired up inside the storage system with a switch/relay up front I can turn on to charge them when the rig is running. I also wired for some overhead camp lights in the tailgate and added a secondary switch to turn on the roof rack lights from the rear if desired. Switches, usb ports, and a battery meter to monitor things. You may ask.. why not run a secondary battery? That is in the works.. you can never have too much power.. I'm kind of a nerd that way.
IMG_20181115_194824.jpg
 

A-Aron

US Rocky Mountain Region Local Expert Utah
Launch Member

Off-Road Ranger I

3,394
Enoch, UT, USA
First Name
Aaron
Last Name
Tiede
Member #

15719

Ham/GMRS Callsign
KJ7LIJ
Roof Rack

Lets face it.. factory roof bars are only good for one thing.. attaching non factory accessories. Took that off.. and made something useful!

1 - Space - you might think I pack a ton of stuff... that is not the case, I try to pack as efficiently as possible.. but I want the ability to pack a lot.. and a place to attach useful things.
2 - Useful things - need a good place to attach the high lift jack, shovel and other items that I need... only when they are needed, nobody like to use their high lift jack.. or shovel.. or am I the only one?
IMG_20181002_083817.jpg
IMG_20181002_210239.jpg

3 - Accessories - also useful things.. but I said I was kind of a electronics nerd.. gotta have a place for lights, I hate walking around with a flashlight in my mouth or only being able to see what is in front of me with a headlamp. also, the side and rear lights make night trails so much better.. its great to see how close you are to the edge of a cliff when driving in the dark.

Front light bar is 50" Straight with White and Amber settings

Side lights are 6" long 18 watt floods

Rear lights are 4" square 18 Watt floods

IMG_20181004_222112.jpg


IMG_20181212_000341.jpg
 
Last edited:

A-Aron

US Rocky Mountain Region Local Expert Utah
Launch Member

Off-Road Ranger I

3,394
Enoch, UT, USA
First Name
Aaron
Last Name
Tiede
Member #

15719

Ham/GMRS Callsign
KJ7LIJ
Trip Preparations:

We planned a trip to Moab and I was getting the list done...
Lift/Suspension - Check
Storage System - Check
Roof Rack and Lighting - Check
Rear Bumper with dual swing outs for extra fuel and Full size spare - Oh crap.. we're leaving next week, there is no way that is going to get done.


Solution:
Saturday afternoon with the welder and some steel I had laying around the garage. Good thing there are plenty of places to fuel up in Moab.. but the spare tire thing.. I'd rather spend an afternoon in the shop.. then lift that monster wheel up onto the roof rack 1 time.

Some online photos and my mind created a babyIMG_20181013_120855.jpg .. and this was born..

Pull off the plastic bumper.. weld some stuff on.. sawzall to make fit..

IMG_20181013_173526.jpg
 

A-Aron

US Rocky Mountain Region Local Expert Utah
Launch Member

Off-Road Ranger I

3,394
Enoch, UT, USA
First Name
Aaron
Last Name
Tiede
Member #

15719

Ham/GMRS Callsign
KJ7LIJ
MOAB!!!
No technical nerdy overland talk here.. just some images for your viewing pleasure.. I was a blast to take Wanda out and put her capabilities to the test.. Very pleased!!
IMG_0265.jpg IMG_0240.jpg IMG_0168.jpg

Testing out the ROOF RACK!!!

IMG_20181019_114556.jpg

Using STORAGE SPACE

IMG_20181020_132525.jpg

Testing Windshield Wipers

IMG_20181020_143032.jpg
 

A-Aron

US Rocky Mountain Region Local Expert Utah
Launch Member

Off-Road Ranger I

3,394
Enoch, UT, USA
First Name
Aaron
Last Name
Tiede
Member #

15719

Ham/GMRS Callsign
KJ7LIJ
Notes from Trip... Everything ran awesome.. Clearance was great, 4 wheel drive was incredible. Plenty of power and a nice quiet smooth ride.
Day 1 We buried the driver side in axle deep mud the trailer behind us trying to get to camp.. 4lo.. and V8 power (My 6yr old now calls it "Toyota Power") and we pulled right out.
Need: Capacity for extra fuel.. said V8 is Thirsty...
 

A-Aron

US Rocky Mountain Region Local Expert Utah
Launch Member

Off-Road Ranger I

3,394
Enoch, UT, USA
First Name
Aaron
Last Name
Tiede
Member #

15719

Ham/GMRS Callsign
KJ7LIJ
Next Project...Rear Bumper...

This one is the largest undertaking to date... Sequoia = poor aftermarket support, of course I knew that going into this, challenge accepted!

Must haves:
1 - Full Size spare capability
2 - Extra Fuel carrying capacity
3 - Rear Protection/armor
4 - Dual Swing out (must for a trailer)
5 - Hitch and heavy duty recovery points
6 - Style

Needs
1 - Recovery/Air tools storage (tired of opening up the hatch every time I need to air up/down)
2 - Fairly light weight (not a plate bumper)
3 - Locking pins to keep swing arms open
4 - Ladder to access roof rack
5 - Awesomeness

Design:
I started by taking a few measurements.. and looking at a lot of bumpers on Pinterest/Google/etc.
With an undertaking this large I decided some actual on computer design work was needed. Thanks to Google for developing Sketchup.. and how-to videos.. I was designing squares in no time.. Took a little practice, but I finally got the hang of it and came up with the basic design.
Rear Bumper Design.JPG

I knew there would be some tweaking as I started to build.. but it is a good idea to have some sort of basic idea of what your plan is before you take off the entire back end of your rig and cut back the frame....

IMG_20181215_152956.jpg

Had to find the compromise between beefy.. and not too heavy.. originally I planned to have each swing arm on a heavy duty spindle, I later decided that I didn't like the idea of a single failure point.. I like to have backups.. just in case. So I decided on a dual point attachment for the swing arms, with polyurethane bushings and 1/2" bolts to secure them in place.

Result: able to use lighter weight materials to make a stronger swing arm.

I welded on some locking pins and got it painted...
IMG_20181220_233743.jpg

Then I welded the sucker to the frame and attached the swing outs:

IMG_20181221_224225.jpg

Next was the ladder to access the roof rack.. I didn't like the idea of opening a swing out or accessing the rack from the rear of the vehicle at all for that matter... Especially when hauling a trailer, what a pain..
Decided to make on on the driver side just behind the tank fill. Took a little tweaking and a few screwed up pieces of steel, but I finally got it the way I envisioned it.
IMG_20181221_231956.jpg

Next up.. load it all down and see how it looks and how she rides.

IMG_20181222_111555.jpg


I decided to go with the Rigid hard case for my easy access to recovery tools and air tools. This is probably my favorite feature.
It can be opened without undoing any straps.

What is inside:
30 foot snatch strap
20 foot tow strap
2 shackles
25ft air hose and air filler
Air down tool
Gloves
Tape measure (comes in handy in those tight spots you're not sure you'll fit through without major body damage)

I cannot express how wonderful it is to just walk to the back of the rig and pop 2 latches to get to all that stuff. Then if needed, pull a few more latches and haul the whole box up the trail to help with a vehicle recovery.
I also love the fact I can attach additional Rigid boxes with their integrated latch system. I have plans for this in the future.

Time to test the swing arm weight bearing capability while open...
IMG_20181222_111428.jpg

I have to tell you, it feels good when an idea turns out better than you expect.. with the arms open, I can stand on either one fully loaded, and the only slight deflection is in the poly bushings. Considering with the recovery box, and 15 gallons of fuel, plus me.. its at close to 350lbs, I decided to push the limit and bounce a little... then more.. and things held together and straight without an issue.

The photo angle isn't the best.. but the hitch actually sits about 24" off the ground and is the same height as the frame of the vehicle.. so there isn't really any better way to increase the departure angle more than what you see without making it ugly.

Also.. you can see another spare under the vehicle.. that is the spare for the trailer.. it is about 1" smaller and fits nice and snug in the stock location.
 

A-Aron

US Rocky Mountain Region Local Expert Utah
Launch Member

Off-Road Ranger I

3,394
Enoch, UT, USA
First Name
Aaron
Last Name
Tiede
Member #

15719

Ham/GMRS Callsign
KJ7LIJ
Finished up the bumper with a few days to spare before Christmas and our 5 1/2 day trip to Death Valley.
I pushed Wanda's limits a little farther in Echo canyon where she ascended on her own power..

Echo canyon:IMG_0370.JPG

And then was used as a recovery anchor for Rocky.. her counterpart (my brothers rig).. his tail end slid a little far.. This incident was part of the fire to start the rock slider project when we returned home.. Sure was glad for those heavy recovery points!

Recovery echo.JPG

The complete story of Death Valley 2018 will have to be told another day.. but you can find route information here. I mapped it during our trip using Gaia GPS.
https://www.overlandbound.com/forums/threads/death-valley-off-road-kml-routes-and-waypoints.21751/

Wanda once again proved herself on 3 runs through Steel Pass and Dedeckera canyon as well as 5 runs through the super soft deep sand of the east side of the Eureka sand dunes. We ran 430+ miles total on unpaved Death Valley trails and roads without a single glitch, many of them with a trailer. Wanda drove like a rock crawler in the technical sections.. and like a rally vehicle down the long stretches of desert road, I couldn't have asked for more. After close inspection I did find a nut that had moved about 1/4 turn on the top of the front strut.. but I can't say it wasn't that way before we left. With all the recent work, I tried to be very thorough in checking bolts and nuts to make sure nothing had come loose.
Lesson: torque specifications actually do matter, follow the recommendations and things stay together like they should.


IMG_20181227_113349375.jpg
 

A-Aron

US Rocky Mountain Region Local Expert Utah
Launch Member

Off-Road Ranger I

3,394
Enoch, UT, USA
First Name
Aaron
Last Name
Tiede
Member #

15719

Ham/GMRS Callsign
KJ7LIJ
Notes from Death Valley:
1 - Body protection - scratched up one of the running boards pretty good, lucky it wasn't worse.
2 - When going to Death Valley take every single drop of fuel you possibly can, we used all 3 Jerry cans.. and then some.
3 - Long distant remote communication is essential.. a couple miles out there won't get you much. Consider satellite options.
4 - What an amazing and beautiful world we live in! Such a unique place.
5 - Traction control helped prevent what could have caused serious damage to rig and trailer when we hit black ice. Thanks Toyota
6 - Steel bumper = saved serious potential damage to rig in more than one instance.

Well, it seems it is time for some additional armor... exactly half of my notes refer to damage.

Rock Sliders

This is one area there is actually some aftermarket support.. there are a few shops that make rock sliders that fit the Sequoia, don't get me wrong, there are a few that make front bumpers, and one I know of that makes a rear bumper. They are very nice and good quality products. If interested.. check out www.1stgenoffroad.com Josh was kind enough to compile these options into one website.

Of course.. I don't love what they have to offer, I personally don't like the "wing" look of rock sliders, I prefer a lower profile, but not too much, their job is to provide protection. Also, I have little kids, and they like to climb into Wanda on their own. Thus the need for a step area with some traction, I'll be honest, I wanted it just as bad as the kids.

Back to the shop!
IMG_20190111_001556.jpg

Take some straight steel, bend it, attach to another piece of straight steel. Etc.


Grind up nice.. and PaintIMG_20190115_002648.jpg

Yes, the Sequoia's frame tapers wider as you go back.. that was fun to figure out...actually, it wasn't.

Next up.. attach to Wanda
IMG_20190115_231922.jpg

We then had the opportunity to test out the new sliders at the #winter4x4jamboree in Hurricane, UT. This is where Wanda, an FJ Cruiser.. and 23 Jeeps went for a trail run. I'm proud to say she held her own and turned some heads doing it. We encountered less difficulty with some obstacles than other more capable rigs. Goes to show.. its not just the rig that determines performance, but the one who drives it. Proud of my wife for taking the wheel for the day!

tapatalk_1548283876093.jpeg

Ok, maybe not the test you wanted to see with the rock sliders.. but hey, that isn't their only function. Also, you can see the solution for the license plate being covered by the bumper swing outs.
 

A-Aron

US Rocky Mountain Region Local Expert Utah
Launch Member

Off-Road Ranger I

3,394
Enoch, UT, USA
First Name
Aaron
Last Name
Tiede
Member #

15719

Ham/GMRS Callsign
KJ7LIJ
Forgotten note from Death Valley: Suspension needs more travel - possible solution = disconnect/possible removal of front and primary rear sway bars.

After much research and discussion with our small group of Sequoia off road enthusiasts... I decided to remove the sway bars for a few days and get a feel for Wanda's performance.

Plan was to drive around the neighborhood, then nearby trail, then work up to normal driving conditions around town, highway, freeway etc..

That all happened in about an hour.. answer: should have removed the sway bars a long time ago... ride quality is much better, minimal body roll change, suspension rides smoother and quieter, and my goal of more suspension travel was accomplished. A few days later I ventured out with the trailer to experience the same results.

You can see our on-going discussion about the removal of anti-swaybars here: https://www.overlandbound.com/forums/threads/who-has-their-anti-sway-bars-removed.21602/

Watch her flex... (that isn't even maxed out..) IMG_0497.jpg Mission accomplished!
 

A-Aron

US Rocky Mountain Region Local Expert Utah
Launch Member

Off-Road Ranger I

3,394
Enoch, UT, USA
First Name
Aaron
Last Name
Tiede
Member #

15719

Ham/GMRS Callsign
KJ7LIJ
Notes from Winter 4x4 Jamboree:
1 - Need better approach angle..

FINALLY! I get to start on a new front bumper.. one that can hold more lights.. and a winch. Also, I can get rid of the brush guard I don't really like.. but hey, it served a purpose.

IMG_20190122_223155.jpg

Goals:
1- Not too heavy.. but beefy strong - protect vital vehicle components/body armor
2 - Capacity for 12-13k lb winch (might need to winch with trailer attached at some point)
3 - Increase approach angle
4 - Capacity for driving spot lights and Amber fog/dust lights
5 - Bolt on (may need to remove to service vehicle components)
6 - Cool design that matches the rest of the rig
7 - Heavy recovery points

Me + Sketchup = Idea plan is born

Me + Cardboard + Tape + Razor Blade = Bumper basic mock up

IMG_20190124_230958.jpg
 

brien

Sonoran Space Program
Staff member
Moderator
Member

Off-Road Ranger I

3,402
Tucson, AZ
First Name
Brien
Last Name
Wankel
Member #

3553

Ham/GMRS Callsign
K7XPO
I love this build, thanks again for letting me take it for a test drive up in Utah. I'm completely jealous by your home-fabricated equipment. That's something I really need to do more of on my vehicle