My DIY offroad utility (base camp) trailer

  • HTML tutorial

Advocate I

1,135
Owen Sound, Ontario, Canada
First Name
James
Last Name
Girard
Member #

0

So I have been planning different aspects of this build for a fairly long time and have finally started building it.
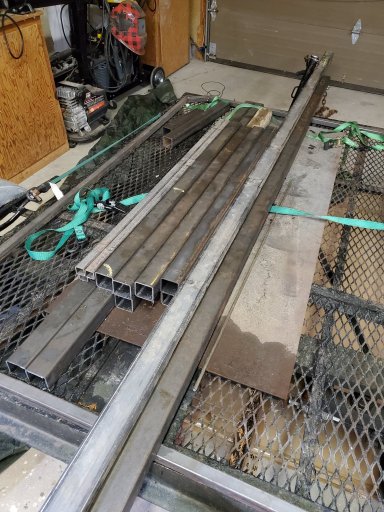
I started out by making some drawings up to get an idea of materials used and a rough finished weight ( guesstimation before getting to far in and realizing it's way too heavy lol).
I keep going through the drawings and finding little things to change here and there that have clearance issues or material changes, but I think I have it all worked out and decided to start. Basically my drawings are rough and are not the final product.
Screenshot_20221203-221643_Gallery.jpgScreenshot_20221203-221700_Gallery.jpg

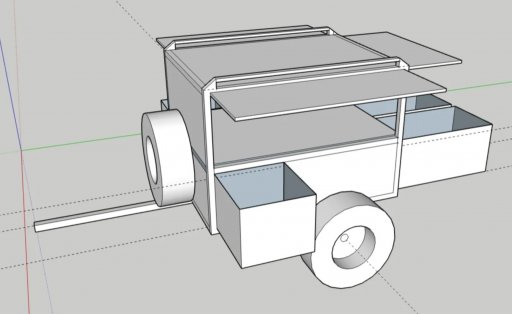
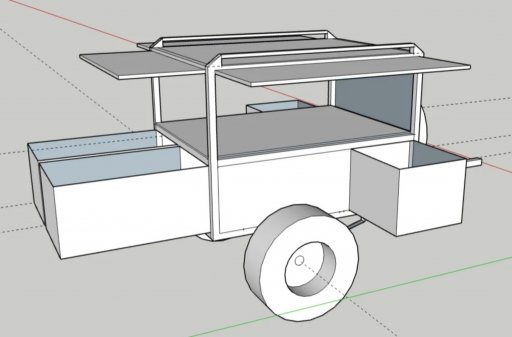
The rear will have 2 slide out platforms ( not drawers) that will run a 48" locking drawer slide, the sides I may turn into 1 more 48" slide as well but am also considering just leaving it as an open compartment.
The top half will be a large open compartment accessible from all sides for storing larger gear like tents, Jack's, traction aids, shovels, etc.
I also planed a roof rack for the top so I can haul kayaks, mount an awning, as we as my camp shower.... and in the future may also add a RTT up there... we will see.
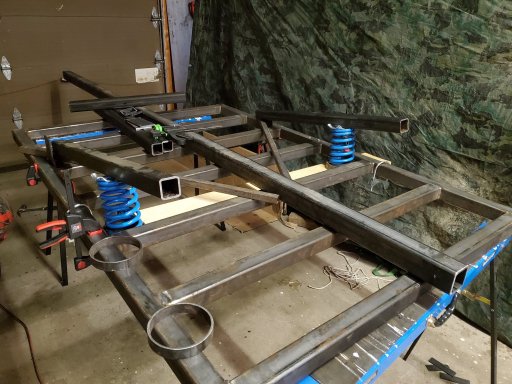
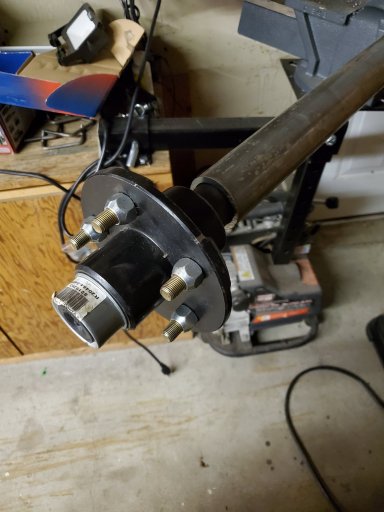
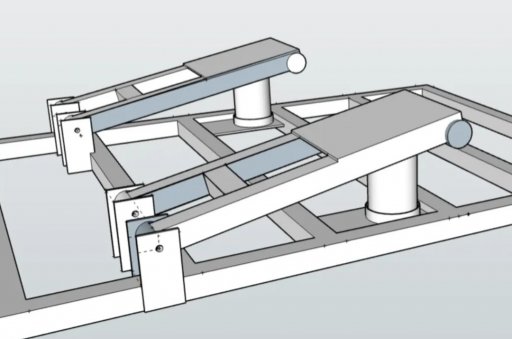
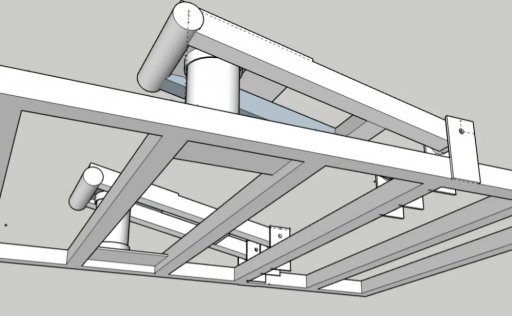
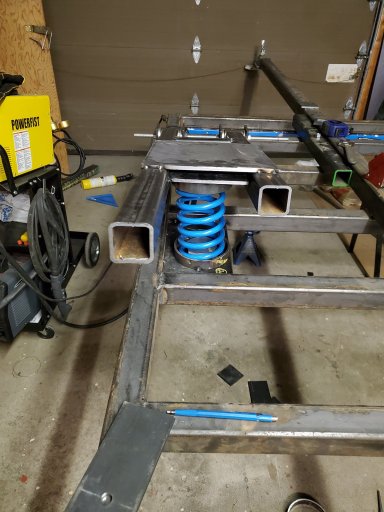
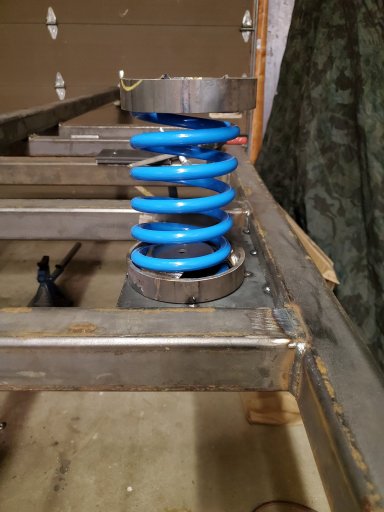
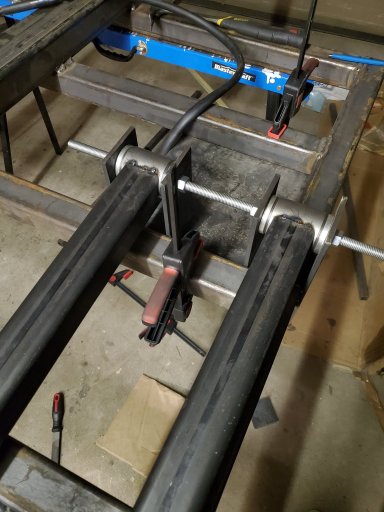
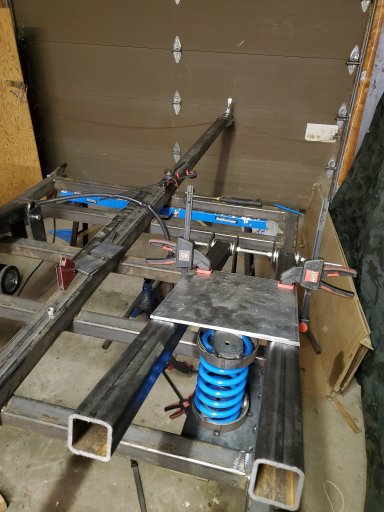
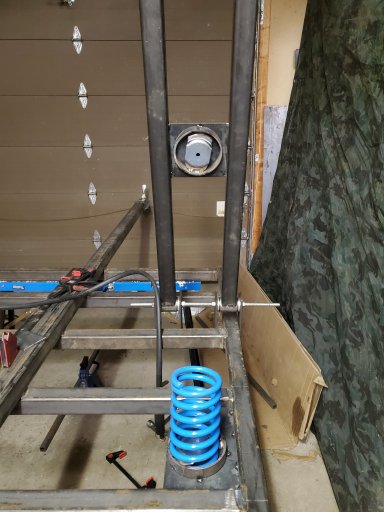
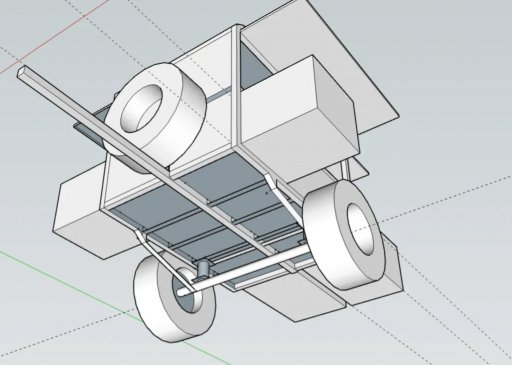
I have decided to try my hand at building and independent suspension system ( which the drawing shows very poorly because the drawings weren't really for designing suspension in my mind). So ha have a bit more planning to do around that.
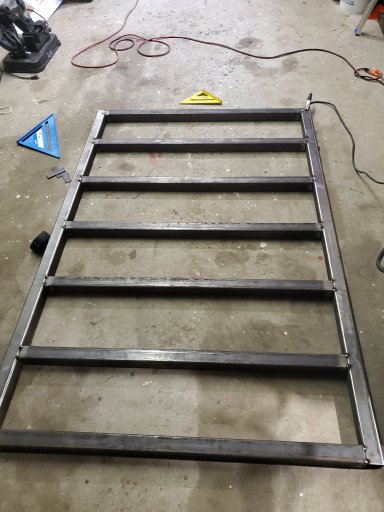
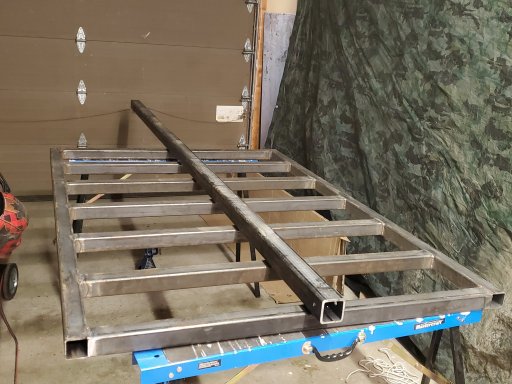
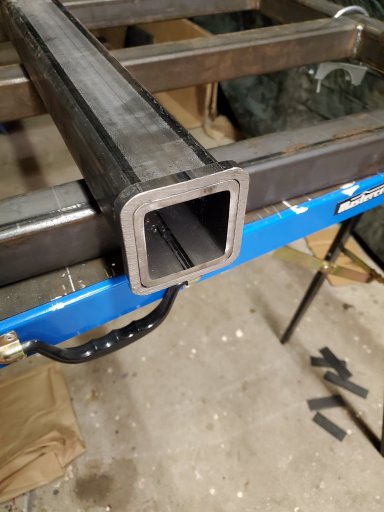
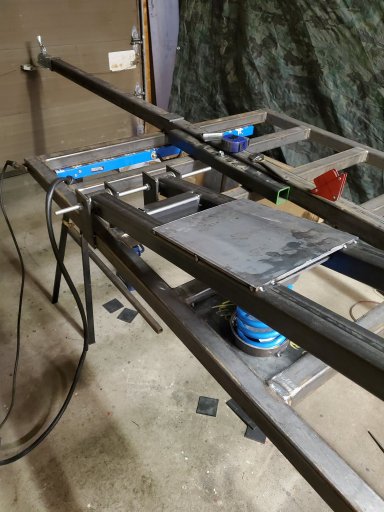
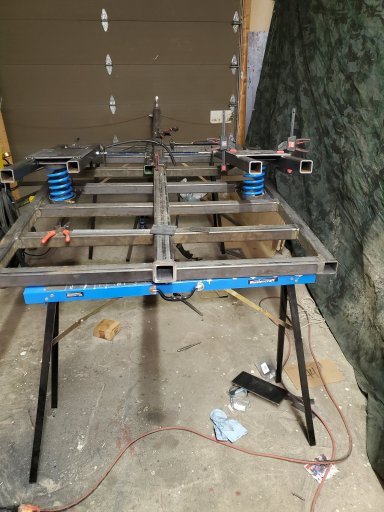
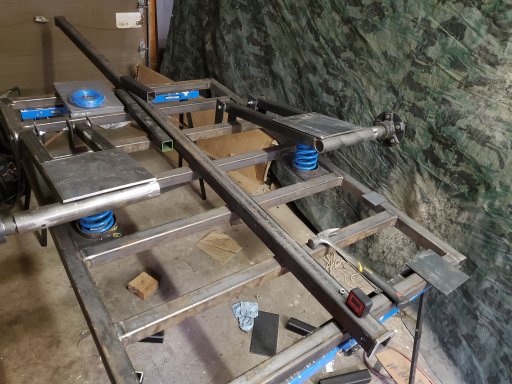
The structure of the main base of the trailer may be a bit overkill but in my mind it shouldn't bent or twist causing issues later on down the road.... time will tell.
 

Attachments

Advocate I

1,135
Owen Sound, Ontario, Canada
First Name
James
Last Name
Girard
Member #

0

The base of the trailer is made of 2x2x.125 square tube. It is a 4x6 outer dimension so that it could be skinned using standard 4x8 sheets of material trimmed out with the least amount of waste.
The tongue is 2.5x2.5x.238 hitch tube with should add even more rigidity in the long run and allow for a hitch mounting point at the rear as well as a removable receiver.

20230429_131521.jpg20230429_140053.jpg20230430_204523.jpg
So far the tongue is just set in place. I need to figure out much it's going to stick out the back.
I am also at the point of mocking up suspension so I can cut and weld my parts...
 

Attachments

Advocate I

1,135
Owen Sound, Ontario, Canada
First Name
James
Last Name
Girard
Member #

0

Took some material and layed it out while I'm waiting for more parts to show up. Figuring out how long the control arms need to be and once I get my bushings, make sure there are no clearance issues.
I am plannkng to set the coils into the grame to bring the overall height down a bit. I am making some coil buckets and trailing arm brackets but i need to make sure everything will work together before getting too far into it.
20230501_200545.jpg
 

Advocate I

1,135
Owen Sound, Ontario, Canada
First Name
James
Last Name
Girard
Member #

0

Not a whole lot of progress today. My wife went out of town and took our youngest with her ( 2 months) so I was hanging out with our oldest ( 3 years old).
Put some collars on each end of the tongue but havnt had a chance to weld them in yet. Same with the axle stubs in the tubes.20230502_223248.jpg20230502_202123.jpg
While I didn't got a whole lot done I did manage to get some good times in with the young lad.
20230430_101628.jpg20230430_100257.jpg
 

Advocate I

1,135
Owen Sound, Ontario, Canada
First Name
James
Last Name
Girard
Member #

0

Finally got the drawings done for the suspension. Basically this is a rough design ( things always seem to change slightly during the build process ...).
I am hoping to get started on the control arms this weekend... if the wife and kids will let me lol.
Screenshot_20230505-211611_Gallery.jpgScreenshot_20230505-211616_Gallery.jpg
 
  • Like
Reactions: Ebbs

Advocate I

1,135
Owen Sound, Ontario, Canada
First Name
James
Last Name
Girard
Member #

0

I havn't had any time to work on this lately. I was hoping to have the control arms tacked up by the end of this weekend so I could bring them in to work and finish weld them ( still having issues with my welder).
However my wife, myself, and the kids have all caught some sort of sickness so it's slow going.
I am hoping to fit out tomorrow and start fixing parts together. But today I managed to get some tabs drilled out so have a look at the width of the bracket, hardware length, and whether I needed to adjust the length of the arms to move the tabs.20230506_145714.jpg20230506_204832.jpg
 

Gatorgrizz27

Rank I

Contributor III

154
Tallahassee, FL, USA
First Name
Jon
Last Name
Gunder
Trailer looks great, I would be concerned about the (lack of) size on those trailing arm mounts though. They are going to see a tremendous anoint of stress and twisting forces, I’d brace and gusset everything six ways from Sunday.
 
  • Like
Reactions: Red_Leaf_Overland

Advocate I

1,135
Owen Sound, Ontario, Canada
First Name
James
Last Name
Girard
Member #

0

Trailer looks great, I would be concerned about the (lack of) size on those trailing arm mounts though. They are going to see a tremendous anoint of stress and twisting forces, I’d brace and gusset everything six ways from Sunday.
Absolutely! I plan on welding some gussets and maybe adding an extra layer of flat bar tying the brackets into the frame in spots.
 

Advocate I

1,135
Owen Sound, Ontario, Canada
First Name
James
Last Name
Girard
Member #

0

Got back out to the garage last night for a bit and got the second control arm started.
Needed bushing sleeves for the shocks I ordered because apparently they didn't come with any, so I made a few up with some small tube. Measured out and mounted the spring plates on the frame side and arm side, still need to drill the center hole out through the perch all the way back through the mounting plate to run a bolt through for a spring retainer.
I also realized that I got too eager the last time out in the garage and didn't drill my axle sleeves out for plug weld before I fix and tacked them so I will have to pull them apart again and adjust that.
Once I get everything tacked up and ready to burn fully I amd going to load it onto another trailer and bring it to work to do final welds but I still have a ways to go before this will be at that point.
20230508_214732.jpg20230508_211142.jpg20230508_211855.jpg20230508_215605.jpg20230508_215827.jpg20230508_220227.jpg20230508_221804.jpg
 

smritte

Rank V
Launch Member

Member III

2,827
Ontario California
First Name
Scott
Last Name
SMR
Member #

8846

Ham/GMRS Callsign
KO6BI
Good work so far. Sorry to hear about your welder issues. I would hate to have to bring stuff to work to weld.
I have two questions.
1. What are you using for arm bushings?
2. Are you going to secure one end of your coil spring or are you using the shock to limit arm travel?
 

Advocate I

1,135
Owen Sound, Ontario, Canada
First Name
James
Last Name
Girard
Member #

0

Good work so far. Sorry to hear about your welder issues. I would hate to have to bring stuff to work to weld.
I have two questions.
1. What are you using for arm bushings?
2. Are you going to secure one end of your coil spring or are you using the shock to limit arm travel?
1. I will be using poly bushings on the arms. I ordered them through TMR Customs as I have used a bunch of their builder parts in my LJ.
1204_720x.jpgpoly_bushing_for_web_720x.jpg

2. I am drilling through the center of the spring perches and running a bolt through for bar style retainers top and bottom. The frame side of the spring also sits partially under the perch and helps to lock it in.

3. The won't limit travel. It has 4" of travel which matches the amount of travel in the springs, but they will be getting mounted on an angle, so 1 inch of travel in the spring will only be roughly 1/2" of travel in the shock. They were the shortest shocks I could find and are meant for RVs. If I need to change them out for something else I can. Same with the springs if I run in to issues down the road at some point. Worst case if it starts to get to be an issue I can alway add limit straps.
 

smritte

Rank V
Launch Member

Member III

2,827
Ontario California
First Name
Scott
Last Name
SMR
Member #

8846

Ham/GMRS Callsign
KO6BI
Thank you for the dimensions on bushings. I'm going to add them to my part list. I've seen this type before but never with the number of choices they have.


Shocks
Just incase yours are longer, these are the shocks I run but not where I bought them. Early lowered bug front. Top and bottom eyelet and the shortest gas shock I could find. I have mine set a couple of degrees back to match the axle swing. I'm sure you already know this but, make sure your shock doesn't change angle (much) as the arm swings up.
An example (without doing math) inline with arm swing. 100% of dampening. 45 degrees out, 50% dampening.
 
  • Like
Reactions: Red_Leaf_Overland

Advocate I

1,135
Owen Sound, Ontario, Canada
First Name
James
Last Name
Girard
Member #

0

Thank you for the dimensions on bushings. I'm going to add them to my part list. I've seen this type before but never with the number of choices they have.


Shocks
Just incase yours are longer, these are the shocks I run but not where I bought them. Early lowered bug front. Top and bottom eyelet and the shortest gas shock I could find. I have mine set a couple of degrees back to match the axle swing. I'm sure you already know this but, make sure your shock doesn't change angle (much) as the arm swings up.
An example (without doing math) inline with arm swing. 100% of dampening. 45 degrees out, 50% dampening.
I did know that changing the angle of the shocks changes the dampening. I am gunna run these and see how they do. I would have preferred a shorter shock but couldn't seem to track any down.
 
  • Like
Reactions: smritte