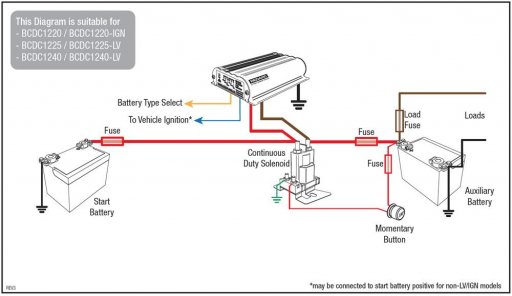
I've been slowly working on a dual battery setup. I finally got around to finishing it a few days ago. Kits seemed way too expensive, so I decided to build my own. It all started with a schematic I found on Google. From there, I started piecing it together.
Univeral battery tray from Dorman for $31
Battery tie down $15
Rubber mounts were $15
Marine battery was $90
Battery cables were $35
Continuous duty cycle solenoid was $22
Add a circuit, fuses, connectors, and solder were $30.
I already had wire, bolts, washers, and nuts from other projects.
Total Cost was around $238
Plus, I learned quite a few things!
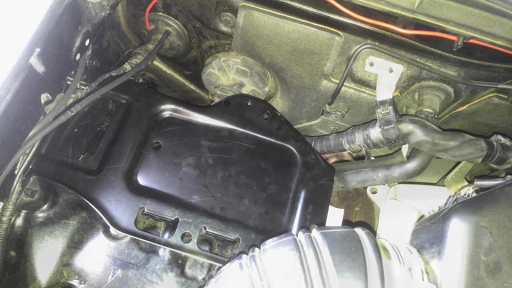
I started by making a stencil for the battery plate by using some cardboard. I found a spot suitable for the plate, placed the stencil, and drilled the holes. I removed the inner fender, and used 4 bolts, nuts, and washers to mount the plate. The fender would allow the plate to flex a bit, so I decided to drill another hole and use a rubber mount I got from energy suspension. I had to shave a little over an inch off the mount so it would fit between the plate and the fender well.
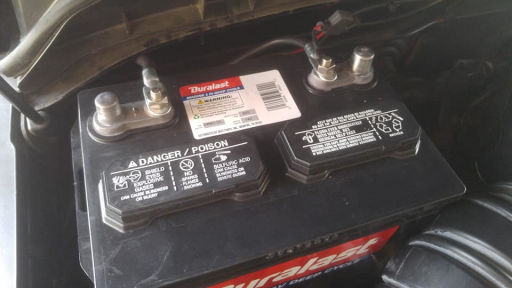
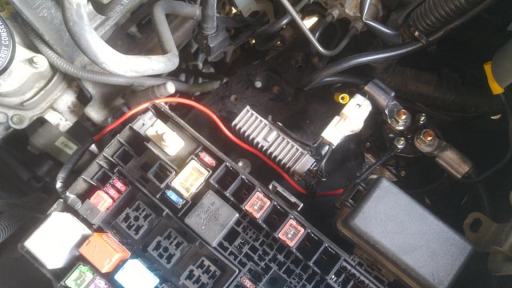
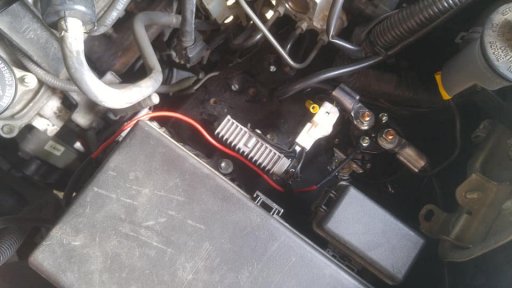
The two tabs on the plate used to hold the battery needed to be bent in a little. I used a battery tie down to secure the battery to the plate (it's on the backside of the battery). I ran the negative lead from the aux battery to the chassis and the positive lead across the firewall to the driver side. The FJ already has bolts protruding from the firewall, so I used zip ties to secure the positive lead to them. I mounted the solenoid to the driver fender well just behind the fuse block.
The small bolt marked (I) on the solenoid is ground to chassis, and the small bolt marked (S) is connected to the EFI fuse using an add a circuit with two 10 amp fuses. The reason for this is that the EFI fuse is the only one that has 12v when the vehicle ignition is on and doesn't when the ignition is off. The solenoid will isolate the aux battery until the ignition is on or when the engine is running. One large bolt on the solenoid is connected to the aux battery positive lead, and the other large bolt is connected to the main battery positive lead. I trimmed the fuse block and cover to accommodate the wire from the add a circuit.
Using a 15 amp fuse, some wire, and a few connectors, I ran a positive lead from the aux battery, through the firewall on the passenger side, and all the way back to the passenger rear of the vehicle. I installed a 12v plug using the chassis as ground. Now I can plug in my 12v Tuff Stuff Refrigerator.
During this project, I made sure to solder and heat shrink all of the connections.


