Hoplite III, a 2022 Power Wagon build (pic heavy)

  • HTML tutorial

Etoimos

Rank V
Launch Member

Member III

2,779
Peyton, CO
First Name
Keith
Last Name
Upton
Member #

11810

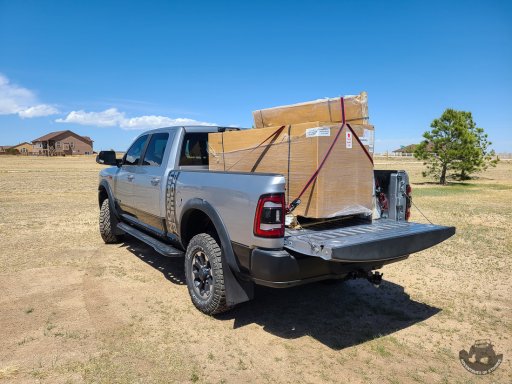
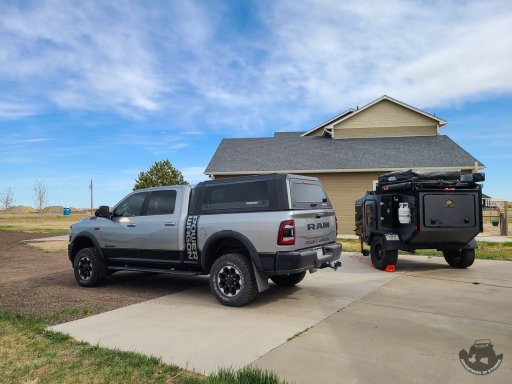
Well, it seems like it is time for another build thread. So of you might remember my Jeep Wrangler build or my Jeep Gladiator build, this time around is a full size truck in the form of a 2022 RAM Power Wagon. The decision to go to a full size truck was based on a couple of things. First, with the wife, a kid and two dogs, the Jeeps were really not big enough to comfortably hold us all. Secondly, the Jeeps were less than ideal on long overland trips where you are driving 10+ hours. Especially when pulling a trailer.

So on Veteran's Day 2021 I pulled the trigger and ordered a factory built 2022 Power Wagon with the following options from Mark Dodge in Lake Charles, LA :

BuildSheet.png

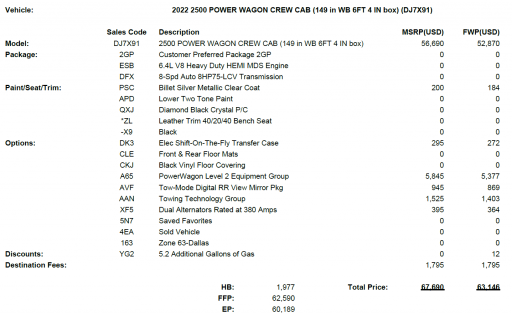
The Truck was built on Jan 18th 2022 and I flew down to picked it up on Feb 11th. The final MSRP price when delivered was $70k and some change. My price from Mark Dodge was $59,669.

20220211_093107.jpg

After visiting with family down in Arkansas I made the 863 mile single day trip back to Colorado. It took 14 hours and 2.5 tanks of gas. I averaged 12.5mpgs on that trip running about 80mph for long stretches of it.

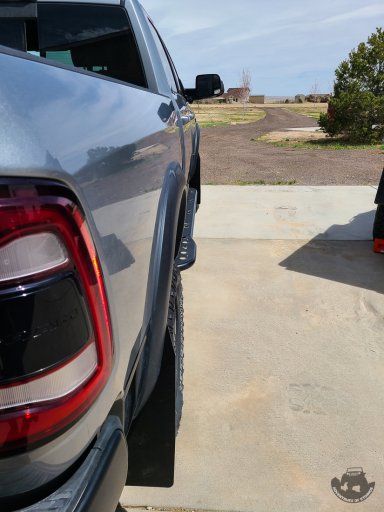
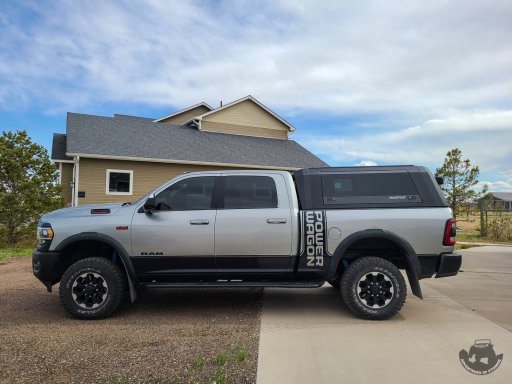
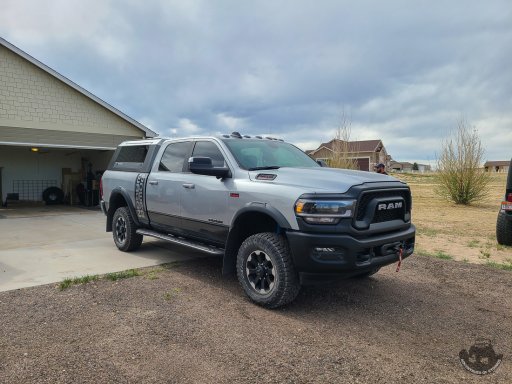
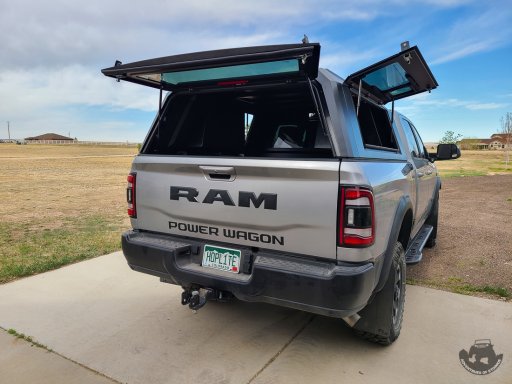
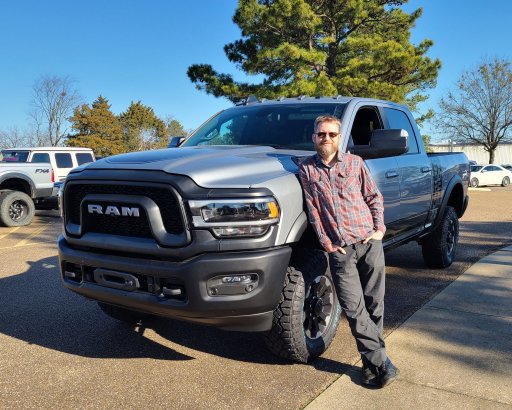
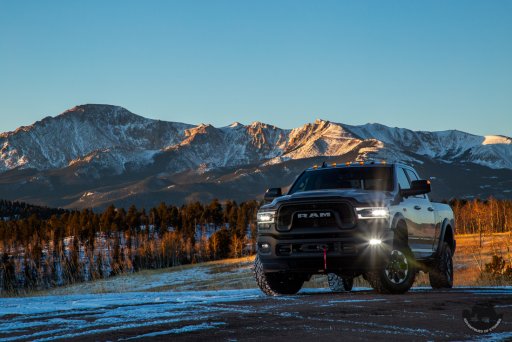
Here it is in stock form at home in Colorado...

PowerWagon-7236.jpg
 

Etoimos

Rank V
Launch Member

Member III

2,779
Peyton, CO
First Name
Keith
Last Name
Upton
Member #

11810

Modding of the new truck started pretty soon after getting it. For the sake of this thread I'll break each mod into it's own post. I am also going to post them in logical order and not in order that they were installed (for the most part).

I'll start off with the White Knuckle rock sliders and Rok Blokz mud flaps. For those that don't know, these trucks are heavy. 7280 pound heavy! Mine weighed 4340lbs on the front axle and 2940lbs on the rear axle. Add in all the mods and gear I'll be carrying when out exploring and it is obvious that only some heavy duty rock sliders will do. Enter White Knuckle Off Road. I opted for the wide version of the sliders with the full top plate so they would double as a step up into the truck.

WKSliders-162947.jpg

WKSliders-172445.jpg

WKSliders-172515.jpg

WKSliders-172500.jpg

WKSliders-172534.jpg

WKSliders-172556.jpg

WKSliders-172632.jpg
 

Etoimos

Rank V
Launch Member

Member III

2,779
Peyton, CO
First Name
Keith
Last Name
Upton
Member #

11810

WKSliders-132607.jpg

WKSliders-132558.jpg

WKSliders-132620.jpg

You will also notice in those photos and the ones below that I installed some XL Rok Blokz mud flaps as well. I ran these on my Jeep Gladiator and they held up very well to some rock crawling. The main reason I have them is to help keep rocks from being thrown up onto the front of my OGT trailer. They should also help to preserve the powder coating on the sliders a little bit.

RokBlokz-132515.jpg

RokBlokz-132535.jpg

RokBlokz-132542.jpg
 

Etoimos

Rank V
Launch Member

Member III

2,779
Peyton, CO
First Name
Keith
Last Name
Upton
Member #

11810

Next up is the RSI SmartCap.

The build and install was pretty straight forward and there were just two "tricky" parts on assembling it. Both were on the rear panel where getting the tabs to align with the slots was kind of a pain. One person had to lift up on the rear panel and at the same time push down on the side panel. The second person had to insert the hardware to lock it all into place.

It comes in two very large boxes.

RSISmartCap-142028.jpg

I did not get the built-in table, so my roof just has the eight rivnuts in it. Those will come in handing for mounting something down the road I'm sure.

RSISmartCap-153417.jpg

Some of the slots had a bend in them. At first I thought this was some type of damage, but the side panels had the "dents" in the exact same place. This makes me think they are from the manufacturing process. These did make it harder to insert the hardware into these slots.

RSISmartCap-153020.jpg

Speaking of hardware, when you take the hardware out of the front and rear panels, do your self a favor and take the black space pieces off and tape the silver metal plates to them. This makes things a lot less fiddly when you are holding the panels together and trying to install the hardware.

RSISmartCap-111922.jpg

While putting this thing together you will notice that they did not skimp on the details. They even cut the part names into the parts. Each panel is also paired to the others with a hand written set of numbers.

RSISmartCap-153127.jpg

Assembly is as simple as Insert Tab A into Slot B and then bolt it down.

RSISmartCap-103035.jpg

The fully assembled SmartCap is pretty heavy. Two guys can pick it up off the floor, but would be hard pressed to lift it high enough to get on the truck... let alone have enough control to do it without damaging anything. I only had two buddies to help me, so we used my Jeep top/RTT hoist to lift it up and then backed the truck under it. That worked out great. We spread the load of the top across all eight M8x1.25 nuts in the built in rails.

RSISmartCap-144028.jpg
 

tjZ06

Rank V
Launch Member

Advocate I

2,268
Las Vegas/Palo Alto
First Name
mynameisntallowed
Last Name
Adams
Member #

20043

Looking forward to seeing this build come together. I went from pulling an adventure trailer (SoCal Teardrop Krawler 459) behind Jeeps ('03 Grand Cherokee Overland that's very built and '17 Grand Cherokee Trailhawk w/ 5.7) to a full size with a Fourwheel Camper. I love my setup, but a full size AND an adventure trailer is the ultimate in terms of space!

-TJ
 
  • Like
Reactions: Shahn and WTSMatt

Etoimos

Rank V
Launch Member

Member III

2,779
Peyton, CO
First Name
Keith
Last Name
Upton
Member #

11810

Looking forward to seeing this build come together. I went from pulling an adventure trailer (SoCal Teardrop Krawler 459) behind Jeeps ('03 Grand Cherokee Overland that's very built and '17 Grand Cherokee Trailhawk w/ 5.7) to a full size with a Fourwheel Camper. I love my setup, but a full size AND an adventure trailer is the ultimate in terms of space!

-TJ
It is really nice having all the space. Of course, it can sometimes mean getting into places can be a little tough if not impossible!
 
  • Like
Reactions: Shahn

Etoimos

Rank V
Launch Member

Member III

2,779
Peyton, CO
First Name
Keith
Last Name
Upton
Member #

11810

Continuing with the bed of the truck, I installed a BedRug Classic. I had looked at the BEDRUG line of products online back in my Jeep days, but I'd never seen one in person. Now that I have one in the PW, I really don't know why I never got around to installing these in the Jeeps. This thing is super nice and makes crawling around in the bed way more comfortable.

The install starts out by having you attach the sides and backs with everything turned inside out. It's a little odd, so a large clear work area comes in handy. They you have to attach all the hook and loop to it.

BedRug-174814.jpg

I did add extra hook and loop around the areas where you had to cut it to allow access to the bed tie downs.

BedRug-185633.jpg

This keeps things tight around those openings.

BedRug-194034.jpg

The BEDRUG also comes in handy for hiding wiring for other projects.

BedRug-194243.jpg

Besides from protecting the bed and adding comfort when you are messing around in there, I think it looks pretty good as well.

BedRug-194447.jpg
 
Last edited:

Etoimos

Rank V
Launch Member

Member III

2,779
Peyton, CO
First Name
Keith
Last Name
Upton
Member #

11810

The next phase in bed build out was installing a driver's side Icky Concept MOLLE panel. I've ran MOLLE panels from other companies in the past, but the Icky panels are by far the beefiest panels I've had. The press brake bends in them really add to their rigidity.

BedMOLLE-134746.jpg

The one downside to them is that you must drill into your bed to install Rivnuts. Once you overcome that aversion, it really is not that bad and makes for a very solid panel.

BedMOLLE-130258.jpg

BedMOLLE-114446.jpg

One thing to keep in mind when installing the driver's side panel is that the hole you have to drill for the front is very close to the fuel filler neck under the bed. One of the rear's also comes close to hitting the under bed support frame member. On my install, the drilled hole actually was inside the U shaped support beam.

My plan was to mount my Hi-Lift jack to this panel like I had it mounted in my Gladiator. The differences in the MOLLE layout between that old panel and the Icky made it so that I needed a pair of the really cool Icky Concept MOLLE Backing Nuts. IC makes a Hi-Lift mount, but I already had a setup I used in the past and wanted to reuse it. This meant that I needed to drill a much larger hole through the center of the Backing Nuts.

BedMOLLE-141941.jpg

BedMOLLE-144045.jpg

With the hardware sorted, it was just a matter of mounting the jack to the panel.

BedMOLLE-144626.jpg

While held securely in place, the jack stuck out into the bed area too much and all those hard and rough parts of the jack was bound to destroy whatever rubbed against them. I also have plans on make a kennel area in the front of the bed for my dog and did not want him to hurt themselve on the jack. So, I determined that the jack could actually be mounted behind the panel! This solved the problem of the jack sticking out into the bed and also made it where I could still use that panel for lots of other things as well. Win win!

BedMOLLE-194432.jpg

Maximus approves!

Maximus-1.jpg
 
Last edited:

Etoimos

Rank V
Launch Member

Member III

2,779
Peyton, CO
First Name
Keith
Last Name
Upton
Member #

11810

One of the mods waiting to be installed in the bed is a Dometic fridge and slide. I am also going to be installing some lighting in there to make things easier at night. All of this means I needed some type of power back there. Instead of adding more load to the trucks battery, I mounted a 100w solar panel on the top of the RSI SmartCap via a pair of 15 series aluminum profiles from TNUTS.

Solar-194824.jpg

There is still some room up top to mount my Tred Pro traction boards once the hardware shows up.

Solar-194917.jpg

The solar panel is connected to a Renogy Wanderer charge controller and finally to an Amazon 50Ah lithium battery, all mounted in the driver side RSI half bin. From there a line is ran inside the bed to the fridge when mounted. To secure the battery in the bin, I made some quick brackets from spare metal laying around the shop. They turned out pretty good but I'm thinking about remaking them with purpose bought metal so that the sizing is a little better. I also need to powder coat whichever set I decide to go with.

Solar-194657.jpg
 

Etoimos

Rank V
Launch Member

Member III

2,779
Peyton, CO
First Name
Keith
Last Name
Upton
Member #

11810

The next area to address was Communications.

Comms-0634.jpg

Up top I'm using a mix of some 67 Designs parts I had on hand and the Bullet Point RubiGrid for the phone holders. BP's shortest arm worked well for the inReach mini. To power these I used a 12v to USB socket adaptor and bought some short charging cables to help keep things clean looking.

Comms-171351.jpg

The tablet is mounted using a universal mount from RAM Mounts that I swapped over from the Gladiator. I'm actually not crazy about this mount for my specific tablet as the X grip function depresses the tablet buttons and turns the screen on/off or changes the volume on it. I'm considering replacing it with the Bullet Point tablet holder since it grips in a different way. There is also too much vibration in the setup. It really needs to be tied in with a second connection point to the truck.

Comms-171847.jpg

The mic holder for my Midland MXT275 GMRS Radio is the Bullet Point CB Radio Holder with their Xtra Long 20cm arm. The mic holder part works really well and has a padded surface on the inside that helps keep it rattle free. The other end of the arm is connected to a 20mm ball I pulled off of one of their phone holders. I mounted that directly to the stock tray in front of the middle seat over the hump.

Comms-142613.jpg

Installing the Midland GMRS radio consisted of ripping out the lower part of the center stack, the carpet and trim around the two drivers doors. I also removed the driver's side rear seat, but that is not completely necessary for how I ended up installing it all.
The lower center stack consists of three parts; the lower panel which just clips in, the bezel that surrounds very thing that has two small bolts (8mm I think) and clips and finally the little cubby with the change holder in it (all clips).

Here are the bolt locations, and where my main radio unit is installed.

GMRS-142000.jpg

Lots of orange clips.

GMRS-142121.jpg

The antenna wire is weaved to slits in my vinyl flooring to keep it up and under things so I don't step on it all the time.

GMRS-140522.jpg

Next I removed the rear seat and door trim to run the wires. I've also pulled the vinyl flooring away from the under seat cubby. There is a hole in the front of the cubby you can pass the wire though and then a sealed hole in the bottom of the cubby to underneath the truck.

GMRS-135040.jpg

GMRS-135046.jpg

From there it was just a matter of routing the antenna a few feet under the truck and up between the cab and cap to the 3db gain antenna mounted on the top of the RSI SmartCap.
 

Etoimos

Rank V
Launch Member

Member III

2,779
Peyton, CO
First Name
Keith
Last Name
Upton
Member #

11810

On the other side of the truck is where I'm installing all of my WeBoost cell signal booster at. This system has a fairly large module and rather small cable connections, so I decided to install it in the rear in-floor cubby on the passenger's side. The cubby is made of three parts. First is the trim and lid, then the cubby liner, and finally the sound dampened cubby its self. I pulled everything out to do this install and it is kind of odd looking down at the rear floor of your truck and seeing the ground!

The WeBoost mount mounted through the main cubby. I used some lock tight so that the nuts would not fall off going down the road.

WeBoost-194847.jpg

A cable gland allows for the antenna wire to exit the cubby while keeping the dust and water out of it.

WeBoost-194857.jpg

The WeBoost module uses a clip stye mount that works really well.

WeBoost-194842.jpg

This is how the antenna cable looks passing though it.

WeBoost-195230.jpg

WeBoost-195251.jpg

Here is everything back in the truck with the interior wires ran through a notch in the trim for a nice clean install. The wires are then ran under the vinyl flooring and exit under the passenger seat at the floor vent. This install keep feet from stepping all over the wires.

WeBoost-201549.jpg

WeBoost-201603.jpg

WeBoost-201611.jpg

WeBoost-201630.jpg

The WeBoost antenna wire follows a similar route as the GMSR setup to the top of the RSI on the passenger's side where its antenna is mounted.
 

Etoimos

Rank V
Launch Member

Member III

2,779
Peyton, CO
First Name
Keith
Last Name
Upton
Member #

11810

With some electronics installed and more planned for the future, it was time to address controlling them. For this I went with the Switch Pros eight switch unit. SDHQ makes a very nice 3D printed replacement panel for the Power Wagon that cleanly mounts the control panel just to the left of the driver's left knee.

SwitchPros-155218.jpg

The wiring is ran through a cable gland installed in a hole I drilled in the firewall clutch cover.

SwitchPros-091805.jpg

The SDHQ Switch Pros engine bay bracket does a good job of tucking everything out of the way.

SwitchPros-095839.jpg

SwitchPros-095846.jpg

Based on some clean installs I saw on another forum, I made a harness extension for the Switch Pros accessories wires and terminated them with Deutsch connectors. I also wired all of the grounds from the Deutsch connectors to a common ground wire. Since there are so many wires in a small area, each was labeled for easy identification later on.

SwitchPros-135306.jpg

SwitchPros-102110.jpg

SwitchPros-094314.jpg
 

Etoimos

Rank V
Launch Member

Member III

2,779
Peyton, CO
First Name
Keith
Last Name
Upton
Member #

11810

Every overland build needs an on board air system of some type, so I picked up an ARB twin compressor for those duties. Phase 1 of the system consisted of mounting the compressor in the passenger side RSI half bin and routing the cables and wires to the engine bay.

ARBcomp-194458.jpg

The wiring runs through the cable gland in the front corner and then behind the BedRug and under the truck to where the Switch Pros is mounted.

ARBcomp-194527.jpg

The ARB twin compressor required three wires going to the engine bay. One was to connect it to the Switch Pros and the other two were the positive and negitive wires to the battery. I chose to connect the ARB to the main truck battery instead of the house battery installed in the RSI for a couple of reasons. First, I did not want to run the house battery down via the compressor since its main job is to power the fridge/freezer. Secondly, the ARB really needs a good solid power source and I order the truck with dual alternators just for this purpose.

The three wires were all ran through more cable glands installed along the fire wall. On the driver's side there was room to place them in the black plastic cover that runs along the back.

SwitchPros-155253.jpg

The wires go across the back, hidden under that plastic cover.

SwitchPros-165258.jpg

The passenger side does not have enough space on the plastic cover for the cable to exit, so I had to drills some holes in the firewall for them.

SwitchPros-165401.jpg

Cable glands were used on this side as well for a nice clean look. Unless you know these trucks, it is hard to tell these wires are not factory installed.

SwitchPros-155303.jpg

Again, all the wires are labeled for easy identification later on .

ARBcomp-154855.jpg

That wraps up Phase 1 of the on board air system with the ability to air up and down manually. Phase 2 will come a little later and add the ability to air up and down both the truck and the trailer simultaneously and remotely.
 

Etoimos

Rank V
Launch Member

Member III

2,779
Peyton, CO
First Name
Keith
Last Name
Upton
Member #

11810

I managed to get a few more things done on the build over the last several weeks...

The Tread Pros are now mounted to the top of the RSI SmartCap next to the solar panel.

PowerWagonBuild-131327.jpg

I also "fab'd" up a curved pressure washer wand. Not it is really easy to wash all the mud and dried dirt from under the truck and trailer.

PWwand-1.jpg
 
  • Like
Reactions: Shahn

Etoimos

Rank V
Launch Member

Member III

2,779
Peyton, CO
First Name
Keith
Last Name
Upton
Member #

11810

I also got some more bed modifications done. First up was the create for Maximus. I made this from a hog/cattle panel that my dad had laying around his property.

PowerWagonBuild-135525.jpg

PowerWagonBuild-195244.jpg

PowerWagonBuild-161241.jpg

PowerWagonBuild-161252.jpg

Once it was all cut to shape and size, I dropped it off at a buddies business to be powder coated as it was too large for me to do in my shop.

PowerWagonBuild-194238.jpg


I used 550 cord to lash the door panel to the overall panel to make the hinges. This works better than I thought it was going to. The orange 550 cord zipper pull just right of center in the above photo is used to secure the door closed.

To attach the panel to the RSI SmartCap I used four stainless steel cable clamps. I powder coated these to get rid of the shinny bits.

PowerWagonBuild-165934.jpg

PowerWagonBuild-173233.jpg

PowerWagonBuild-194252.jpg

Maximus seems to really enjoy having his own room in the truck now.

PowerWagonBuild-194448.jpg

PowerWagonBuild-194459.jpg
 
  • Love
Reactions: Shahn

Etoimos

Rank V
Launch Member

Member III

2,779
Peyton, CO
First Name
Keith
Last Name
Upton
Member #

11810

You can also see the Icky Concepts bulkhead MOLLE panel installed in some of the above photos. It was kind of a pain in the ass to install with the BedRug and Smart Cap already on the truck. I had to pull the BedRug away from the bulkhead so that I could install the riv-nuts.

PowerWagonBuild-172449.jpg

PowerWagonBuild-172510.jpg

The biggest pain was that the SmartCap came down to low for me to install the upper riv-nuts. I had to loosen the cap's clamps and then use my hoist to lift just the front of the cap up enough to get the required room to install them.

PowerWagonBuild-172435.jpg

After that it was a quick job of putting the BedRug back in place and bolting the panel on. You probable also so in the previous photos that I got my secondary Dometic fridge installed in the bed as well. It is mounted to a slider that allows it to slide out flush with the end of the tail gate.
 
  • Like
Reactions: Shahn

Etoimos

Rank V
Launch Member

Member III

2,779
Peyton, CO
First Name
Keith
Last Name
Upton
Member #

11810

A couple of week ago I was also able to finish up the on board air system with an ARB Air Compressor Pressure Control system. If you are unfamiliar with ARB Pressure Control system, it allows you to configure preset tire air pressures in an app and then inflate or deflate your tires by simply connecting a "whip" to each tire and then hitting a couple of buttons in the app. On my setup I can inflate all four of my stock tires from my Overlanding pressure of 20psi to my Daily Driving pressure of 36psi (I'm still fine tuning my daily pressure) in just a tad over 7 minutes. Deflating from 36psi to 20psi take about the same amount of time... if you trick the system a little. This system, at least on my truck, has a hard time deflating to the last psi. It will release some air which will drop it down to the target psi and stop. The pressure rises 1psi once the valve closes and this sets off a cycle of very small adjustments trying to deflate that last psi down to the target. What I have found best to do is set your target psi to 1psi less than what you really want. This way the system takes it down to your true target psi and you can turn the system off before it goes through that whole cycle mentioned above.

PowerWagonBuild-165905.jpg

The mounting bracket they include did not work for my needs, so my hotrod building neighbor made me up a bracket to mount it to my passenger side half bin MOLLE panel.

PowerWagonBuild-174653.jpg

I then rounded up everything else I need to powder coat and hit them all with a satin black that is a very close match to the SmartCap.

PowerWagonBuild-180836.jpg

PowerWagonBuild-180952.jpg

PowerWagonBuild-161809.jpg

Here is everything put together and attached to the pressure control module.

PowerWagonBuild-171536.jpg

I hard mounted Schrader valves to the truck at all four corners and run the tubing from the four corners back to the compressor area. That was done with parts from the Up Down Air system that I had bought for the Gladiator and never got around to installing on it.

ARBcomp-170558.jpg

ARBcomp-194022.jpg

PowerWagonBuild-094626.jpg
 
  • Like
Reactions: Shahn

Etoimos

Rank V
Launch Member

Member III

2,779
Peyton, CO
First Name
Keith
Last Name
Upton
Member #

11810

Of course, the BedRug had to be pulled back again to run the tubing up and into the bed of the truck.

PowerWagonBuild-184331.jpg

PowerWagonBuild-184907.jpg

The pressure control unit had to be tapped into the ARB compressor harness so that it turns on when the compressor does. For this I removed the pin from the connector and spliced the new wire into that and put it back into the connector.

PowerWagonBuild-192613.jpg

With everything hard plumbed it was time to connect the tires via the "whips" and see how the system did.

PWBuild-161042.jpg

There were a few leaks in my fittings up at the control module that needed to be taken care of. These leaks also showed me that quite a bit of moisture was being generated by the compressor. I am going to have to get an inline moisture trap installed at some point in the near future.

PowerWagonBuild-211939.jpg

The next series of upgrades will focus on lighting. I have plans for some offroad lights as well as some lights for inside the SmartCap. Until then, have fun out there guys!