Just finished up this project this morning, and thought it was a good thing to share a how-to for.
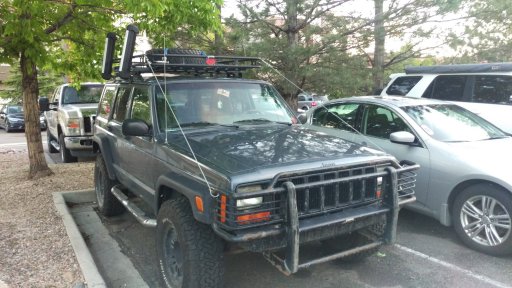
Our 2001 Cherokee is our purpose-budget-built camping vehicle, and we have made a bed platform for the back in order to be able to not add too much size and weight (and cost) with a RTT. The down side to this is the shuffle of items from inside to roof of the car, or fumbling with cargo straps in order to keep space open and easy to use when settling into camp. This spring has been dedicated to dialing in the safari basket setup in order to make everything go a bit smoother.
I started by bolting on multiple fork-mount bike hitches (3 bikes, but only 2 seats?! sounds about right) and a used Toyota/Subaru style ski rack in order to keep our bigger, messier toys out of the sleeping space.
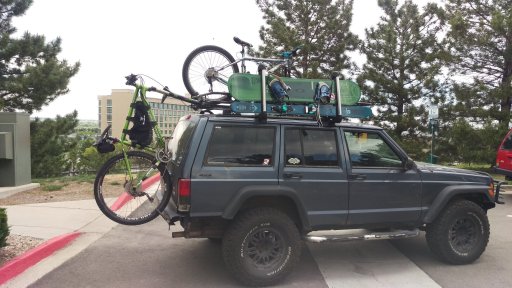
This didn't help with the fact that we both had helmets, wet boots, gloves, pants, and jackets to deal with, and take up a ton of space. I originally thought about a mounting system using some lag bolts through the bottom of a box, and wing nuts to make it easy to take off/on. The issue with this was either a) the wing nuts had to be on the inside of the box for security, meaning it would either be loaded and unloaded up top, or would have to be dug through to attach; or b) wing nuts on the outside meant it could just be popped off and walked off with.
The only quick release option I could find on the market that I liked was the EO2 Fastener system, which would cost me about $165 BEFORE purchasing a box. Didn't seem like it was worth that price tag, so I decided to make my own. Unfortunately, I could not find a project like this on any of the forums I troll, so it took a bit of brain juice and "critical thinking" to figure it out.
I went ahead and ordered a box on the sturdier side of tupperware, but you could easily do this with something just as nice as a Pelican, YETI, or whatever fancy nonsense.
Link: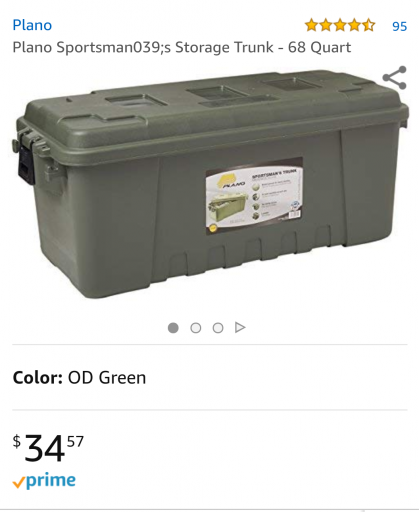
After sizing it up into position, I thought that something similiar to a toolbox latch would be a good solution, as my roof rack bars allow for a vertically mounted clasp plate. $6.99
Link: POWERTEC 3.5 in. Stainless Steel Spring Loaded Chest Locking Hasp with Latch Plate Inch (4-Pack)-21106 - The Home Depot
For hardware, it took 8 M3 machine screws, fender washers, and nuts; 8 5/16 pop rivets, and 4 premade mounting plates I used to sandwich the plastic as reinforcement. You could easily save a few bucks by drilling and cutting steel or aluminum stock to make these plates as well, I just couldn't be bothered. Altogether, this cost about $22 at a local hardware store.
I started by installing the clasp plates to the roof rack. For this part, I set the box where it would ultimately sit, and held the clasp up to mock a location. I was also careful that the clasp plate's hook was below the top of the crossbars so that if items were set up top they would not be damaged by the plates or knock them loose.
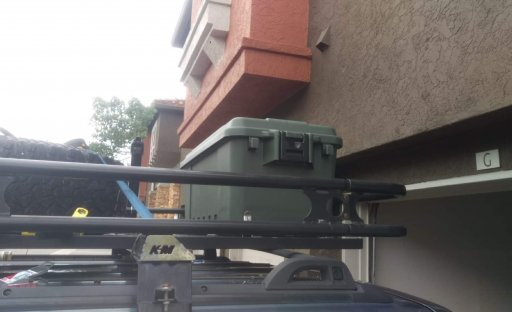
I installed these by drilling two mounting holes on the side I started on, one for each clasp plate. After this, I installed one rivet on each plate, and tightened it down so that the plate was level. This way, I could use the plate as the drill guide and did not have to worry about the bit walking at all. Drill the second holes for the plates, install the rivet, and then move onto the clasp!
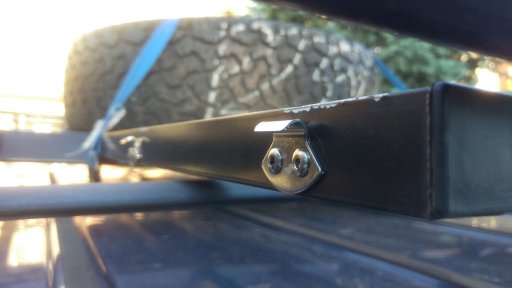
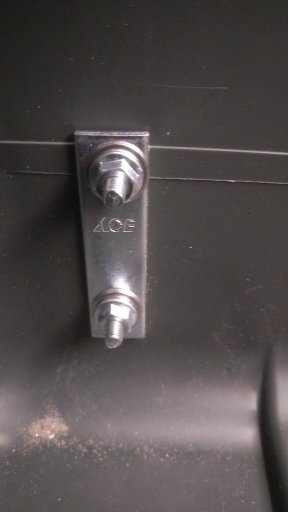
Once both clasps are installed on one side, I replaced the box onto the rack and hooked the clasp's loop onto the plate. I used a sharpie to mark where the top hole of the mounting plate would be for both clasps, and then drilled about 2mm above the mark to provide better tension on the buckles. After both top holes are drilled, install the clasp with the top screw, backing plate, washer, and nut barely fingertight.
Get the box back on the roof, check to see if there is enough tension on the latch, and if there is mark with your sharpie where the second bolt hole from the clasp plate is. Drill it, and finish installing the clasp.
Here's a picture of the inside where the clasps are attached:
Repeat this on the other side, and you'll have a quick release rooftop cargo box for about $60!
While you've got your drill out and reaching the roof, some new limb risers are a quick, easy install if you follow along with the OB video tutorial on how to make your own!
Cheers!
Our 2001 Cherokee is our purpose-budget-built camping vehicle, and we have made a bed platform for the back in order to be able to not add too much size and weight (and cost) with a RTT. The down side to this is the shuffle of items from inside to roof of the car, or fumbling with cargo straps in order to keep space open and easy to use when settling into camp. This spring has been dedicated to dialing in the safari basket setup in order to make everything go a bit smoother.
I started by bolting on multiple fork-mount bike hitches (3 bikes, but only 2 seats?! sounds about right) and a used Toyota/Subaru style ski rack in order to keep our bigger, messier toys out of the sleeping space.

This didn't help with the fact that we both had helmets, wet boots, gloves, pants, and jackets to deal with, and take up a ton of space. I originally thought about a mounting system using some lag bolts through the bottom of a box, and wing nuts to make it easy to take off/on. The issue with this was either a) the wing nuts had to be on the inside of the box for security, meaning it would either be loaded and unloaded up top, or would have to be dug through to attach; or b) wing nuts on the outside meant it could just be popped off and walked off with.
The only quick release option I could find on the market that I liked was the EO2 Fastener system, which would cost me about $165 BEFORE purchasing a box. Didn't seem like it was worth that price tag, so I decided to make my own. Unfortunately, I could not find a project like this on any of the forums I troll, so it took a bit of brain juice and "critical thinking" to figure it out.
I went ahead and ordered a box on the sturdier side of tupperware, but you could easily do this with something just as nice as a Pelican, YETI, or whatever fancy nonsense.
Link:

After sizing it up into position, I thought that something similiar to a toolbox latch would be a good solution, as my roof rack bars allow for a vertically mounted clasp plate. $6.99
Link: POWERTEC 3.5 in. Stainless Steel Spring Loaded Chest Locking Hasp with Latch Plate Inch (4-Pack)-21106 - The Home Depot
For hardware, it took 8 M3 machine screws, fender washers, and nuts; 8 5/16 pop rivets, and 4 premade mounting plates I used to sandwich the plastic as reinforcement. You could easily save a few bucks by drilling and cutting steel or aluminum stock to make these plates as well, I just couldn't be bothered. Altogether, this cost about $22 at a local hardware store.
I started by installing the clasp plates to the roof rack. For this part, I set the box where it would ultimately sit, and held the clasp up to mock a location. I was also careful that the clasp plate's hook was below the top of the crossbars so that if items were set up top they would not be damaged by the plates or knock them loose.

I installed these by drilling two mounting holes on the side I started on, one for each clasp plate. After this, I installed one rivet on each plate, and tightened it down so that the plate was level. This way, I could use the plate as the drill guide and did not have to worry about the bit walking at all. Drill the second holes for the plates, install the rivet, and then move onto the clasp!

Once both clasps are installed on one side, I replaced the box onto the rack and hooked the clasp's loop onto the plate. I used a sharpie to mark where the top hole of the mounting plate would be for both clasps, and then drilled about 2mm above the mark to provide better tension on the buckles. After both top holes are drilled, install the clasp with the top screw, backing plate, washer, and nut barely fingertight.
Get the box back on the roof, check to see if there is enough tension on the latch, and if there is mark with your sharpie where the second bolt hole from the clasp plate is. Drill it, and finish installing the clasp.
Here's a picture of the inside where the clasps are attached:

Repeat this on the other side, and you'll have a quick release rooftop cargo box for about $60!
While you've got your drill out and reaching the roof, some new limb risers are a quick, easy install if you follow along with the OB video tutorial on how to make your own!

Cheers!


