Casper's 2016 taxa Tiger Moth build

  • HTML tutorial

Casper66

Rank IV
Launch Member

Enthusiast III

1,080
Culpeper, Va.
First Name
Christopher
Last Name
Carter
Member #

21273

"WE DID A BAD THING"

This will be a build and adventure log for us and our micro camper. I will start with a brief introduction to us and our back ground.
I began "camping" in the millitary I had never spent a night in a tent or eaten outside a kitchen in my life up until then as it just wasn't something my family did. As our daughters began to grow we all got into the Girl Scouts, yes even me. My wife lead 2 troops from when they were wee little until they graduated High school and I assisted. We had 17 years as troop leaders and after our girls disbanned my wife continued on as an outdoor ed instructor for a few more years and i maintained status as the archery instructor for 3 counties. Needless to say we are outdoor people.
With the girls grown and gone we got a little bored and decided we needed to get out and adventure some. I had had enough of tents, not knocking them, I have a horrible back and shoulders 30+ years of autobody and welding have taken their toll and I was not going to sleep in a tent anymore. So we decided to look for a camper that would suit "our" needs not neccessarily everyones.
Wants:
A dry comfortable space
A small footprint
Off roadable
AC for when it is hot
Needs:
Self sufficient even if it means modifications (for which there have been many)
Adequate cooking space
Be able to sit up in it
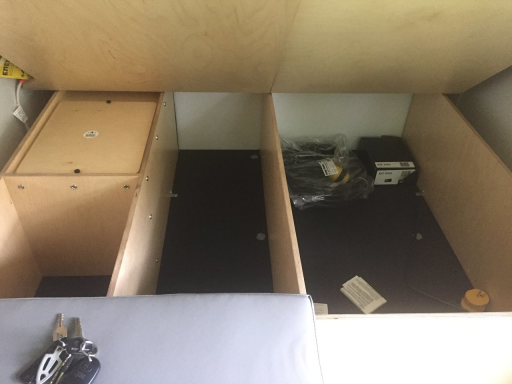
Offer plenty of storage

We set off insearch of a tear drop as i thought it would be just perfect. We were not looking for big screen TV's or fireplaces so it seemed a simple approach. With as bad as my back is the crawling in and not being able to sit comfortably was seeming impossible to accomodate. I understand some tear drops are so large you can walk in them but not what we were looking for we wanted tiny you will see in a bit.
We happenned to drive through the next town over from us Orange va on the way to look at some campers and found a dealer we didn't even know existed and saw a multitude of tiny campers we had never even heard of in a number of varying sizes and shapes.
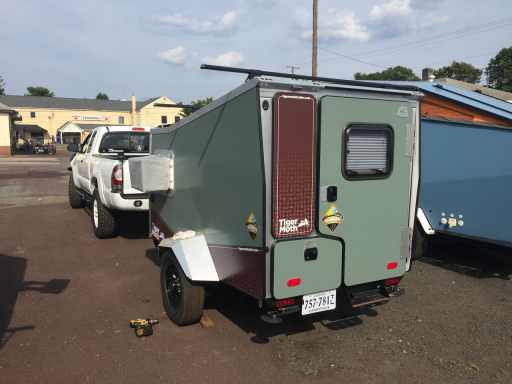
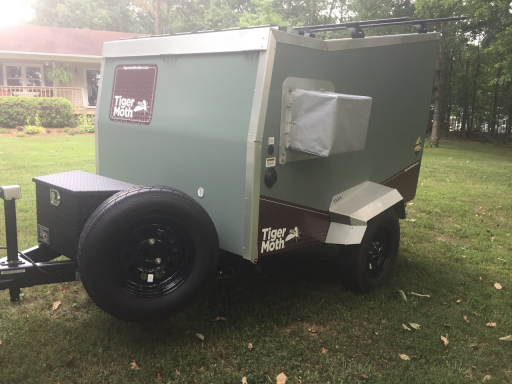
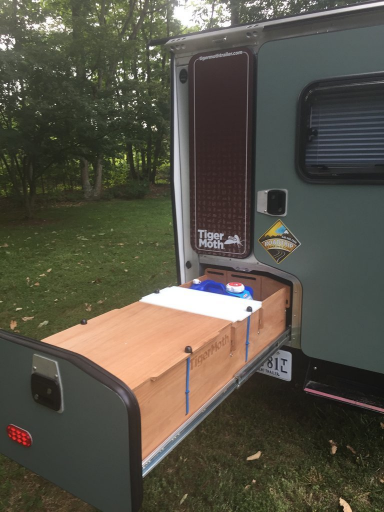
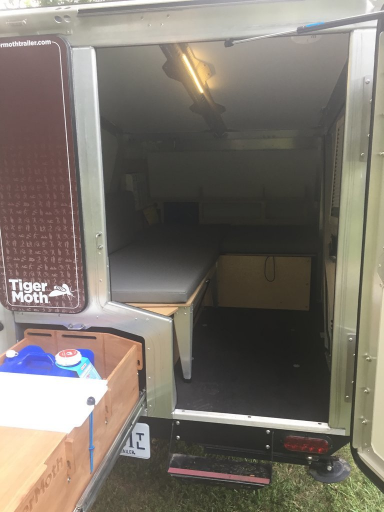
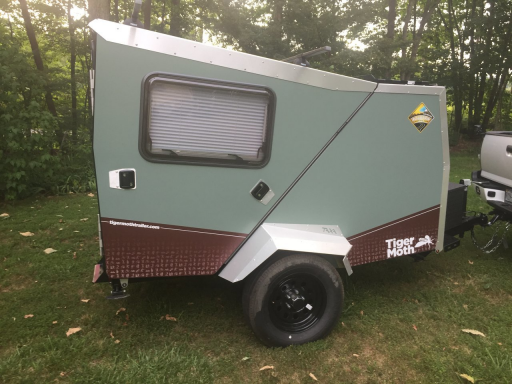
What we found was incredible, to us. A Taxa Tiger Moth and it checked off most all of our wants and needs. The following pictures will tell it all. I have almost no pictures on file anywhere as they were on my other phone which was destroyed o i will have to copy and paste from another site.
The TM is not a tear drop it really doesn't fall into any category much like us. We don't call ourselves Glampers or overlanders we just kinda camp where we want to and relax. The new model year TM's were a touch above what we desired to spend as this was kinda a celebratory purchase after paying our house off. I got lucky and the dealer had a left over 2016 sitting around back and we settled on about a third off on price.
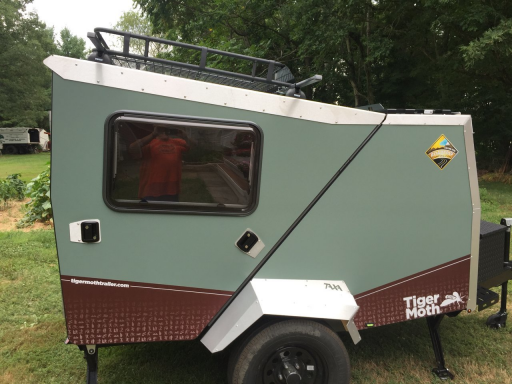
Camper total length (stock) is about 12'
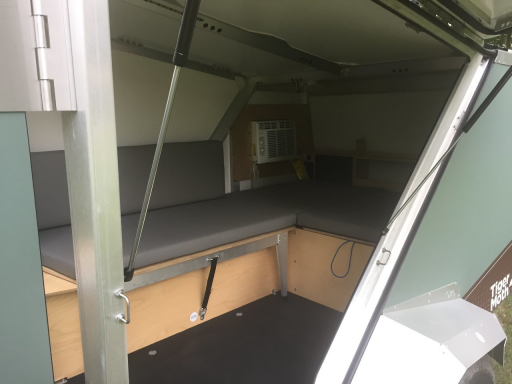
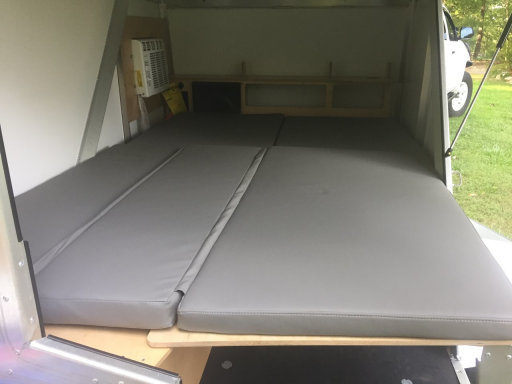
You can sit up and kindat stand in it
The benck folds out and the entire inside turns into a little bit larger than a full size bed
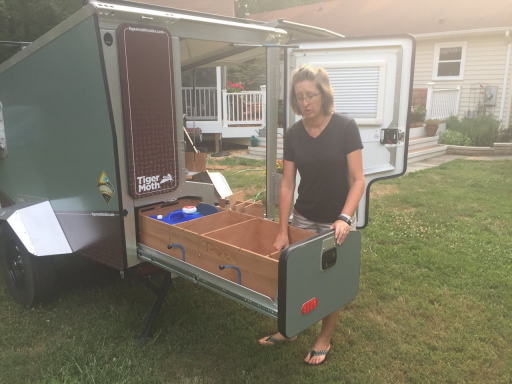
4' pull out kitchen space
Thule racks
Cargo racks
A tool box on the tongue
And only weighed (empty) 910 pounds as it is all aluminum except the frame

Adventures So far:
8-4-17 Outlanders River Camp in Luray, Va
9-5-17 The Anvil Camp Ground in Williamsburg, Va---we wanted to tour Colonial Williamsburg
10-1-17 Westmooreland State park
4-22-18 Outlanders River Camp
8-5-18``New River junction camp Ground
8-13-18 Flag Pole Knob
9-3-18 Mathews arm campground
10-14-18 mathews arm camp ground
10-21-18 AOAA Tacoma world event in Coal Township Pa
8-18-19 Outlanders River Camp
10-31-19 Pochahontis State park
6-19-20 Lewis Mtn. Shenandoah Nat. Park
7-4-20 Loft mtn Shenandoah national park

Yes I know there are multiples listed as some locations are only an hour from us and good weekend getaways and we just like being there.

Modifications so far:
Cargo basket
Hasika Awning
Grilling solution
Kitchen mods
Auxillary lighting
USB port installations
Tongue extension and Lock n Roll install
Spare tire relocation
Spare tire mounted table
"The Box" fabbricated steel box for storage and fridge
Electrical supply dual batteries and solar
heavier front stabalizer jacks
Dexter lift kit
Mud flap fabrication
Larger tires
Remote solar suitcase

This will take a while as I have been working on this for 2 years but I will try and break each mod down in individual posts.

2016 taxa Tiger moth 7-20-2017 the day we got it:
1572199388246.png


1572199432978.png


1572199491300.png

1572199534893.png

1572199581901.png

1572199617379.png

1572199649627.png

1572199685734.png

1572199715222.png

So our adventure began. We have had a ball sometimes like this year life gets in the way and we haven't really got to get out but we are trying. Thanks for reading I will break the mods down in individual posts.

For those of you who are on Tacoma World there is a comprehensive build for this there
 
Last edited:
  • Like
Reactions: eagle_A40
Casper66

Rank IV
Launch Member

Enthusiast III

1,080
Culpeper, Va.
First Name
Christopher
Last Name
Carter
Member #

21273

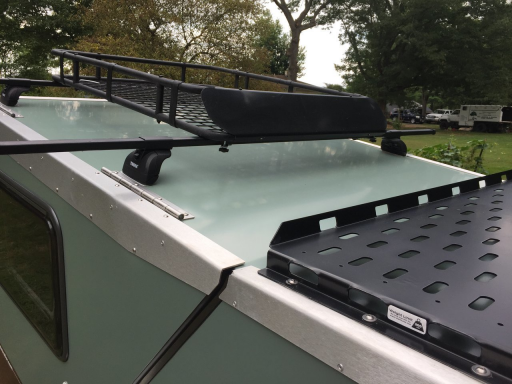
Cargo basket:
One of the first things i did was install a cargo basket on the Thule bars. I already had it so figured why not it allowed for more stowage of equipment

1572200953025.png

1572200985695.png
 
  • Like
Reactions: eagle_A40

Casper66

Rank IV
Launch Member

Enthusiast III

1,080
Culpeper, Va.
First Name
Christopher
Last Name
Carter
Member #

21273

Hasika awning:
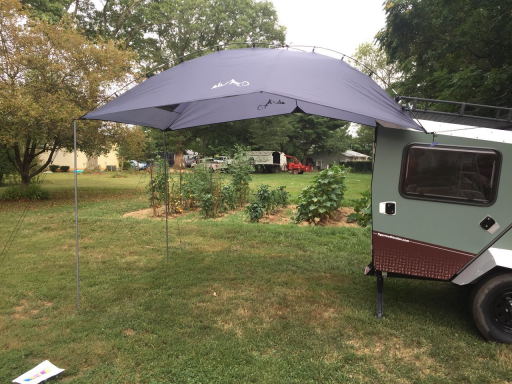
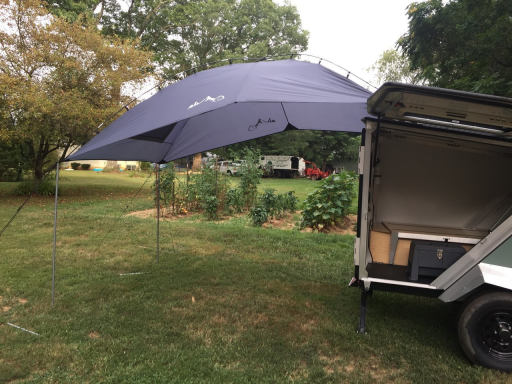
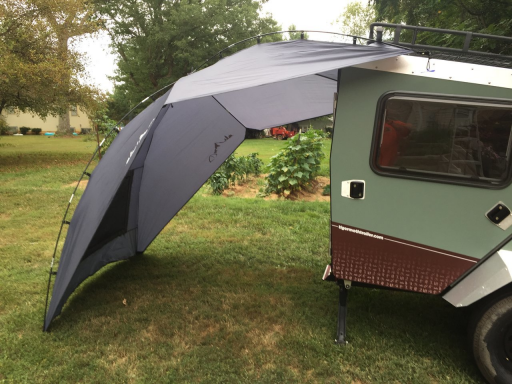
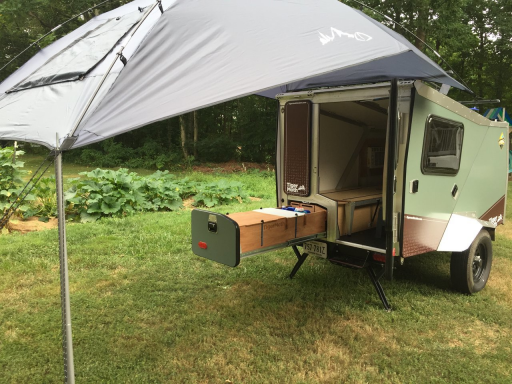
We needed something to cover the rear cooking area but the available options from ARB and others weren't appealing. If we got one the width of the campe it was too small and if we got a bigger one it would be too wide for the camper.
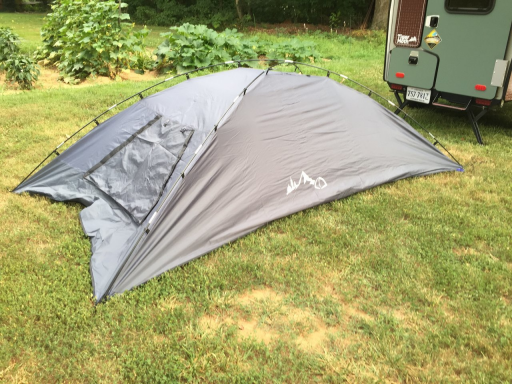
We looked and looked and found the Hasika adjustable awning. It is primarily designed to fit the rear of a minivan or a camper shell on a truck. I adapteed it to the rear Thule bar with some PVC mounts and it works fantastic! The downward slope of the sides provides much more protection from the sun and rain. The poles can be adjusted in height by adding or removing sections so we can customize it to our site. If we were to ever have suprise visitors it can also be removed and pinned to the ground and create a tent.
Light weight, easy to assemble, packs into a tiny package and reasonably priced. I haven't found a flaw yet. In high winds I add tarp clamps to the sides and addtional ropes securing it to the ground and it doesn't collapse.

1572201589779.png

1572201623667.png

1572201653615.png

1572201686384.png

1572201715887.png
 

Casper66

Rank IV
Launch Member

Enthusiast III

1,080
Culpeper, Va.
First Name
Christopher
Last Name
Carter
Member #

21273

Grilling Solutions:
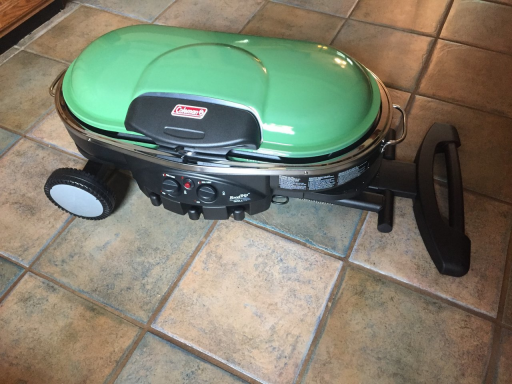
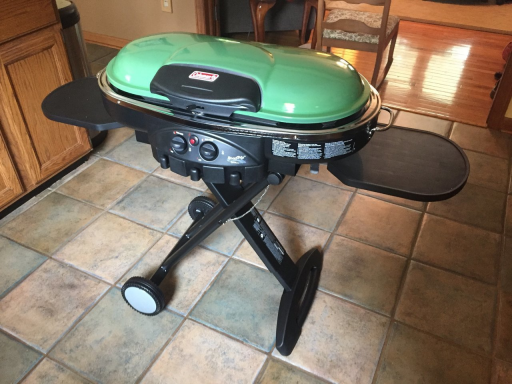
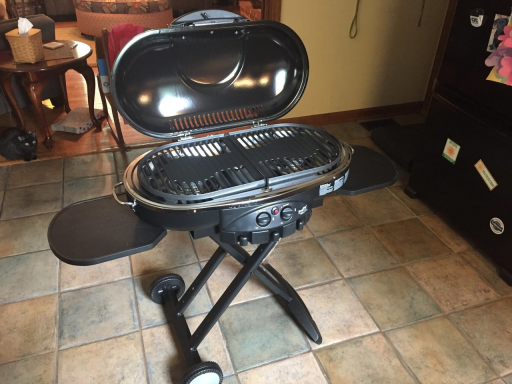
We love to grill food both meet and veggies so I figured why short change ourselves and be limitted to anly a camp stove?
W ended up finding the Coleman Radtrip grill. It does the job handily and folds flat. As our space is limitted this was a big selling point and it runs off our coleman gas bottles.

1572201979258.png

1572202010316.png

1572202042888.png
 

persquank

Rank V
Launch Member

Enthusiast III

2,191
DFW
First Name
Randall
Last Name
Stephens
Member #

9377

This is such a neat little trailer. I can't believe you have an air conditioner.
 
  • Like
Reactions: Casper66

Casper66

Rank IV
Launch Member

Enthusiast III

1,080
Culpeper, Va.
First Name
Christopher
Last Name
Carter
Member #

21273

Kitchen Mods:
Yes a real modification! other than fabbing a mounting solution for the awning most mods have been purchase and install.
On our first trip we discovered that A: the camp stove we had took a crap, even though I tested it befor we put it in the camper. and B: we had almost no prep space for cooking.
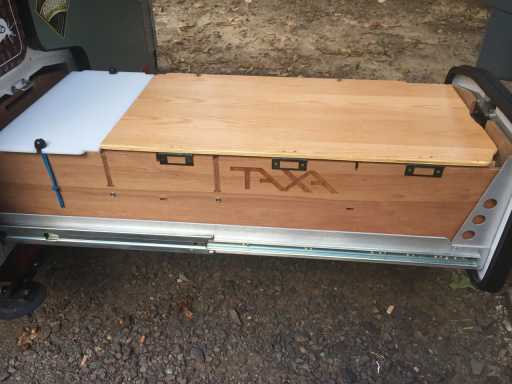
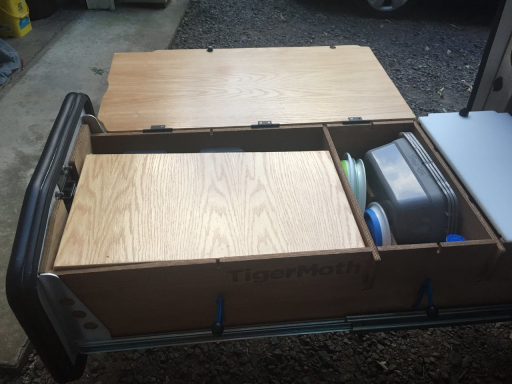
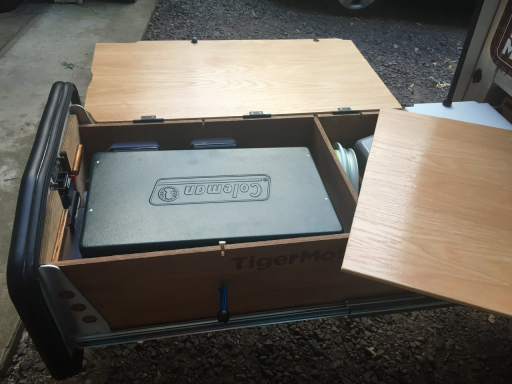
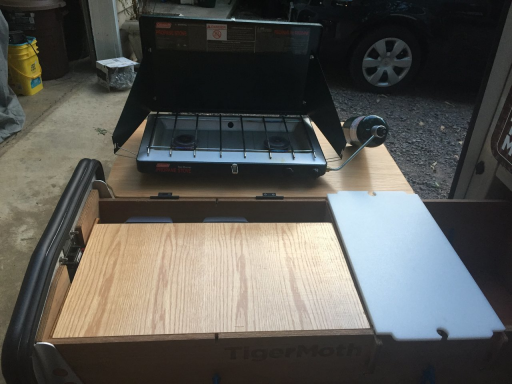
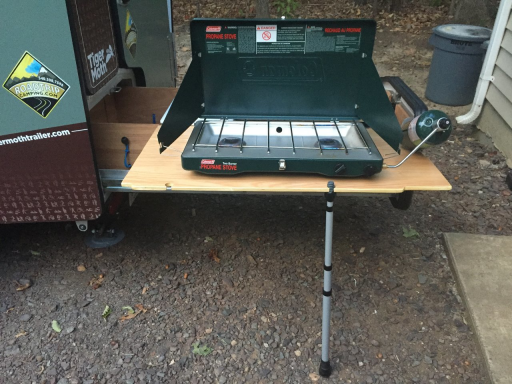
The kitchen was designed to allow you to store your stov inside the main compartment which is handy. The "newer" models had brackets added to the cook station lid so you could mont it on the side of the kitchen drawer to hold the stove for.cooking which eliminated any more prep space. I got a set of the brackets, installed them, and foind on ours the box is a bit different and they wouldn't work. Oh well, time for me to be creative.
I made a larger lid enocompassing 2 of the kitchen compartments and hinged it to the box instead of a lft off. Flip the lid over and use a adjustable paint rod and you can level it right up. I then added some runners inside the box and made a board that fits over the stove for storage but when the lid is flipped over and stove removed it doubles as prep space. This left a gap in the rear allowing food to drop through so i made a hinged door for that as well. (not seen in the photos)

1572203291449.png

1572203336597.png

1572203368354.png

1572203403719.png

1572203440209.png
 
  • Like
Reactions: eagle_A40

Casper66

Rank IV
Launch Member

Enthusiast III

1,080
Culpeper, Va.
First Name
Christopher
Last Name
Carter
Member #

21273

This is such a neat little trailer. I can't believe you have an air conditioner.
Thanks! It has really been a blast. The AC was an option that was already installed when we got it. It is factory installed. The best part is if it goes bad I just need another small window unit. We never run it above low or it turns the camper into a refridgerator. It can only be used if we are at a camp ground with electric or have a generator but we are grateful to have it when it is hot it makes such a difference at night. Keep watching i am posting all the mods post by post it'll take a while
 

Casper66

Rank IV
Launch Member

Enthusiast III

1,080
Culpeper, Va.
First Name
Christopher
Last Name
Carter
Member #

21273

Auxillary lighting:
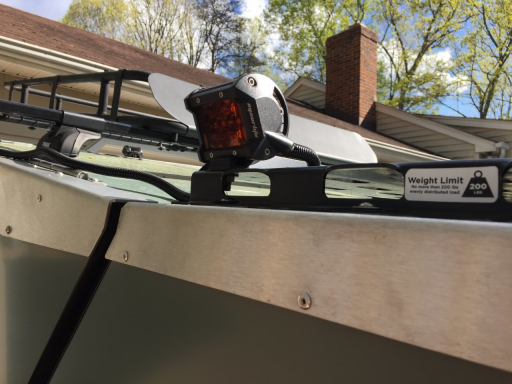
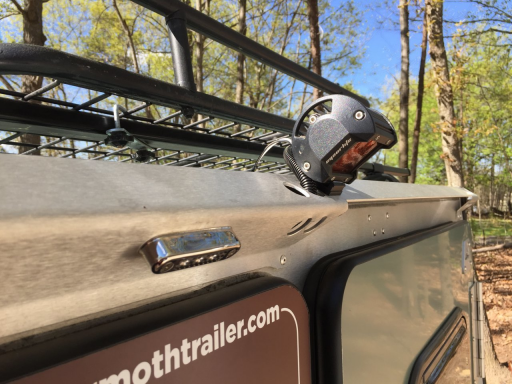
When we were out camping I noticed it was DARK out around the camper at night and was looking for a way to fix the issue. I had some Amazon pods mounted in the bumper of the truck with amber laminex films on them so I replaced them with Caliraised amber pods and relocated the old pods to the camper. I monted one in the rear illuminationg the cooking area which works outstanding and one on the passenger side attached to the cargo rack so if I get out at night it is ll lit up and i don't fall. The camper came with a tiny LED light over the cooking area already installed so I just pulled it out and tied the other pods into it so it all works off the factory switch

1572204090010.png

1572204118466.png
 
  • Like
Reactions: eagle_A40

Casper66

Rank IV
Launch Member

Enthusiast III

1,080
Culpeper, Va.
First Name
Christopher
Last Name
Carter
Member #

21273

USB solutions:
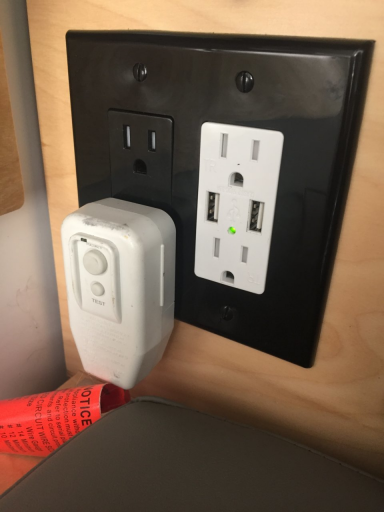
I discovered that while we have a couple of 12v power plug spots sometimes it wasn't enough. I found these outlets that supplied 2 additional usb ports granted they can only be used if we are at a campground.
1572204300043.png
 

Casper66

Rank IV
Launch Member

Enthusiast III

1,080
Culpeper, Va.
First Name
Christopher
Last Name
Carter
Member #

21273

Tongue extension and Lock n Roll install:
Ok this will eventually make sense as you keep reading through the next 4 mods. Believe it or not this all spurred from us buying a fridge for a joint Christmas present to each other. We were tired of dicking with coolers and it just made sense.
So, at this time I was still able to get the camper in the garage. With a background in welding and fabrication the fun was about to begin. I may not have done this the way everybody would but I have a tendency to overbuild which I don't view as a bad thing.
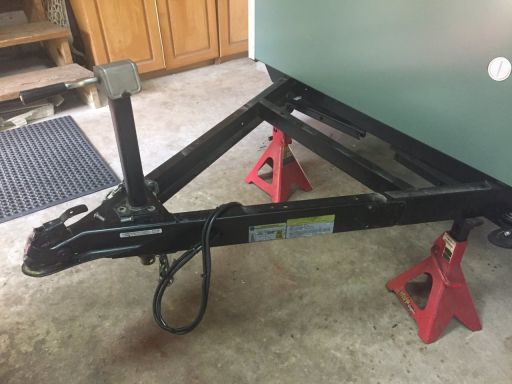
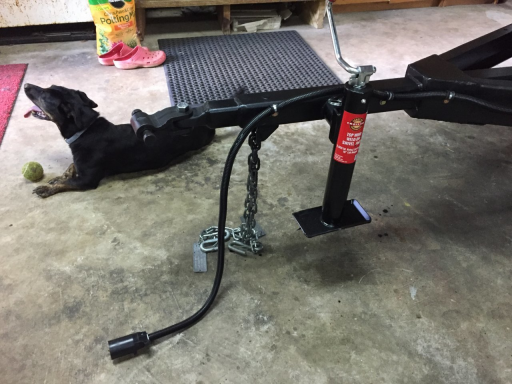
I stripped the tongue clean of the tool box, spare tire mount, cargo rack, tongue jack, and coupler

1572205406910.png

1572205442870.png
So a brief description here as to what went on here:
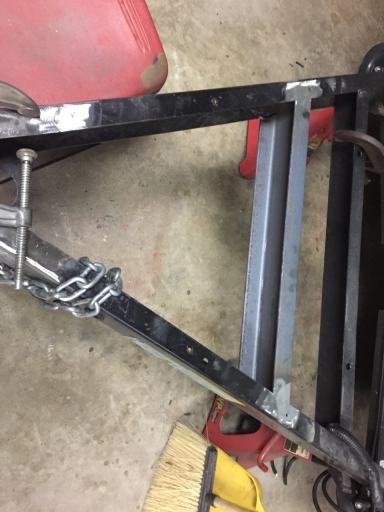
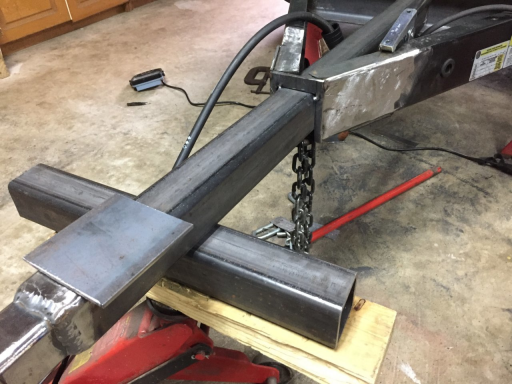
I added a new cross member with a piece of 4" channel
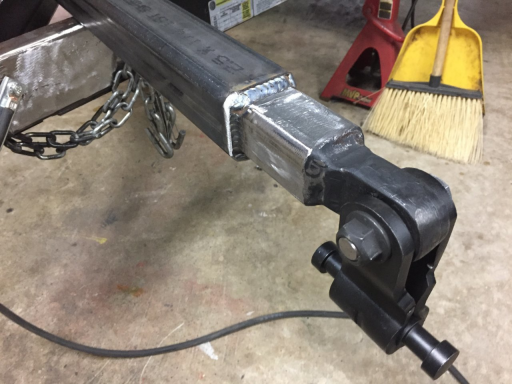
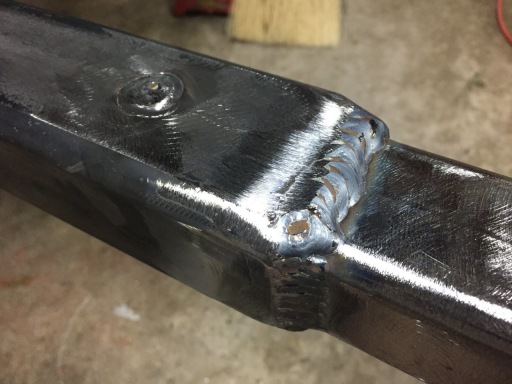
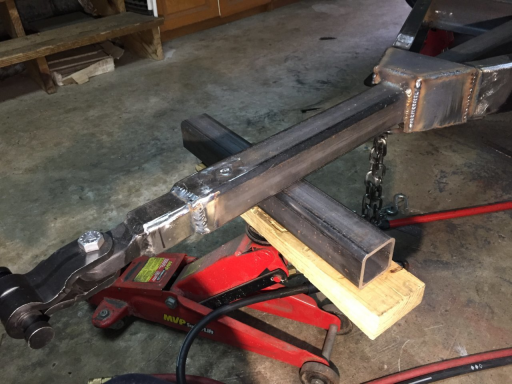
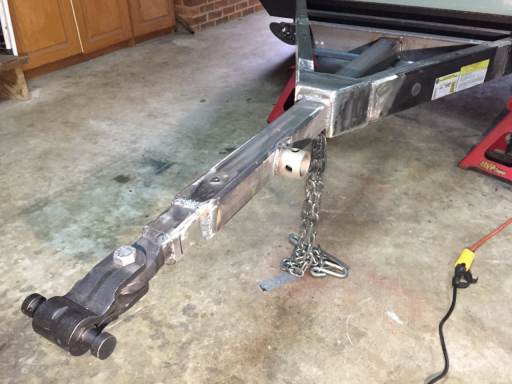
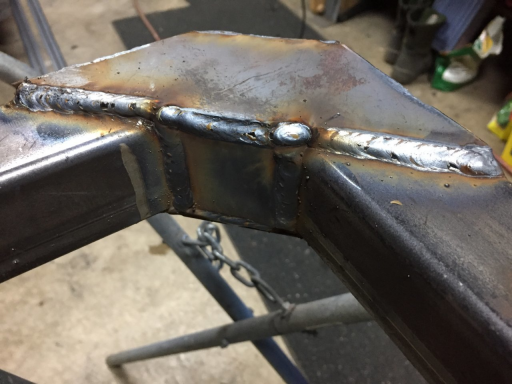
I bought the Lock n Roll part that would slip into a reciever and an axtension tube the right size for it to be slid into. It was then welded all the way around and plug welded

1572205741499.png

1572205774275.png

1572205808878.png

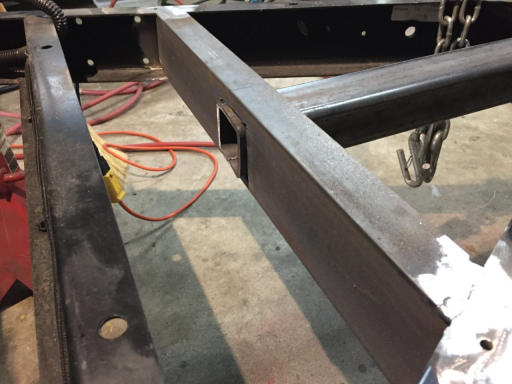
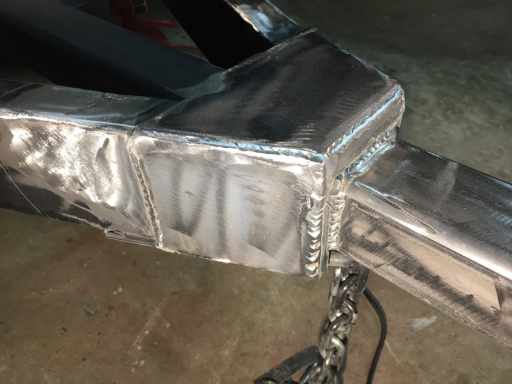
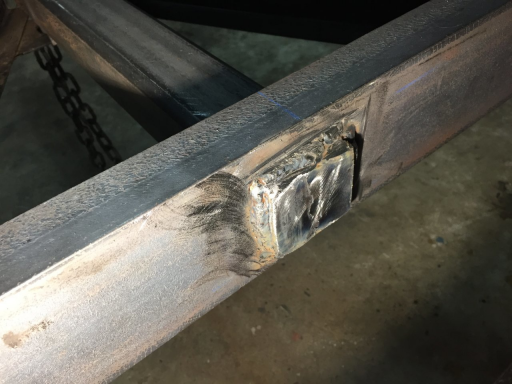
I cut a square hole in the cross member to slide the tube through where it was welded solid front and back and capped off as I welded everything else

1572205910697.png

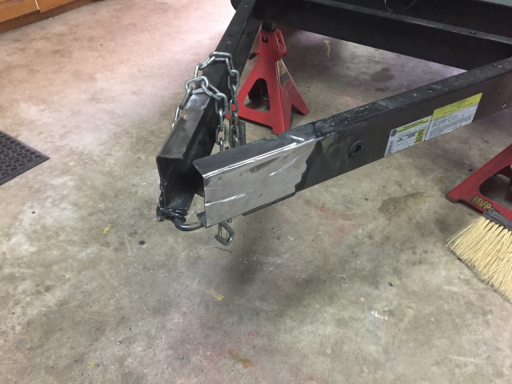
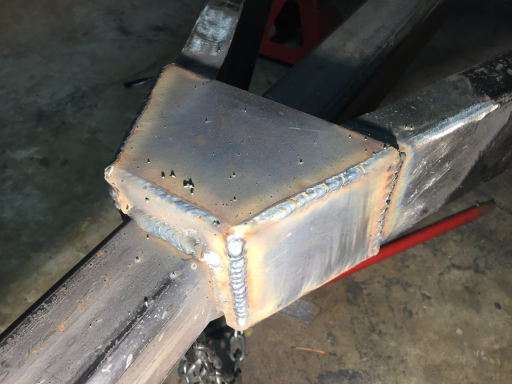
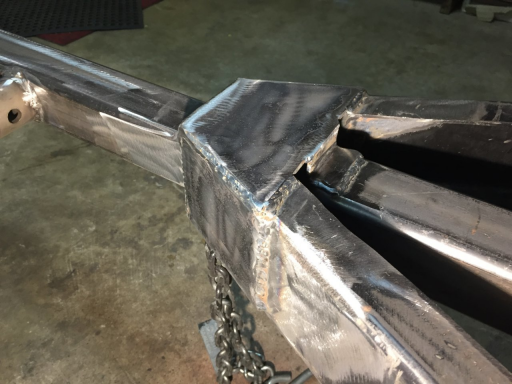
I centred up the tongue and fabbed plates and gussetts and welded up the end solid (this is when I welded the tongue through the cross member solid also). The end is capped off on the frame and everything is tied in together

1572206074096.png

1572206118178.png

1572206153074.png

1572206189716.png

1572206228362.png

1572206272006.png

I added a weld on ring for a tongue jack

1572206347696.png

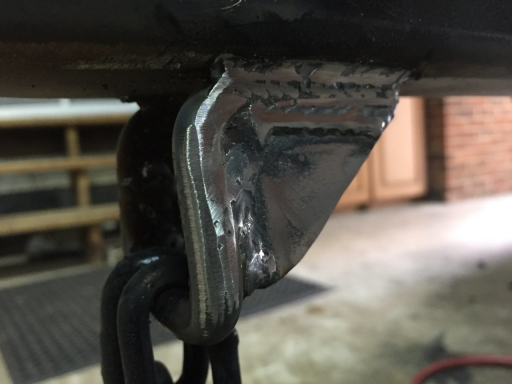
and fabbed a relocate for the safety chains

1572206419550.png

I then had to extend the trailer wires to match and painted. Phase 1 is complete

1572206503420.png
 
  • Like
Reactions: eagle_A40

Casper66

Rank IV
Launch Member

Enthusiast III

1,080
Culpeper, Va.
First Name
Christopher
Last Name
Carter
Member #

21273

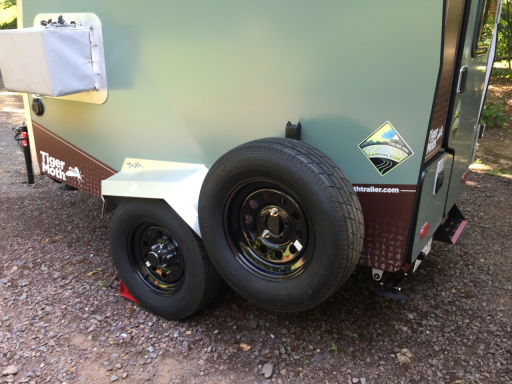
Spare Tire Relocate:
Well, with the spare removed from the tongue and all my future plans involving a good bit of added weight to the front i decided to relocate the spare to the rear of the camper. It had to go on the driver's side as the opening side hatch on the passenger side would interfere with it.
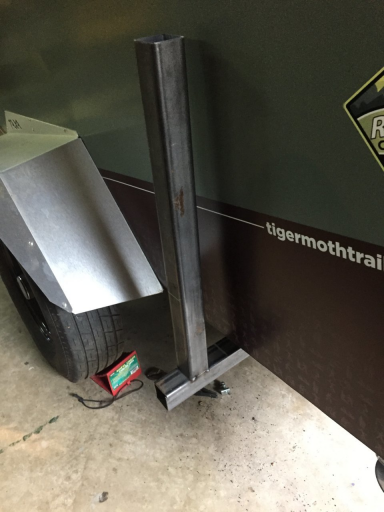
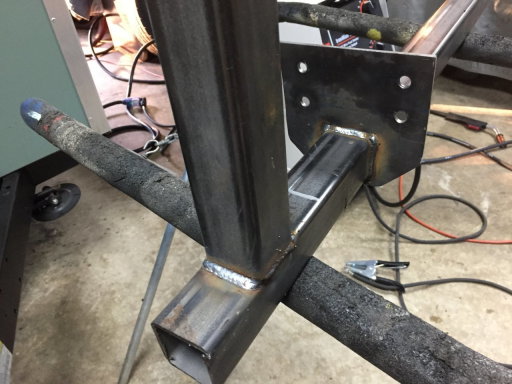
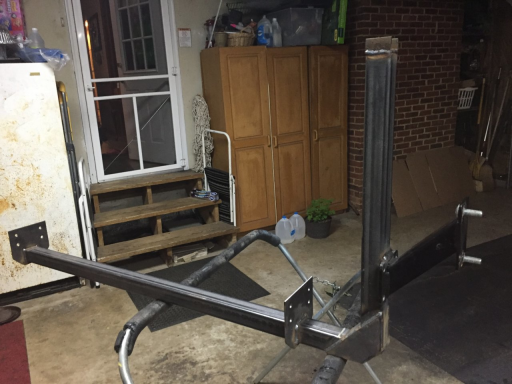
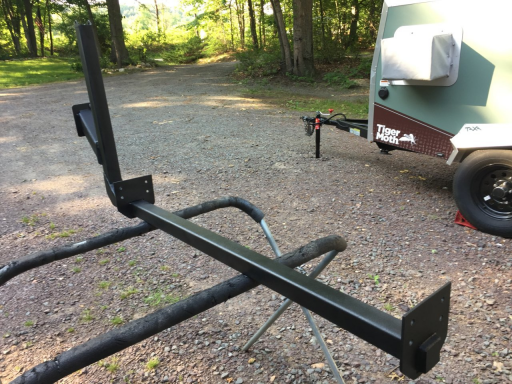
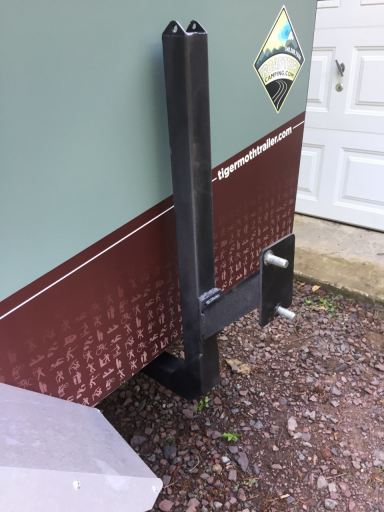
I cut and drilled some frame plates out of 3/16" steel and ran a 2" steel tube from frame to frame oand out the driver's side. I cut the plates so the tube actually goes through thm and could be welded solid. I then added an upward tube and repurposed the spare tire mount to th upward post. The frame plates were mounted with 3/8 hardware 4 bolts per side.

1572207020289.png


1572207060908.png
1572207105650.png


1572207188679.png

1572207222847.png

1572207255472.png

1572207290110.png

1572207317203.png

1572207351981.png
 

Casper66

Rank IV
Launch Member

Enthusiast III

1,080
Culpeper, Va.
First Name
Christopher
Last Name
Carter
Member #

21273

Table mounted to spare:
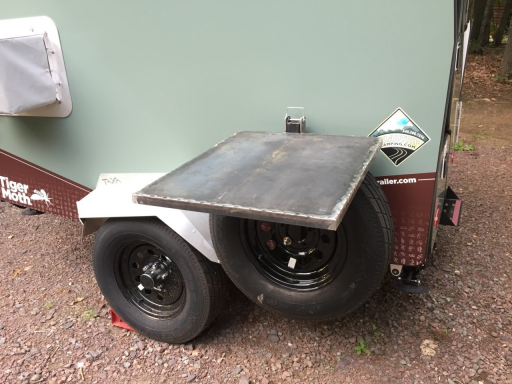
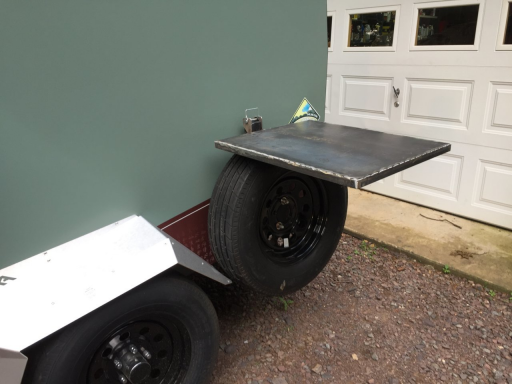
I had some materials left over so I had the bright idea (I only get 1 or 2 a year) and decided to fab up a table which would simply clip on the the spare tire mount. I kinda figured this out while doing the spare tire relocate and capper the top of the up post and added tabs to mount the table to.
Simple table made from 1" angle and 16ga sheet metal and it stores away in the next project

1572207650920.png

1572207677929.png
 
  • Like
Reactions: eagle_A40

Casper66

Rank IV
Launch Member

Enthusiast III

1,080
Culpeper, Va.
First Name
Christopher
Last Name
Carter
Member #

21273

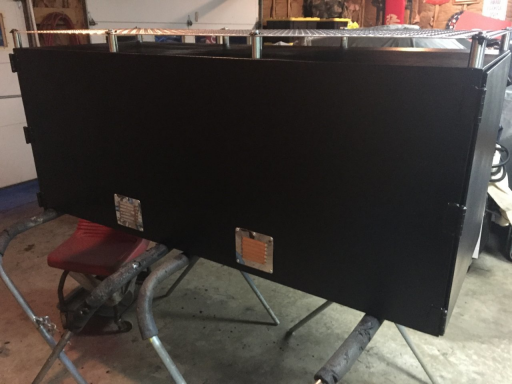
THE BOX:
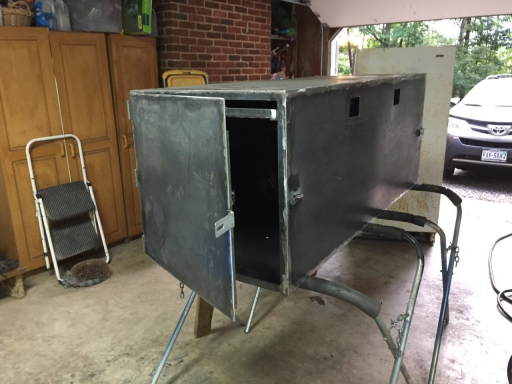
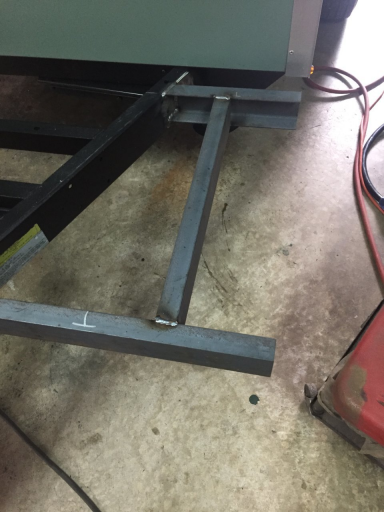
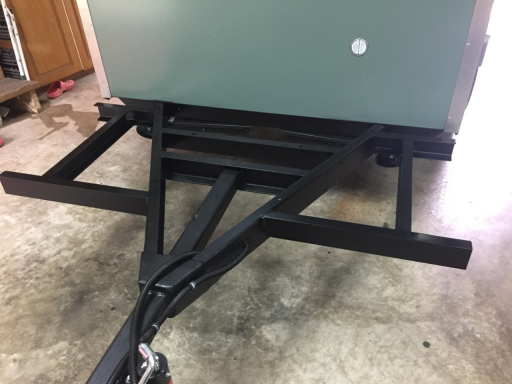
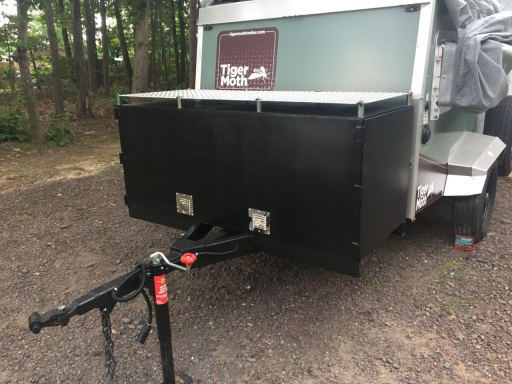
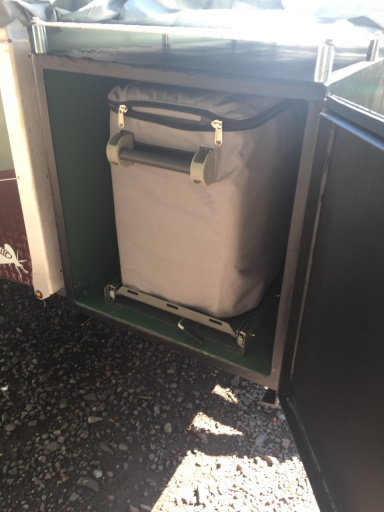
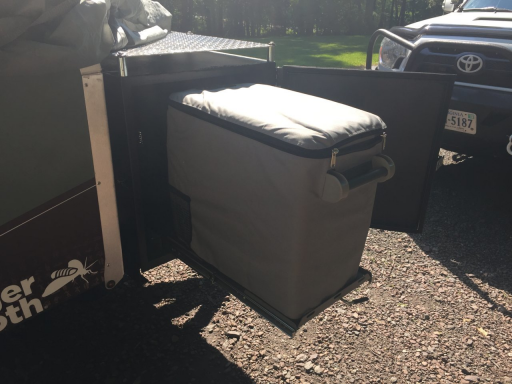
Well it all kinda came down to this. We took the camper out with the new fridge and it is so tiny we had nowhere to keep it so it had to sit outside and I just didn't like that. The plan became creating a house for the fridge so I managed to take a $650 purchase and turn it into about $1600 and 2 months worth of work. What a fun 2 months though. After researching the fridge's requirements for space and considering overheating issues I developed a plan for a steel 24"x24"x60" box to mount on the front of the camper hence the last few mods you have read. The space had to come from some where so I made space. Extending the tongue also provided an added ease of backing the short ass camper into spaces.
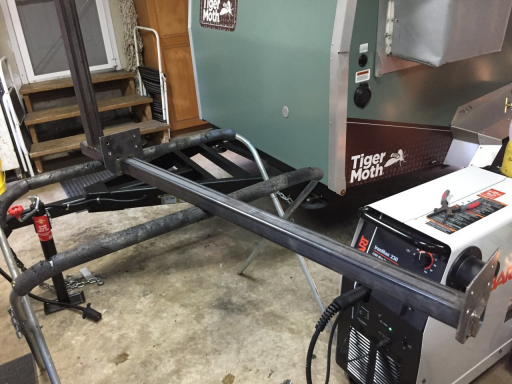
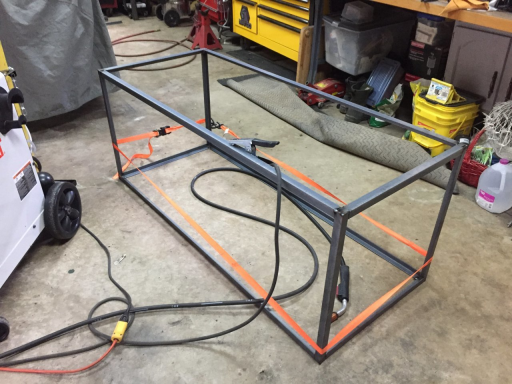
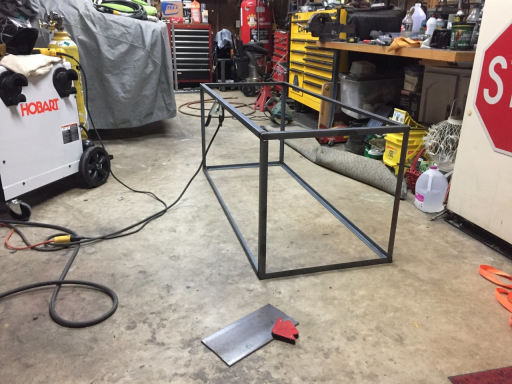
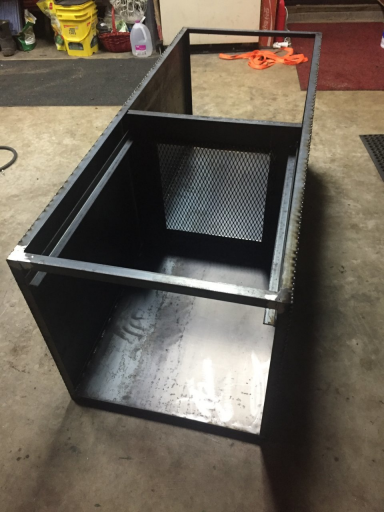
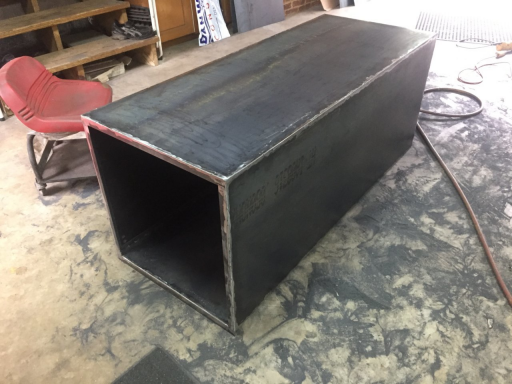
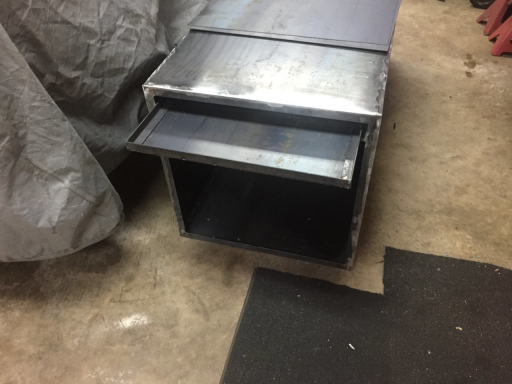
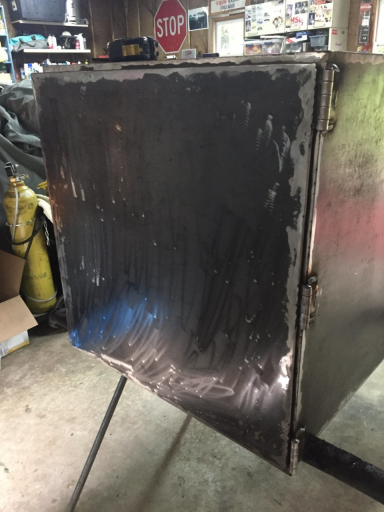
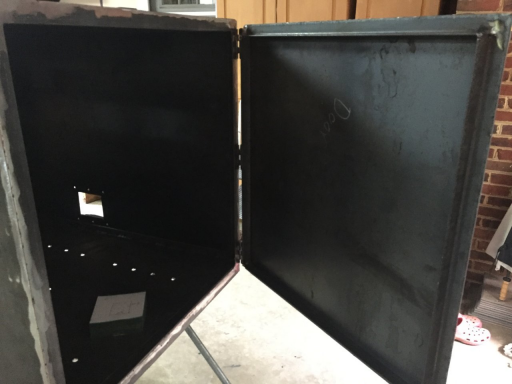
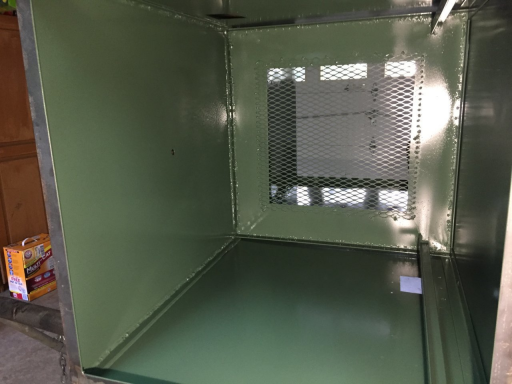
There is not a lot i can describe here as we go it was simply a lot of cutting, welding, and grinding. The box is completely framed with 1" angle and skinned with 16ga sheet metal. The doors are on the ends with the driver's side door being for storage and the passenger side being for the fridge. For added airflow I added a partition in the middle with an expanded metal center and 4 boat vents 2 at the bottom in the front and 2 at the top inn the rear which allow a cross flow of air and help keep things cool. Perhaps one of the brightest ideas during this was the addition of a piece of aluminum diamond plate to the top spaced off the box 1 1/2". This plate reflects sunlight and the air gap acts as an insulator to keep the box cool in direct sunlight. It really works also the diamond plate can be burning hot but inside the box stays cool. With the width of the box and the lack of width and taper of the frame I also had to extend the frame outward to match the box. Then everything except the shiny bits was coated in several coats of DIY bedliner.

1572208557559.png

1572208587219.png

The rails you see in the fore front of this pic are for storage of the shelf

1572208664059.png

1572208691863.png

1572208730025.png

1572208874712.png

1572208901113.png

1572208927861.png

1572208987718.png

1572209016245.png

1572209088884.png

1572209120553.png

1572209170074.png

1572209203026.png

1572209232024.png

And so it all comes together and i hope with all your patience reading through all ths that it makes sense
 

Casper66

Rank IV
Launch Member

Enthusiast III

1,080
Culpeper, Va.
First Name
Christopher
Last Name
Carter
Member #

21273

Electrical supply:
With the addition of the fridge and the fact I have to sleep wit a CPAP unit I didn't think the single battery was enough for when we are away from campgrounds and electricity. I spoke with my dealer and we outlined a system that would fullfill our needs. IDK crap about solar systems but being as i ahd done some work for him I got him to do this for me.
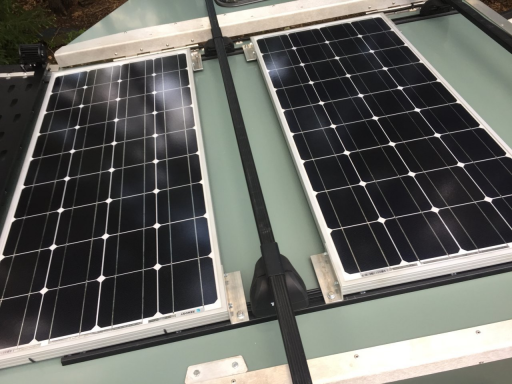
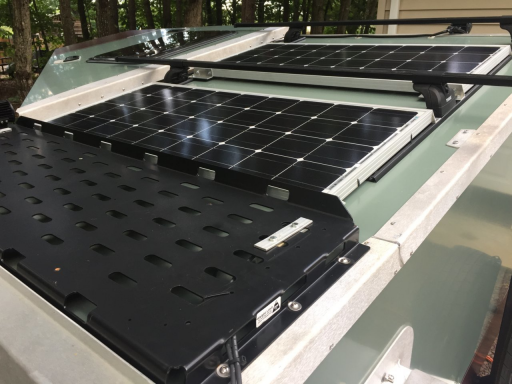
He installed a Rhino rack track system on the roof with polymer bushings to prevent the roof from buckling and still allowing minimal use of the Thule bars. To the racks were installed twin 100 watt solar panels

1572210402492.png

1572210440065.png

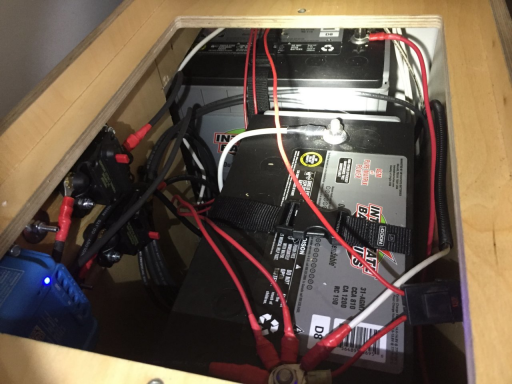
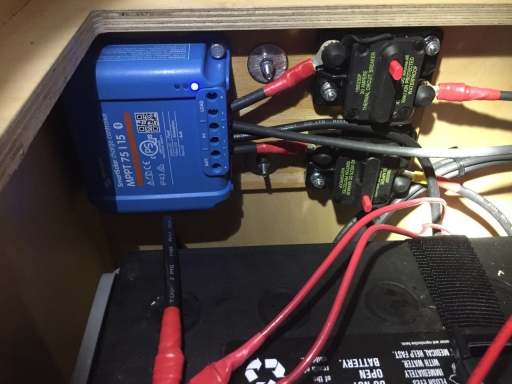
Inside he installed 2 Interstate group 31 AGM spiral core batteries with 2 breakers and a Vectron Energy bluetooth charge controller

1572210536634.png

1572210562085.png

Well laid out system and a nice clean install it has worked flawlessly so far
 

1Louder

Rank VI
Launch Member

Member II

4,187
AZ
First Name
Chris
Last Name
K
Member #

1437

Ham/GMRS Callsign
K1LDR
Man those are ugly as hell! But that's what makes them cool!!! I am not a fan of the AC unit being mounted like that. 1 strong unforeseen branch and whammo. If it ever fails I would probably switch to a portable unit. It isn't my trailer though!

Nice job with all of the modifications.
 
  • Like
Reactions: Casper66

Casper66

Rank IV
Launch Member

Enthusiast III

1,080
Culpeper, Va.
First Name
Christopher
Last Name
Carter
Member #

21273

Man those are ugly as hell! But that's what makes them cool!!! I am not a fan of the AC unit being mounted like that. 1 strong unforeseen branch and whammo. If it ever fails I would probably switch to a portable unit. It isn't my trailer though!

Nice job with all of the modifications.
I am not particularly fond of the AC placement either. I have to be very concious when we are on trails of branches. I bought some steel rod though and plan on fabbing a brush guard for it that shouldn't be too difficult and I can keep it fairly tight. I don't really understand why they didn't just go through the front. They used an existing window opening.
Yes it is ugly kinda one of those it's so ugly its cute kinda things. Function over form though it does what we need
 

1Louder

Rank VI
Launch Member

Member II

4,187
AZ
First Name
Chris
Last Name
K
Member #

1437

Ham/GMRS Callsign
K1LDR
I am not particularly fond of the AC placement either. I have to be very concious when we are on trails of branches. I bought some steel rod though and plan on fabbing a brush guard for it that shouldn't be too difficult and I can keep it fairly tight. I don't really understand why they didn't just go through the front. They used an existing window opening.
Yes it is ugly kinda one of those it's so ugly its cute kinda things. Function over form though it does what we need
I have had a Smart car (Maybe ugly), Honda Element (Certainly kinda Ugly), and my FJ Cruiser (Kinda funny lookin) Nothing wrong with that. My next rig will be a Forerunner unless something weird comes out when I'm ready. Good idea on the brush guards.

Solar looks good. If you keep the trailer in the shade just add a portable panel to keep everything charged up. In full sun what you have should be fine though.
 
  • Like
Reactions: Casper66

Casper66

Rank IV
Launch Member

Enthusiast III

1,080
Culpeper, Va.
First Name
Christopher
Last Name
Carter
Member #

21273

I have had a Smart car (Maybe ugly), Honda Element (Certainly kinda Ugly), and my FJ Cruiser (Kinda funny lookin) Nothing wrong with that. My next rig will be a Forerunner unless something weird comes out when I'm ready. Good idea on the brush guards.

Solar looks good. If you keep the trailer in the shade just add a portable panel to keep everything charged up. In full sun what you have should be fine though.
It came prewired for Zamp solar panels. This was all figured in to the scenario. I will get a set of suitcase manels with a built in charge controller and they can just be a plug and play scenario. Because yes you can't have Sun all the time. It is in the plan
 
  • Like
Reactions: 1Louder

Casper66

Rank IV
Launch Member

Enthusiast III

1,080
Culpeper, Va.
First Name
Christopher
Last Name
Carter
Member #

21273

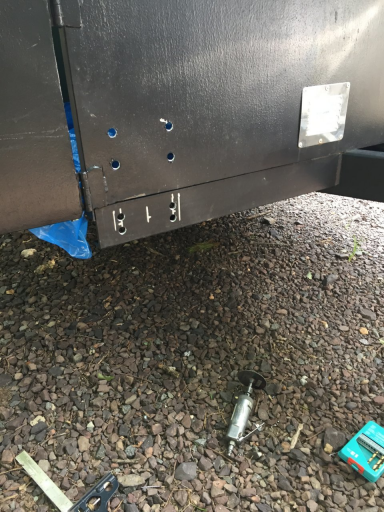
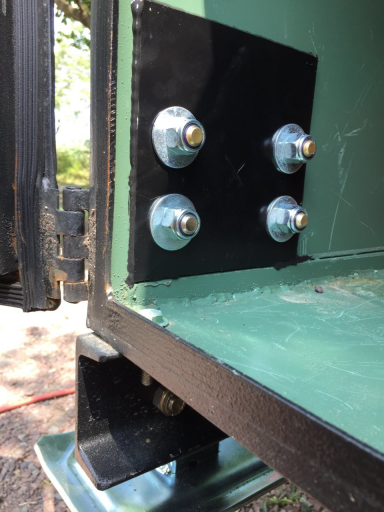
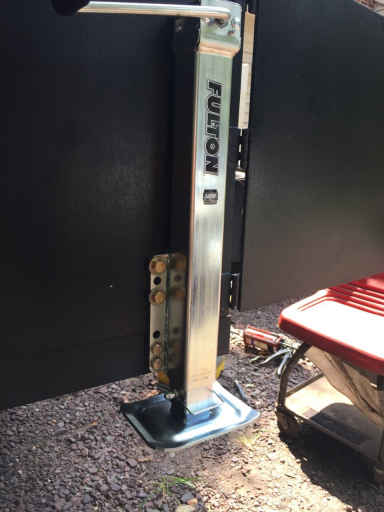
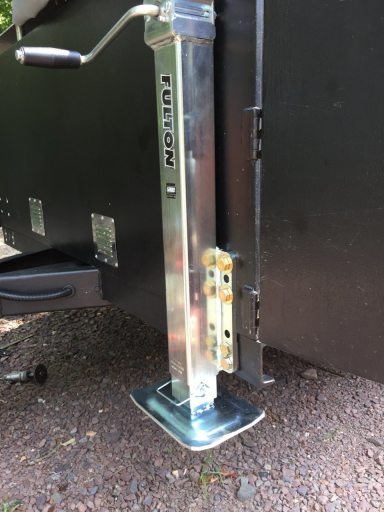
Front Jacks:
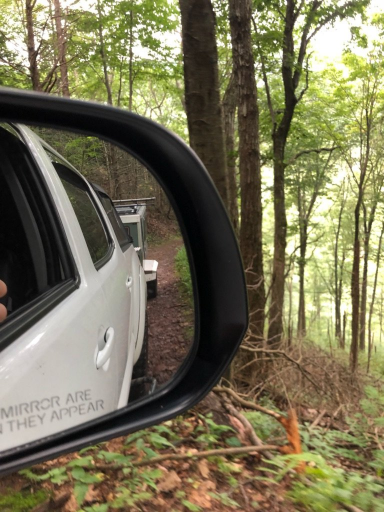
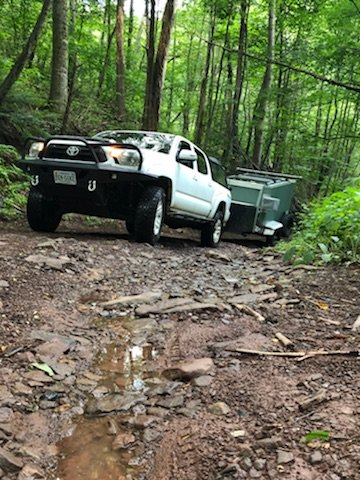
So we went with friends and took the camper up into the mountains on the Jeep trails. We found some weaknesses right off the bat. When we got to the top and got out I found I had ripped off one of my front stabalizer jacks. So more clearance and heavier duty jacks were put on the work schedule.

1572219503271.png

1572219544356.png

First up was the front jacks

1572219763611.png

1572219794025.png

Fulton 5000lb jacks

1572219844738.png

1572219880968.png
 

Casper66

Rank IV
Launch Member

Enthusiast III

1,080
Culpeper, Va.
First Name
Christopher
Last Name
Carter
Member #

21273

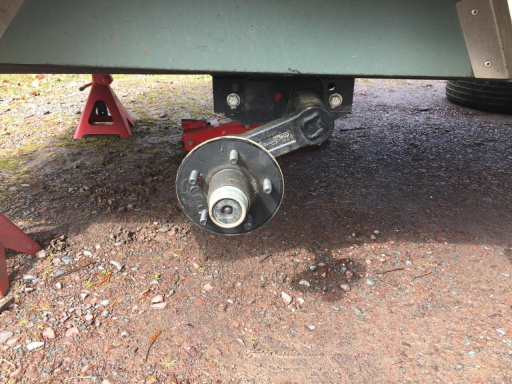
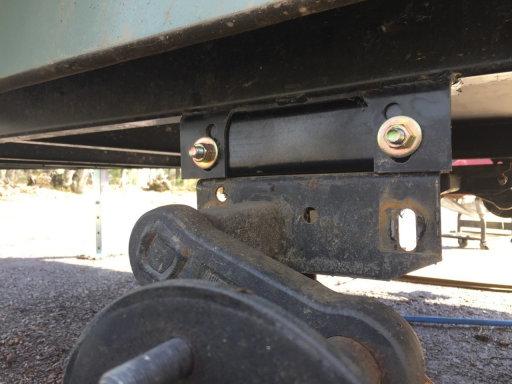
Dexter axel lift:
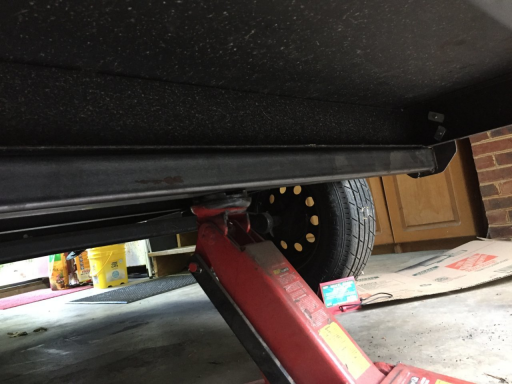
So now on too more clearance. I got intouch with the dealer and ordered a 2.6" lift rom Dexter he actually had it in stock so I went and picked it up. Super simple install.

1572220233811.png

1572220276085.png