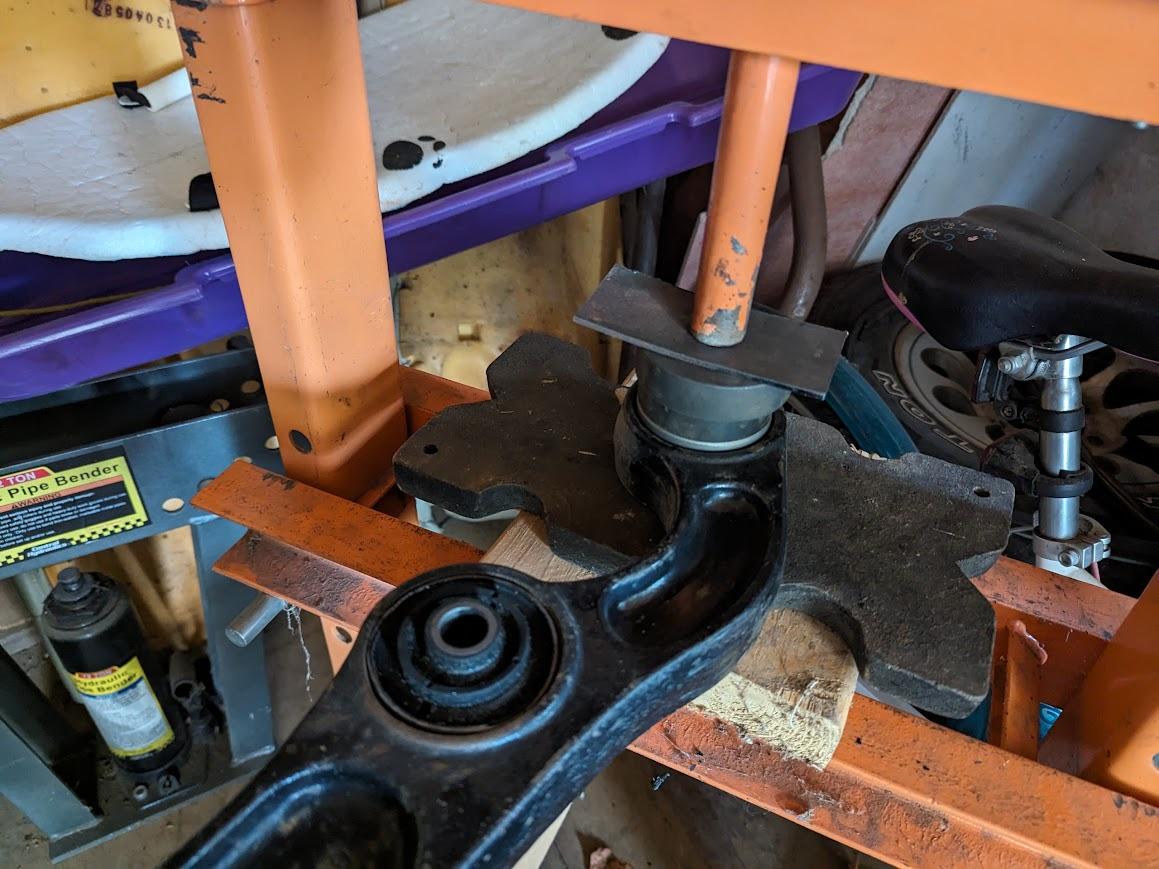
Build/activities thread: 1989 Raider, 2010 Sequoia, and my other stuff.

  • HTML tutorial

irish44j

Rank II

Enthusiast III

443
Fairfax County, VA, USA
First Name
Joshua
Last Name
Hickey
In my never-ending search for whatever is making the irregular BANG / POP sound when flexing, time to take some other stuff apart. I've replaced about half of the front end components to no avail so far. I know it's not swaybars/endlinks since it's made the noise with them disconnected. So on to the only things I haven't replaced/changed during this search: The upper balljoints and the lower control arm bushings. I managed to reproduce the noise a cople times using a jack, but cannot pinpoint WHERE its coming from, other than the front right vicinity.

So took everything apart on the right side, where I'm 95% sure the noise is coming from (5% somewhere else on the right side).


Also gave me a chance to make sure the front CV isn't binding or anything. I have a new spare, but the one on there felt great/smooth so not going to replace it. But the upper balljoint was super-sloppy and really gritty, so replaced it with a new one. I'll definitely have to do the other side as well when I have time.
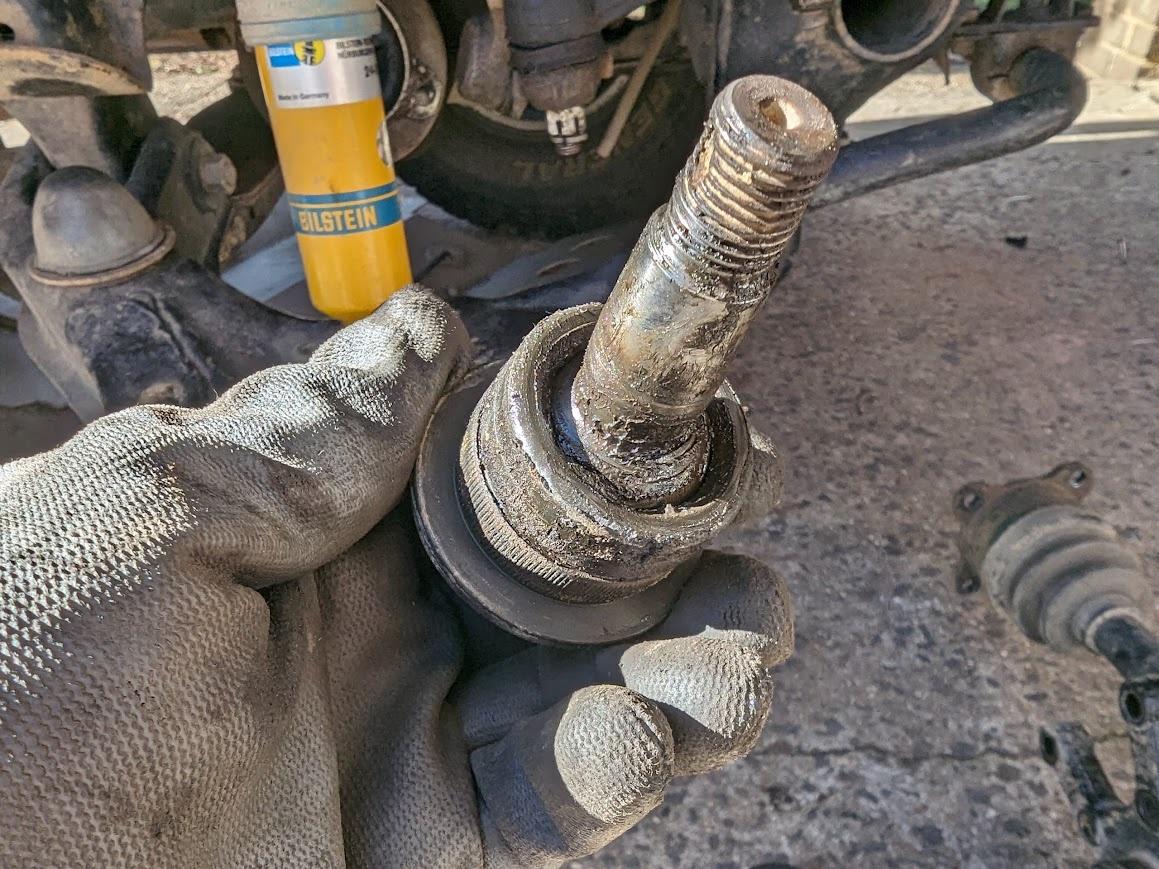


The lower bushings look perfect, so didn't replace them for the time being since it's a hassle to press them out.

Its hard to test stuff like this, but I tried out some curbs and other suburban obstacles and no noise so far, so fingers crossed
 

North American Sojourner

Rank VI
Member

Inventor I

3,886
Mid-Missouri, MO, USA
First Name
Dave
Last Name
Zimmer
Member #

30139

Service Branch
USN (ret)
In my never-ending search for whatever is making the irregular BANG / POP sound when flexing, time to take some other stuff apart. I've replaced about half of the front end components to no avail so far. I know it's not swaybars/endlinks since it's made the noise with them disconnected. So on to the only things I haven't replaced/changed during this search: The upper balljoints and the lower control arm bushings. I managed to reproduce the noise a cople times using a jack, but cannot pinpoint WHERE its coming from, other than the front right vicinity.

So took everything apart on the right side, where I'm 95% sure the noise is coming from (5% somewhere else on the right side).


Also gave me a chance to make sure the front CV isn't binding or anything. I have a new spare, but the one on there felt great/smooth so not going to replace it. But the upper balljoint was super-sloppy and really gritty, so replaced it with a new one. I'll definitely have to do the other side as well when I have time.


The lower bushings look perfect, so didn't replace them for the time being since it's a hassle to press them out.

Its hard to test stuff like this, but I tried out some curbs and other suburban obstacles and no noise so far, so fingers crossed
"Ball joint looks good from my house"
LOL
Nice work Sir.
Zim
 

irish44j

Rank II

Enthusiast III

443
Fairfax County, VA, USA
First Name
Joshua
Last Name
Hickey
"Ball joint looks good from my house"
LOL
Nice work Sir.
Zim
When I first got these balljoints I was a bit dubious about them - they didn't have a traditional sealed boot design, but rather this thick rubber "cap" of sorts that was strange. However, not knowing 80s Mitsubishis I thought maybe that was just "how it was designed." But clearly they allowed dirt and grime to get in there, and the replacements have a traditional boot. Honestly, can't for the life of me figure out who thought the old one was a usable design, especially for an offroad vehicle. SMH.
 

irish44j

Rank II

Enthusiast III

443
Fairfax County, VA, USA
First Name
Joshua
Last Name
Hickey
Oh a couple other little things:

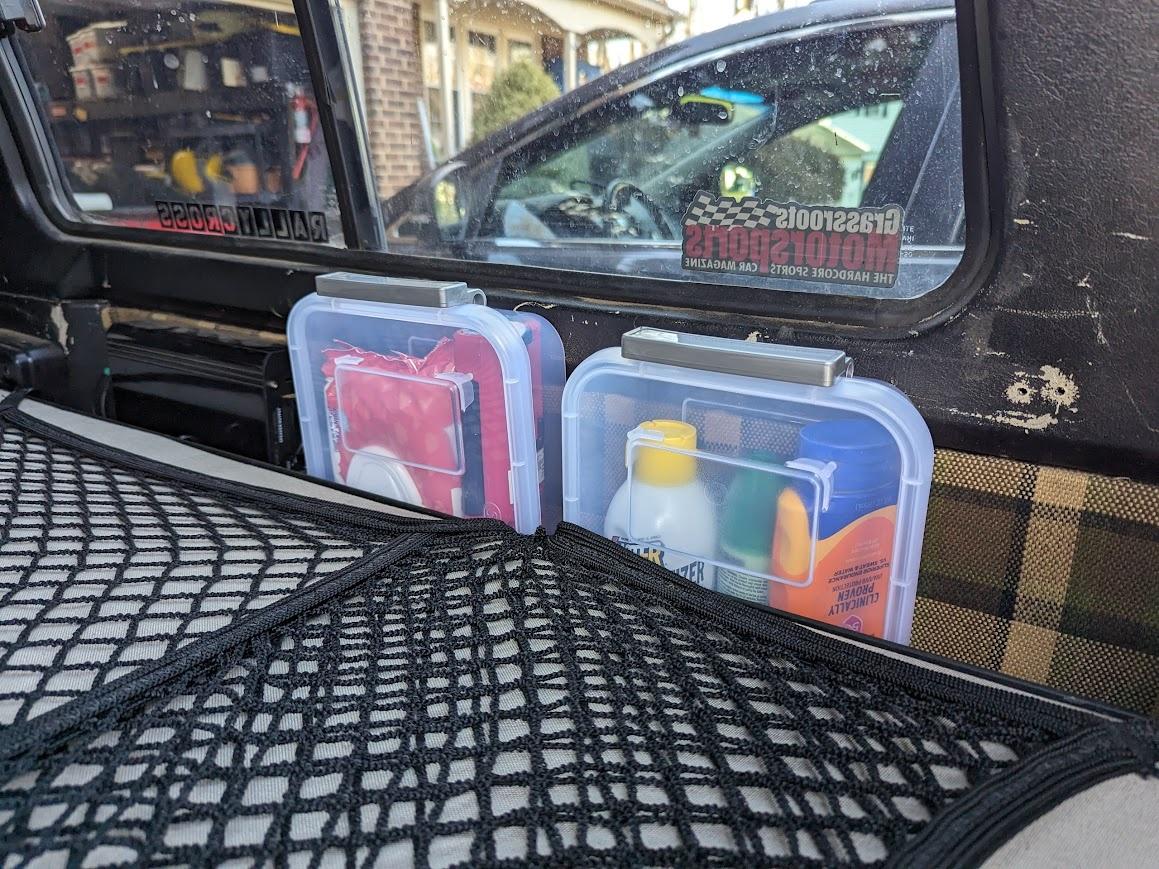
1. some airtight little cases to put things like bug spray, sunblock, wipes, and other little things that I want handy at camp. These fit snugly between the platform and the inner trim. I may add a third one for general toiletries for camp.


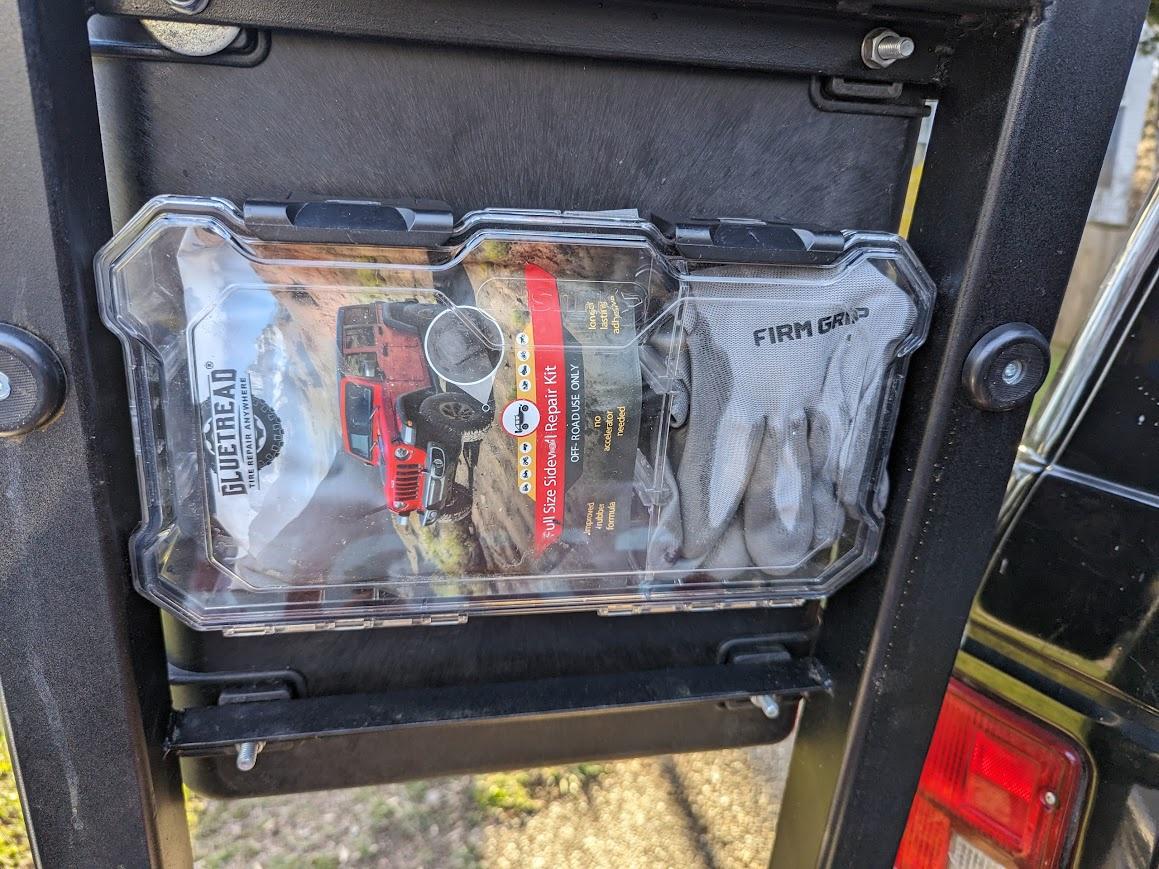
2. a little watertight Husky box hidden behind the fold-down table on the swing-out, just bolted to the backside of the gear box. Just someplace to stash some gloves for quick access and also my tire patch/plug kit. May be useful to put cooking utensils in here, IDK. Just something to fill the space for now (I had to break off the side latches since they wouldn't fit, but the two left close it tight just fine).


irish44j

Rank II

Enthusiast III

443
Fairfax County, VA, USA
First Name
Joshua
Last Name
Hickey
Finishing up the updated interior sleeping arrangement. For those who have been following this a while, the old setup required removal of the front passenger seat, and then I had a 3-foot board with legs that bolted to the seat base to make a flat surface. While that worked fine, it required leaving the passenger seat outside the car - not really ideal for bad weather.....and bad weather is the only reason I'd be sleeping inside the rig rather than in a tent in the first place, really.

So after thinking about it, here's the solution:

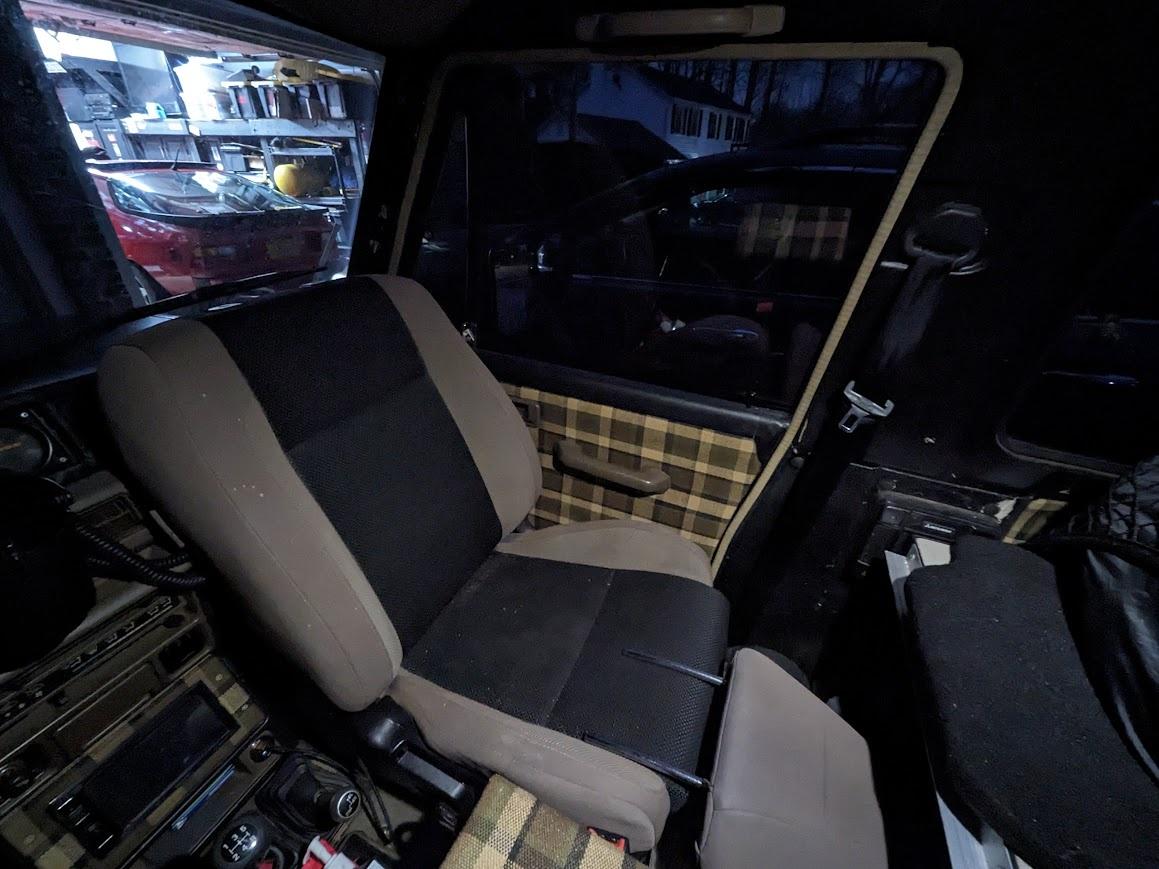
1. The seat unbolts from the base and has the same mounting points front and rear....so you can literally unbolt the seat, rotate it to face backwards, and then bolt it back on. With the headrest off, it can go right up against the dash, facing rear:


2. Added a "lip" at the front end of the rear platform to support the forward platform


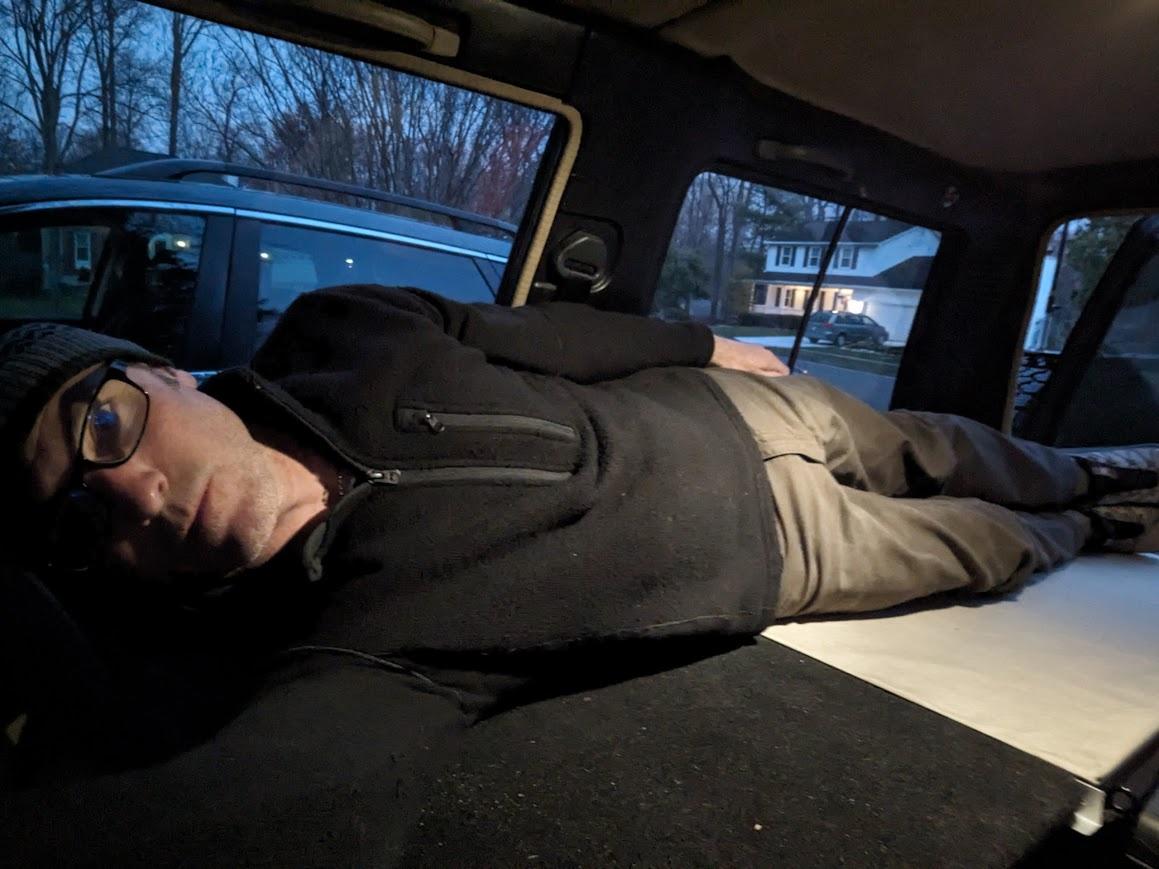
3. took the old board I used, stripped thr carpet, and cut it to a "custom fit" and then put the carpet back on. The rear end sits on that lip, and the front end is supported by the seat itself with something in between to the right height. The headrest is pretty much the right height, actually, so that's convenient (plus a jacket I bundled up in there). Or my first aid box is about right as well. Either way, the forward platform is held in place side to side by the seat wings and the lip n the rear. In any case, it's pretty solid in there.


Put together


It gives me about 6'3" from the seatback to the rear door. Luckily, I"m only 6'0" lol


And when not in use it just stacks on the rear platform, under whatever other gear I have strapped down there.


So all in all, that was pretty easy and should work pretty well. Honestly, the passenger seat backwards is kinda convenient in general - if I'm not planning to carry any passengers on the road I may just travel with it like that lol. In any case, it takes about 30 seconds to unbolt it with a small impact (or any 14mm wrench) and turn it around so it's a pretty easy process overall.

--

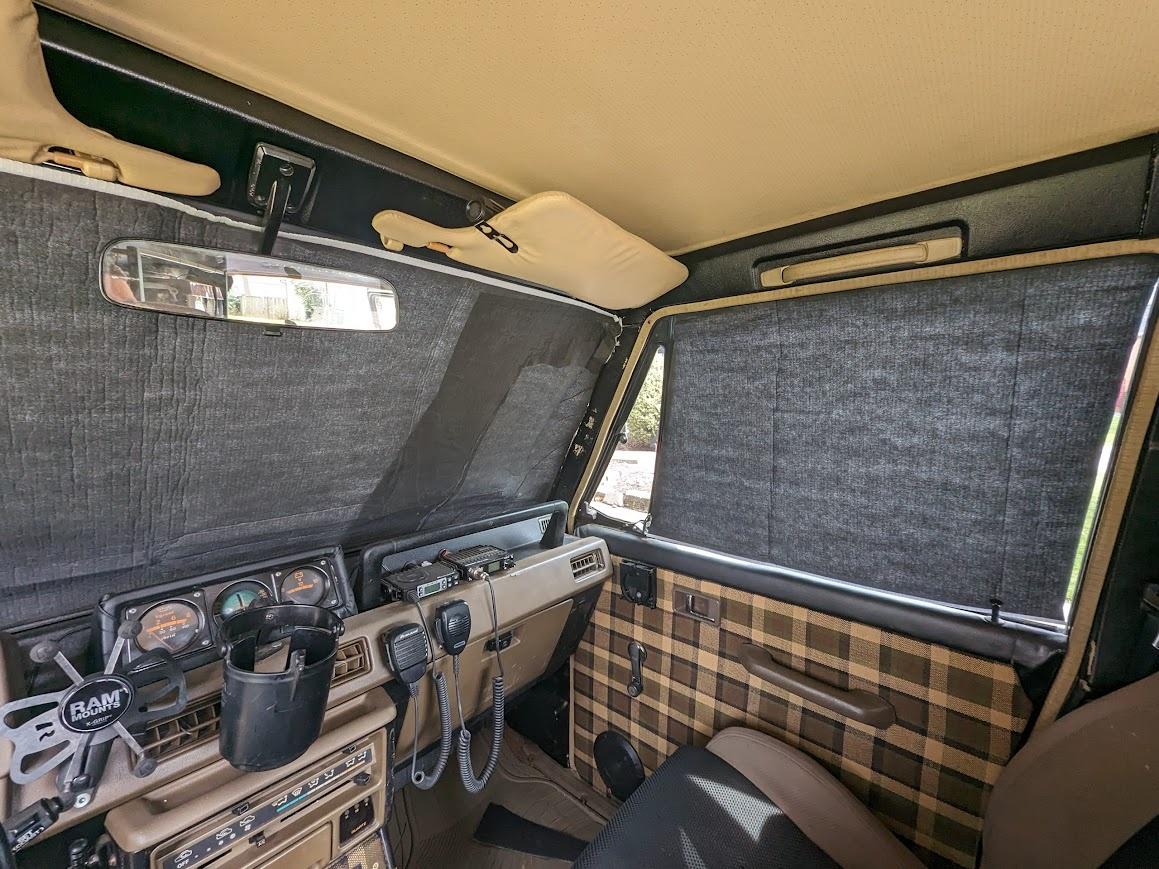
Next up: design some curtains or window coverings since the Raider has a lot of glass and I like a bit of privacy.
 

MrWilsonWJ

Rank V
Launch Member

Member III

1,691
Kennewick, WA
First Name
Dustin
Last Name
Wilson
Member #

23384

When I did window covers for my Jeep I used that foil looking bubble wrap stuff they make windshield shades out of. You can buy pretty big pieces off amazon then cut to fit each window, adds a little insulation and is pretty much a black out curtain. When I cut the shape I left little tabs ever so often I could bend over and use stick on velcro to attach to the trim around the window.

 
  • Like
Reactions: Dougnuts

MrWilsonWJ

Rank V
Launch Member

Member III

1,691
Kennewick, WA
First Name
Dustin
Last Name
Wilson
Member #

23384

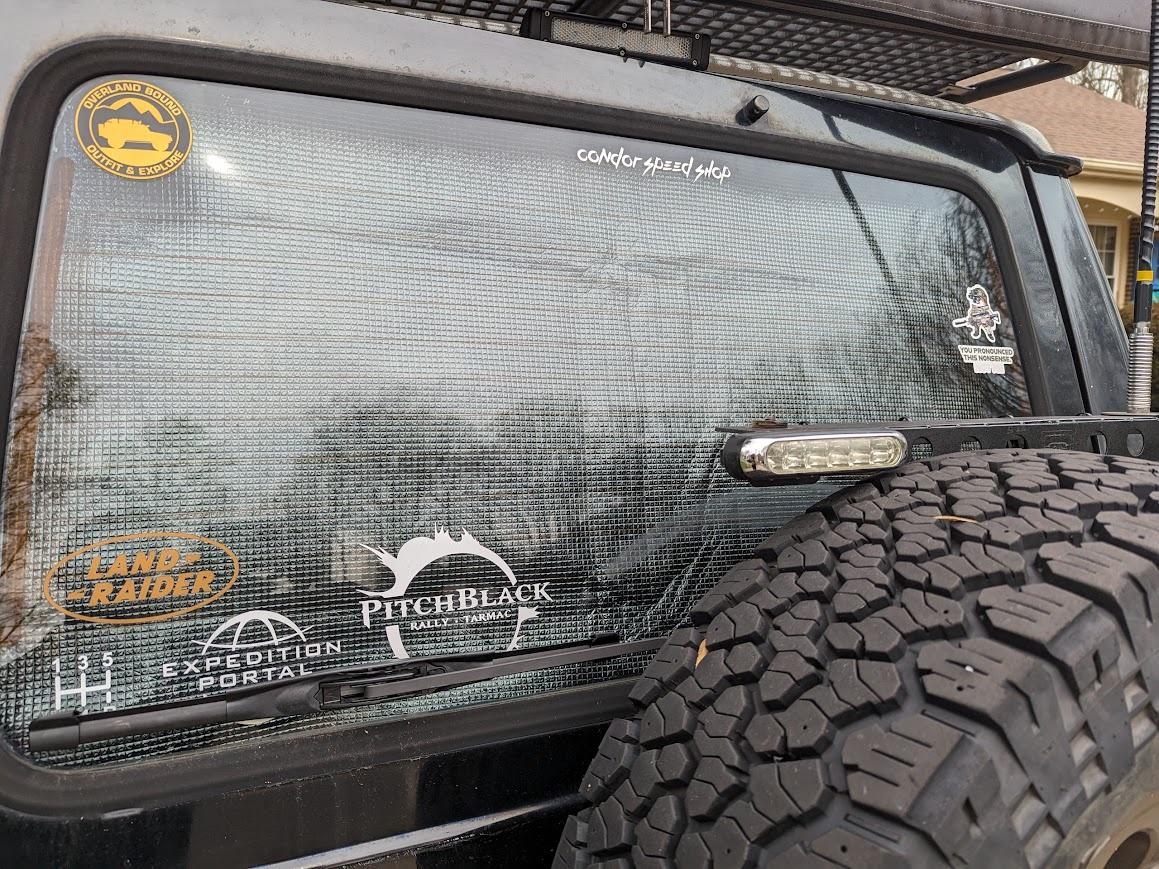
Looks like my link didn't work, but if you search RV window insulation on Amazon you should find it. I don't have any picture from the inside of my Jeep but here's what it looks like from the outside.

BPL1.jpg
 
  • Like
Reactions: irish44j

irish44j

Rank II

Enthusiast III

443
Fairfax County, VA, USA
First Name
Joshua
Last Name
Hickey
Thanks - definitely thinking of that as a good solution, especially in the front windows/windshield where stowing curtains is problematic. I may do some roll-ups in the back, we'll see :).
 

irish44j

Rank II

Enthusiast III

443
Fairfax County, VA, USA
First Name
Joshua
Last Name
Hickey
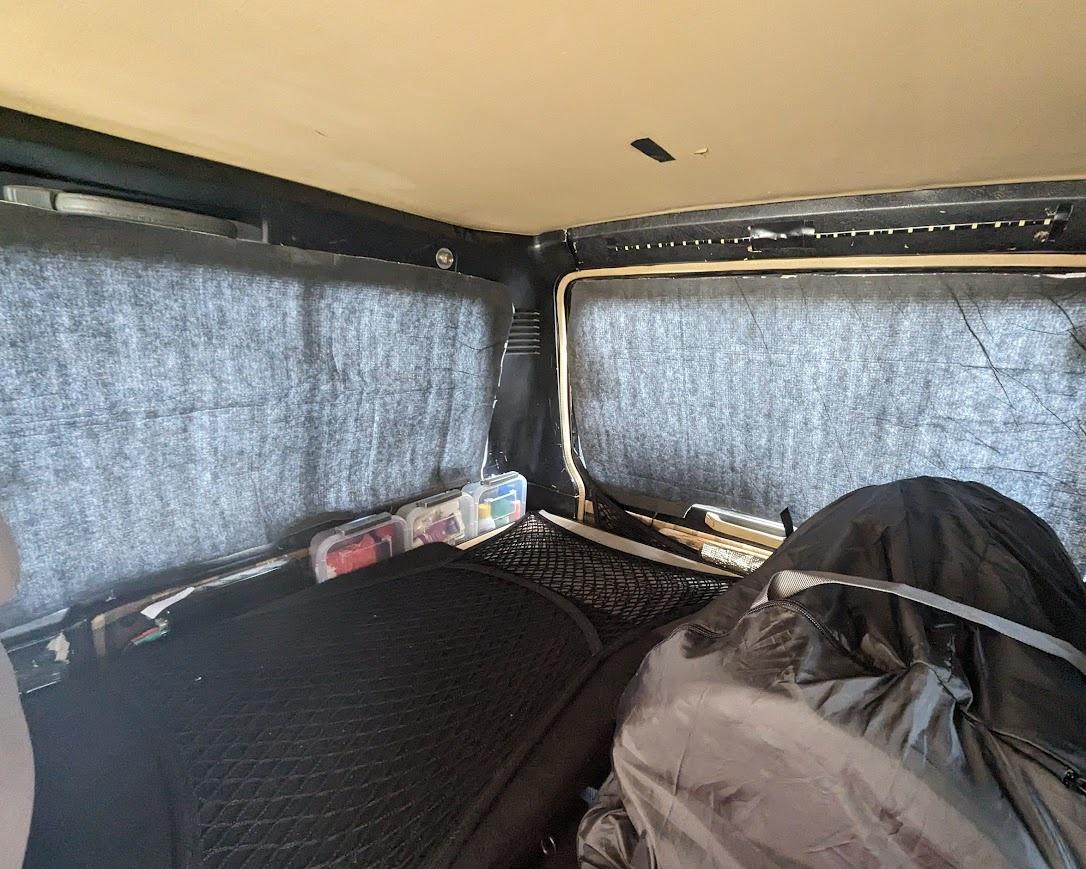
Grabbed some of that stuff off Amazon and did some cutting velcro application this morning. Should work just fine. This stuff is kinda cheapo and some of the black backing came off, but it's good enough for my purposes since I don't really sleep during daylight anyhow...


And found an old car grocery net that works well to store them when not in use


---

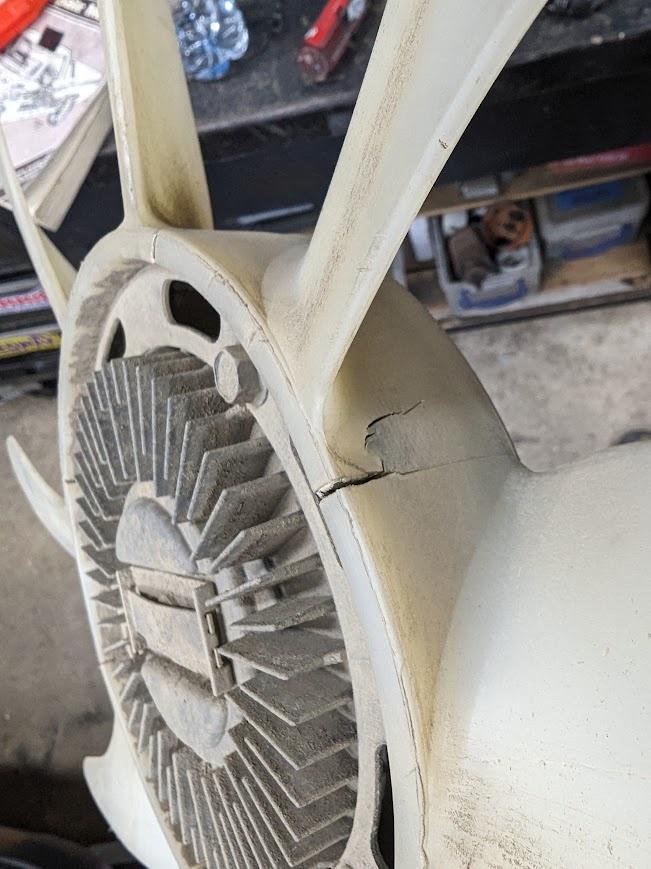
noticed a while back that my crank fan was cracking badly, like between every blade.


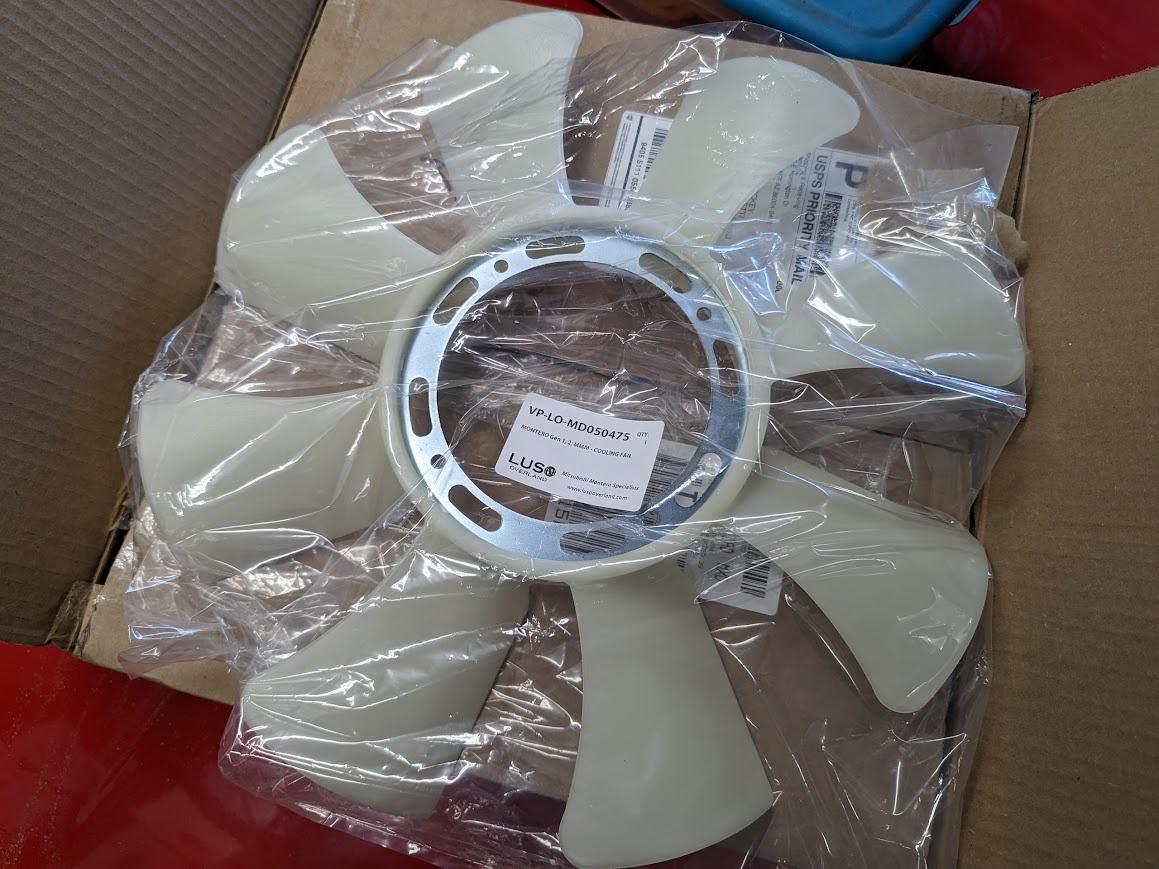
Not something I want to break on a trip or on trail. so spent a few bucks and got a new one from Luso. Easy install, no pics because you can't really see it much with the shroud on lol


--

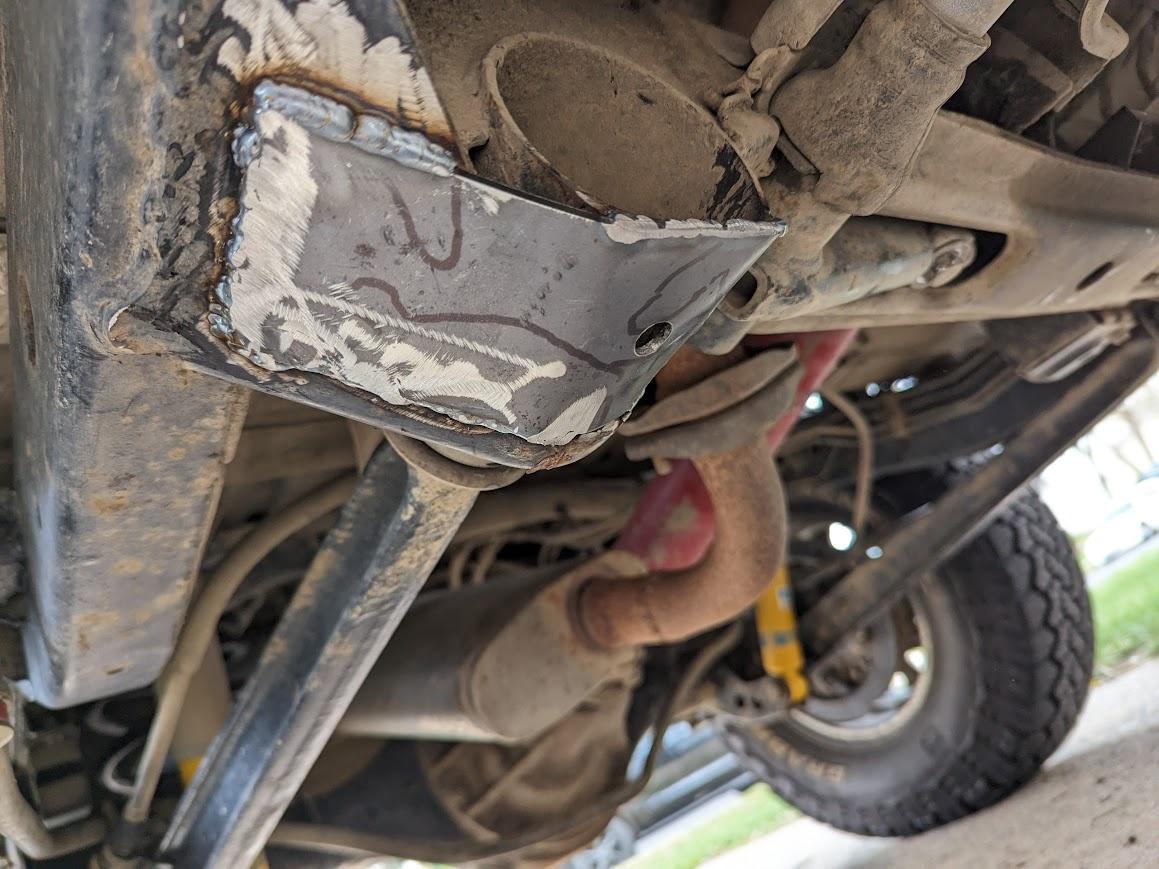
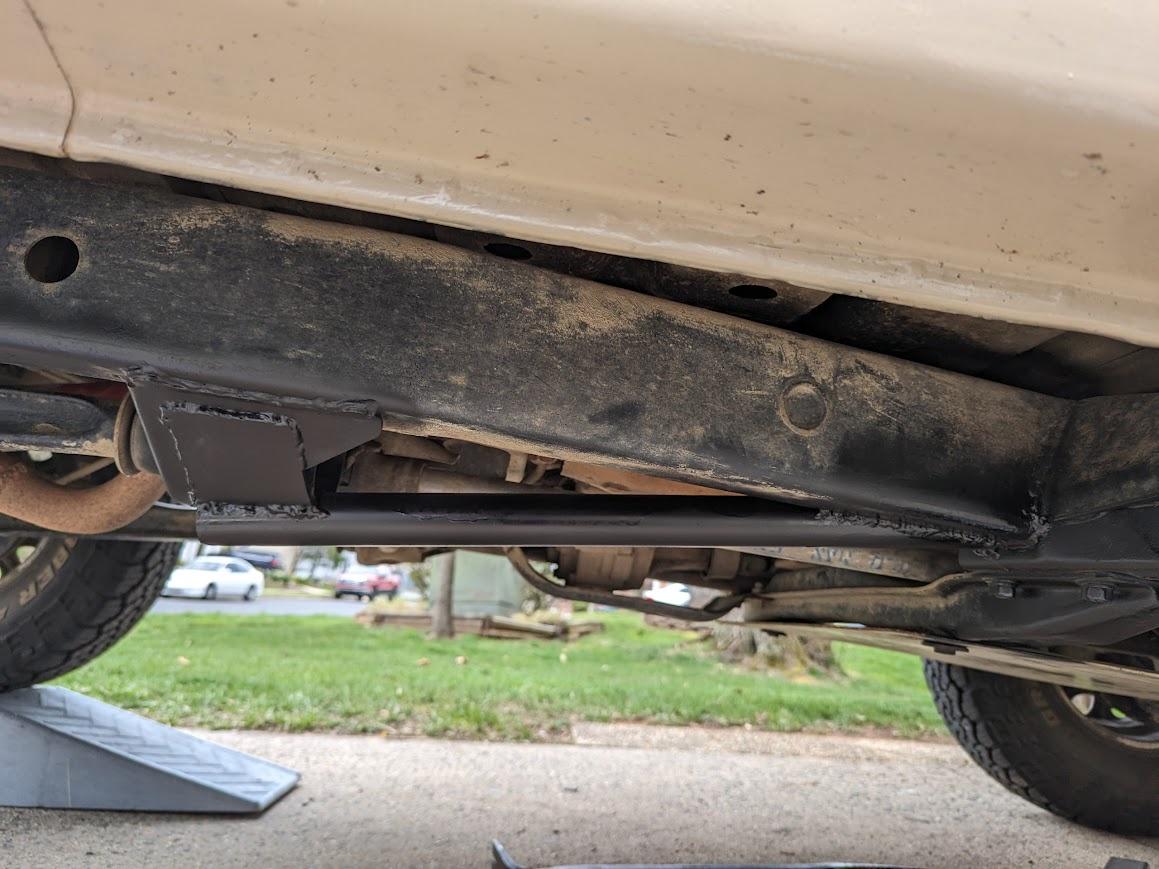
So one of my main complaints in rocky terrain is that the front mounts for the rear trailing arms, which originally had a round profile, get caught on rocks and basically bashed....


Figured I'd make some "sliders" with some DOM tube scraps I had sitting around. First thing was to cut/flatten out the bottom of the original shroud piece there using a big crowbar. Then got some 3/16" plate and plated it


Then some sloppy notching and cutting and welded the DOM from the mount to the frame forward of it. It's not all that pretty, but should do a good job keeping that piece from getting hung up on rocks while still allowing access to the large forward bolt. IDK, we'll see how it works out....worst case I get the angle cutter out and cut it off. Gotta do the other side at some point.


BFR812

Rank III
Member

Enthusiast II

603
Reno, Washoe County, Nevada, United States
First Name
Russel
Last Name
Parker
Member #

47115

Grabbed some of that stuff off Amazon and did some cutting velcro application this morning. Should work just fine. This stuff is kinda cheapo and some of the black backing came off, but it's good enough for my purposes since I don't really sleep during daylight anyhow...


And found an old car grocery net that works well to store them when not in use


---

noticed a while back that my crank fan was cracking badly, like between every blade.


Not something I want to break on a trip or on trail. so spent a few bucks and got a new one from Luso. Easy install, no pics because you can't really see it much with the shroud on lol


--

So one of my main complaints in rocky terrain is that the front mounts for the rear trailing arms, which originally had a round profile, get caught on rocks and basically bashed....


Figured I'd make some "sliders" with some DOM tube scraps I had sitting around. First thing was to cut/flatten out the bottom of the original shroud piece there using a big crowbar. Then got some 3/16" plate and plated it


Then some sloppy notching and cutting and welded the DOM from the mount to the frame forward of it. It's not all that pretty, but should do a good job keeping that piece from getting hung up on rocks while still allowing access to the large forward bolt. IDK, we'll see how it works out....worst case I get the angle cutter out and cut it off. Gotta do the other side at some point.

Like your post, and would like to know what material you used to make your curtains.
 

irish44j

Rank II

Enthusiast III

443
Fairfax County, VA, USA
First Name
Joshua
Last Name
Hickey
Like your post, and would like to know what material you used to make your curtains.
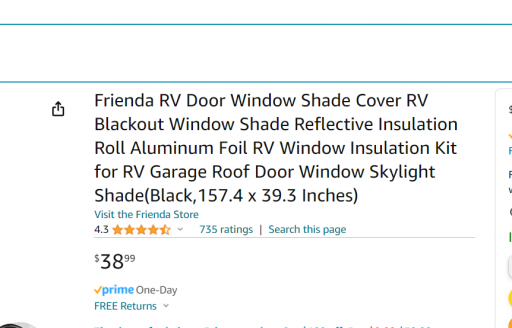
I used this stuff, which has the black backing and comes in various roll sizes (I got the 157x39" roll which was plenty for this small rig but probably not enough for a 4-door SUV). There are various other similar ones, this is just the one I happened to get.


BFR812

Rank III
Member

Enthusiast II

603
Reno, Washoe County, Nevada, United States
First Name
Russel
Last Name
Parker
Member #

47115

Like your post, and would like to know what material you used to make your curtains.
I used this stuff, which has the black backing and comes in various roll sizes (I got the 157x39" roll which was plenty for this small rig but probably not enough for a 4-door SUV). There are various other similar ones, this is just the one I happened to get.

Does the material have a name?
Where did you buy the material from?
Love what you did and would like to do the same.
Thanks
 

irish44j

Rank II

Enthusiast III

443
Fairfax County, VA, USA
First Name
Joshua
Last Name
Hickey
Small projects this evening, some stuff I've been meaning to get around to.
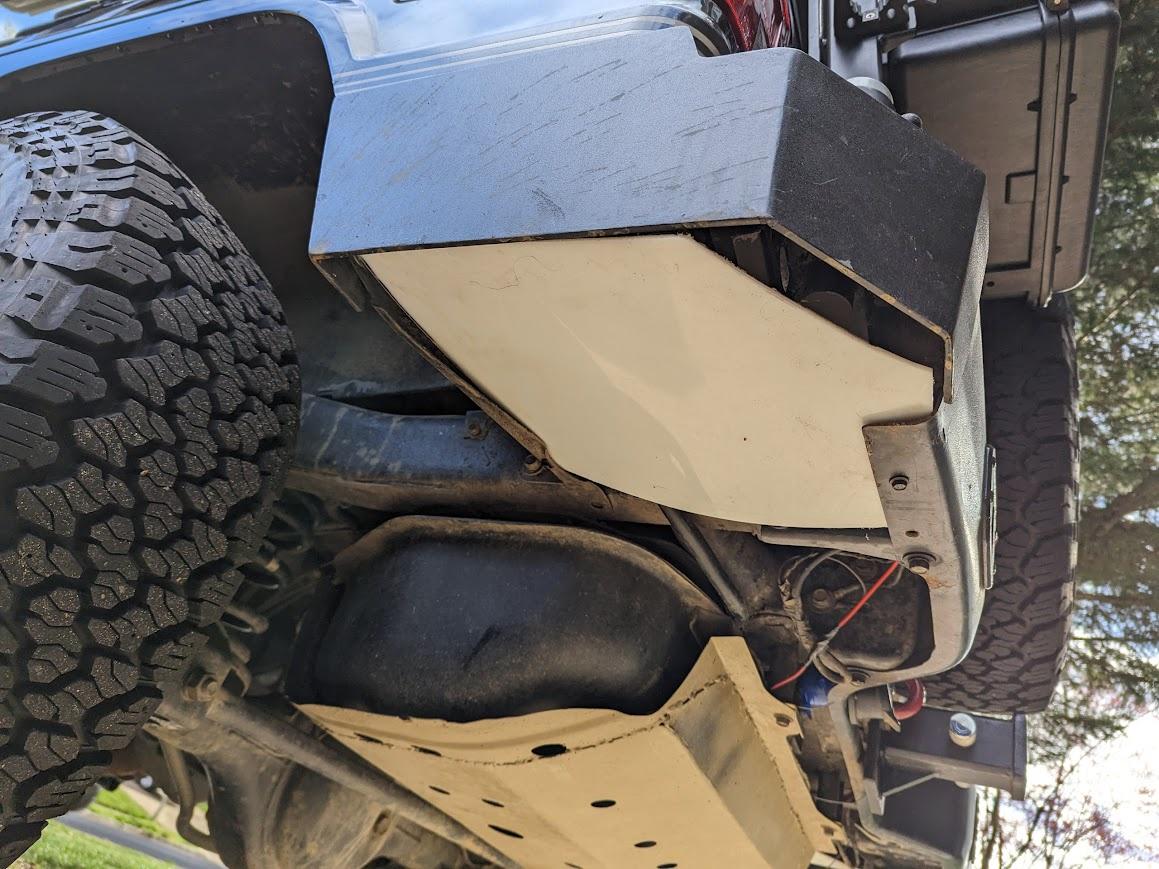
First off, with the new rear bumper caps I got rid of the janky mudflaps I had, but of course the result of that is that mud and crap will basically just come off the rear tires right into the underneath of the bumpers. Don't really want flaps back there that drag on rocks and stuff, so instead grabbed some cardboard, made a template, and cut out some old HDPE sheet to match, and a couple small bolts and now there's some protection there. Not pretty, but nobody will see them anyhow...


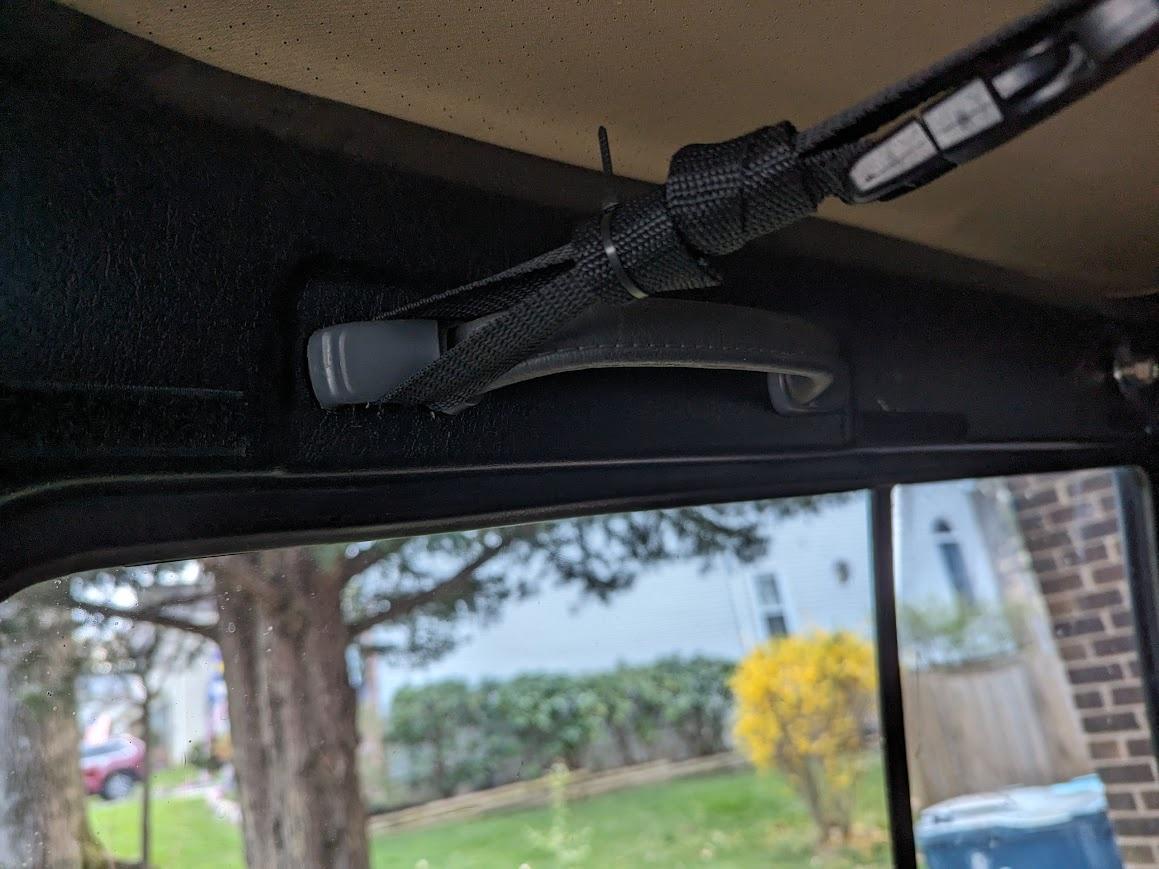
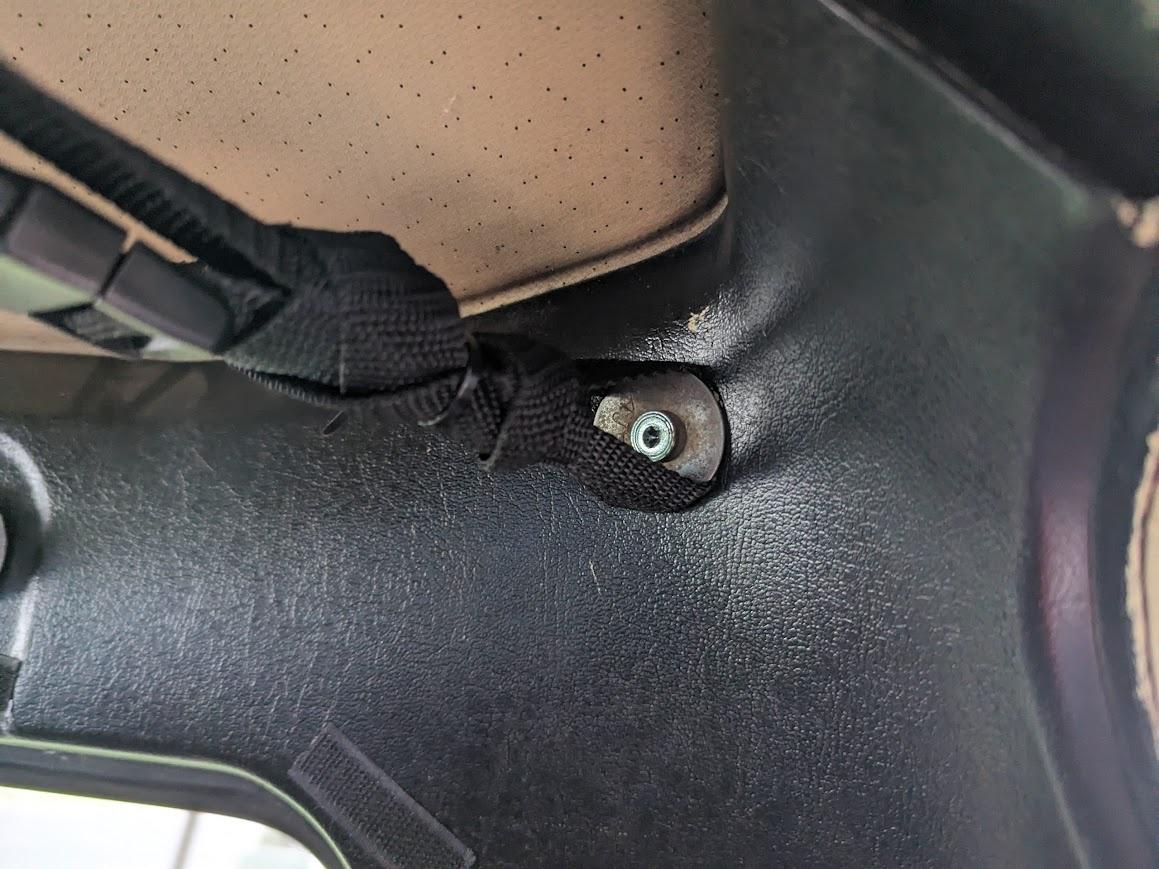
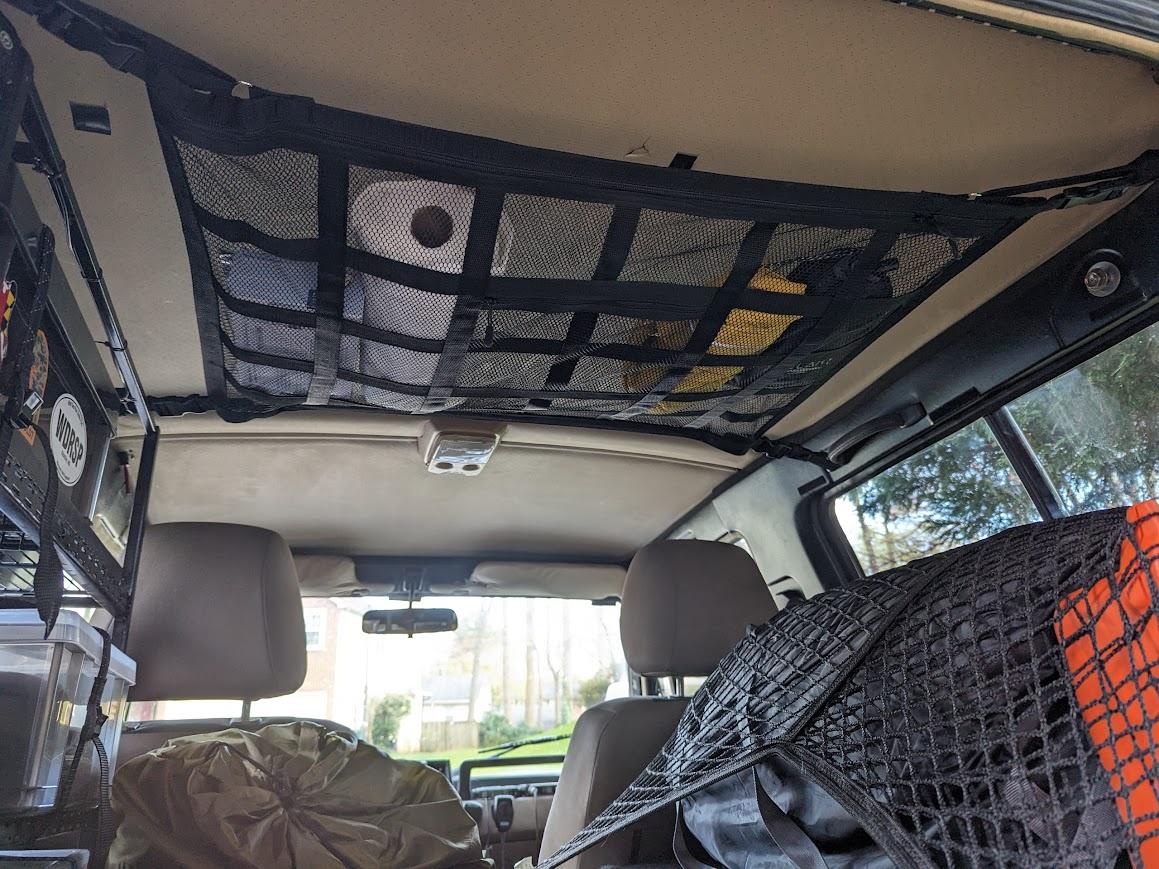
Second, I've wanted to do a roof net inside the truck. This thing has a pretty high overhead so there's space for one without blocking rearview or getting in the way of stuff. I wanted to find one that doesn't sag, so no stretchy ones, and one with decent support. After searching Amazon found one for cheap that looked promising, so let's see. These have a clip at the four mount straps and a compound loop of sorts to allow you to tighten it taut (or that's the idea) It's a bit big spread for the rear grab handles to the rear seatbelt mount bolts, which was my initial plan. So used the grab handle front bolts


At the rear I just used a couple self-tappers into the internal steel shell area in the rear corners


All in all, pretty good. It tightens up nice and doesn't sag with lightweight stuff on it. The other nice part is that it's dual-layer, so you can unzip at one end and put everything INSIDE of it rather than on top where it could fall off off-road, etc. So mostly just put some lightweight stuff (rain and mud clothing, paper towels, wipes, etc) up in there. Still room on top of it for towels and stuff I bring when camping. All in all, pretty pleased with how this turned out - may have to get one for the sequoia as well


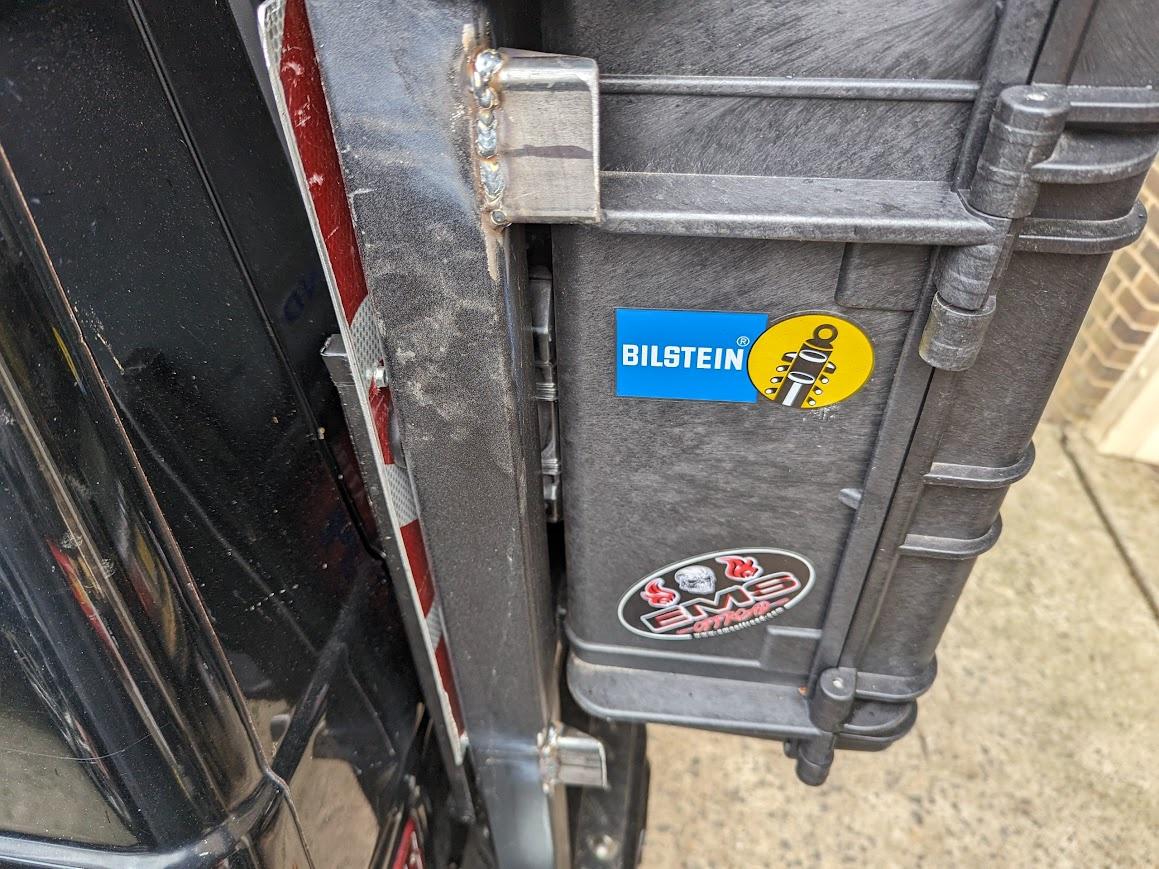
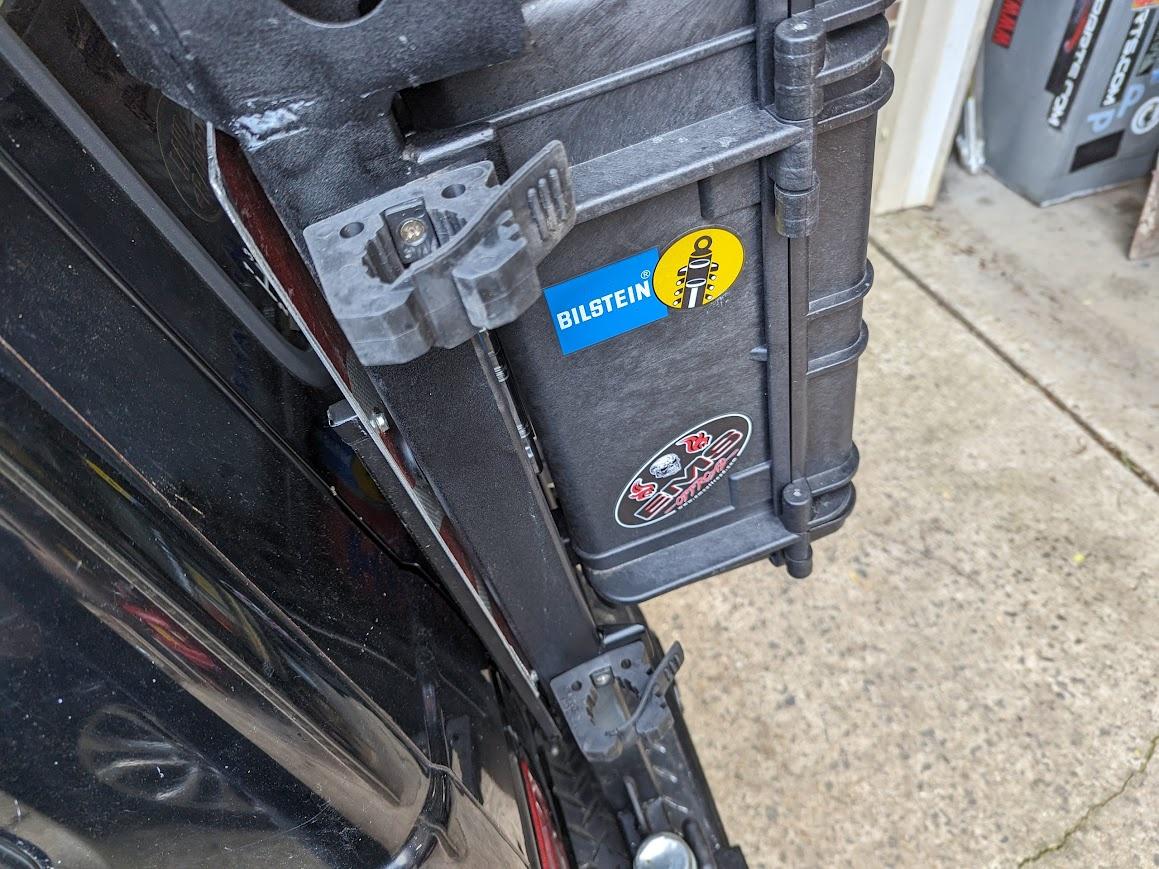
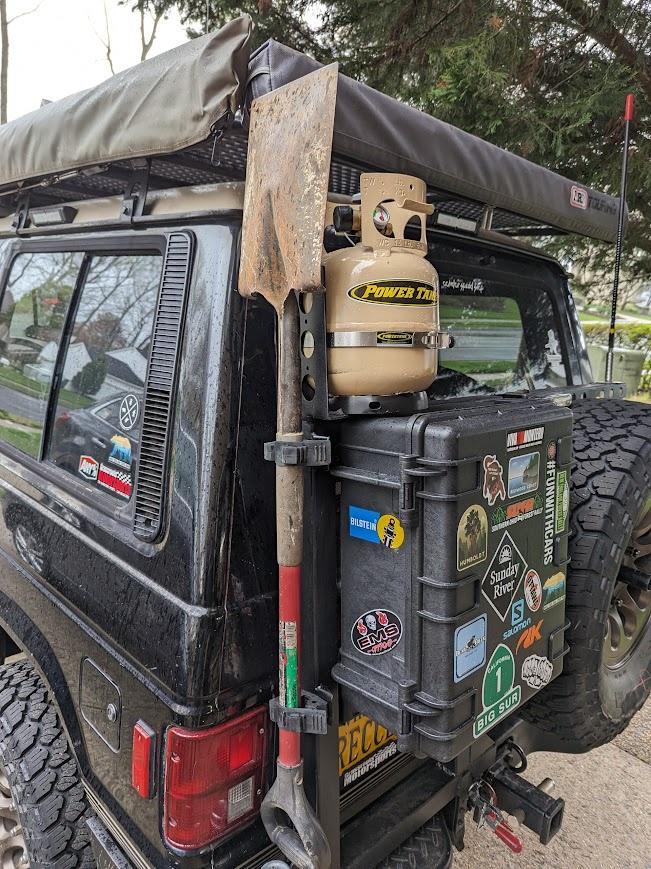
Third. I've been meaning to do a shovel mount. Most guys just do it on the roof rack, but I like as little stuff up there as possible in general. But the new swing-out has the requisite space on the left-hand vertical frame. Picked up a couple of the rubber mounts, which are a bit wider than the frame...plus too close to the rear door when it's closed. So made some little extensions out of some scrap pieces


And mounted the mounts...


This isn't the shovel I'm gonna use, which is a bit smaller, so just stuck this one on for test-fit until I get the other shovel I want, which is about a foot shorter overall and should fit more closely.


hrichard

Rank V
Member

Off-Road Ranger III

2,381
Camden, DE, USA
First Name
HARRY
Last Name
RICHARD
Member #

47651

Ham/GMRS Callsign
KC3UVV
What shovel is that? I have been looking for something that would blend in with the rig and not be too bulky for quite a while, and I believe that will fit the bill
 

irish44j

Rank II

Enthusiast III

443
Fairfax County, VA, USA
First Name
Joshua
Last Name
Hickey
Finally got around to doing the rear trailing arm bushings, something I didn't do when I originally updated all the suspension because at the time they "looked fine." Well, they don't look fine now:


Luckily, this is actually a pretty easy job - literally just undo three big bolts and drop the arm right out from under the axle, though the bolts are a bit of a hassle to get to with an impact. Then the usual drill/cut out the rubber, and then cut the sleeve with a sawzall to get the old (probably original) bushings out...


Then pressed the new ones in, easy peasy


Torquing the big bolts to spec (105 and 170lb) under the truck is a bit of a struggle with leverage (I don't have a lift), but got it done. Oddly the FSM (and Haynes) says to tighten it all up to spec with the vehicle off the ground (e.g. at droop), which is pretty much the opposite of ever other car I've ever worked on that required bushings to be tightened with the car on the ground. Not sure what the rationale for this is, since it seems to load up the bushings when the truck is driving on the road, but that's what the FSM says, so that's what I did.
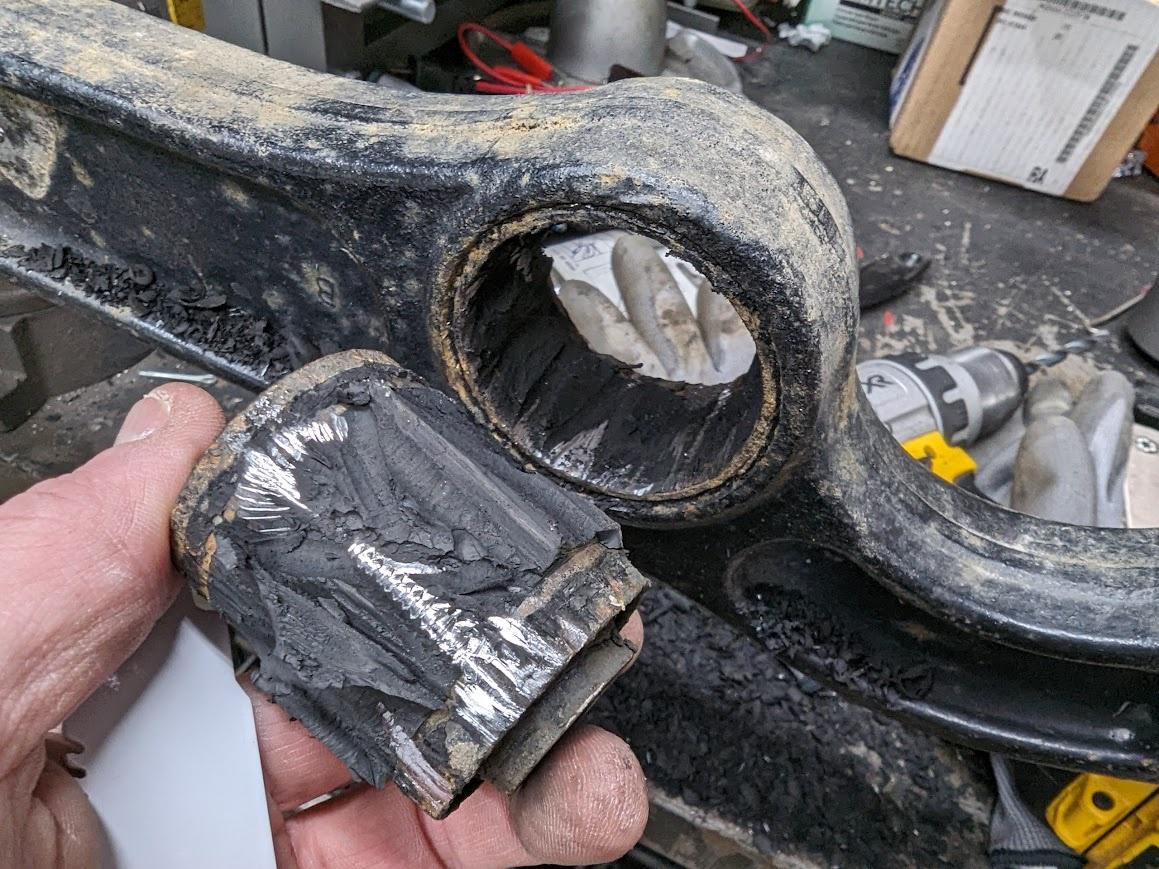
Test drive didn't really show any change in feel since it's just smooth roads, but hopefully this will once and for all eliminate the noises in rough terrain.
 

hrichard

Rank V
Member

Off-Road Ranger III

2,381
Camden, DE, USA
First Name
HARRY
Last Name
RICHARD
Member #

47651

Ham/GMRS Callsign
KC3UVV