Started to get my "overland" trailer built up this past week. I'll going to do my best to put in as much information as possible and document this process as much as possible. This will be my very first build thread so bare with me and I hope I can answer any questions possible. I plan on keeping a detailed log of parts/materials bought so anyone can get an idea of what has gone into this.
I have a buddy who is a professional welder who will be doing about 80% of the work while I lend a hand where I can. I will probably be limited to grinding, sweeping, grabbing beers and pulling out the CC to buy stuff.
Build Details:
Trailer: 1961 Ben Hur Farm Trailer
Use: Camping, light overlanding. (planning on building the trailer as needed and growing with our adventures) Tow behind 2015 Jeep Cherokee KL. Mount RTT on a short rack on the trailer, use the trailer to haul most camping items.
Plan: Restore/maintain as much as possible of the original trailer. Needs 100% a new frame, 3" of new sides (bottom rusted out), and new front. Tailgate is mostly salvageable, will need to patch rust/cut out sheet metal and replace.
Build/Cost Sheet:
Parts/Materials
- Trailer | $250
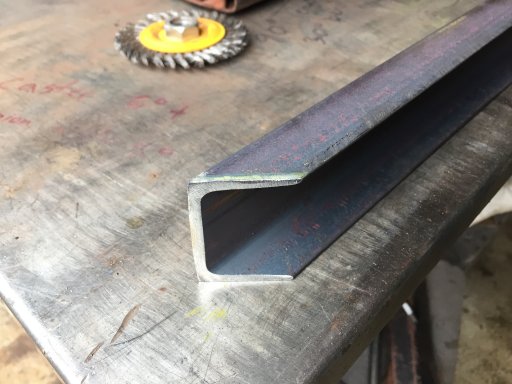
- (2) 6' - 1" X 2" .125 wall C Channel | $20.4
- (2) 4' - 1" X 2" .125 wall C Channel | $13.60
- (3) 4' - 1" X 2" .125 wall Box Tube | $31.20
- 2" X .125" X 46" Flatbar | $6.75 (going to cut into 3 12" strips")
- 12" X 47 " Treadplate | $33.94 (for tailgate)
- (3) 4" Mild Steel weld on hinge | $12.81 ($4.27 ea.)
Consumables/Fees
- (3) 5" Sand Disc | $6.93 ($2.31 ea.)
- Cutting charge | $2.50 (4.20.17)
- (2) grinding wheel | $9.20 (4.60 ea.)
- (6) cutoff wheel | $10.50 (1.75 ea.)
- (2) 2 pack 3M respirators $19.98 | ($9.99 ea.)
- Safety Glasses | $8
Materials Total: $368.70
Consumables Total: $57.11
TOTAL: $425.81
-----------------------------------------------
2.20.17
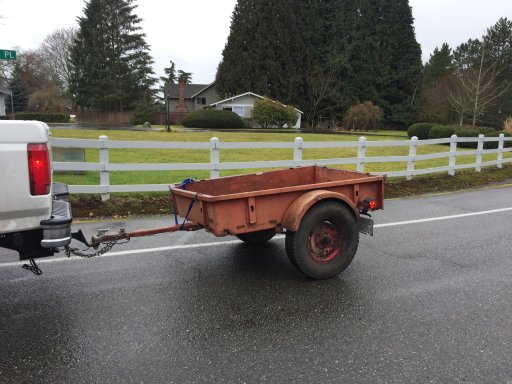
Picked up this trailer after searching online for a while and figuring out what I want to use as a platform. Went back and forth between finding a trailer like this or just going and buying a new frame from Harbor Freight or similar.
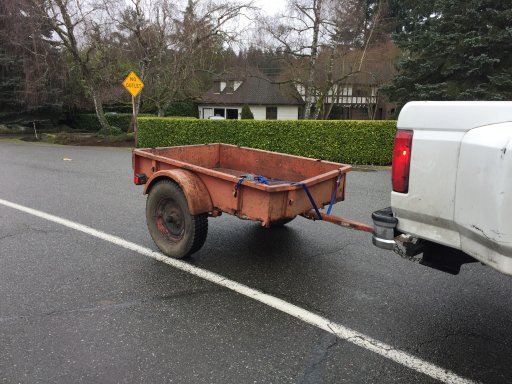
Drove about 30 minutes to go look at this trailer after seeing it posted on CraigsList for a day. Guy wanted $350 for the trailer and I was happy to pay it based on photos I saw.
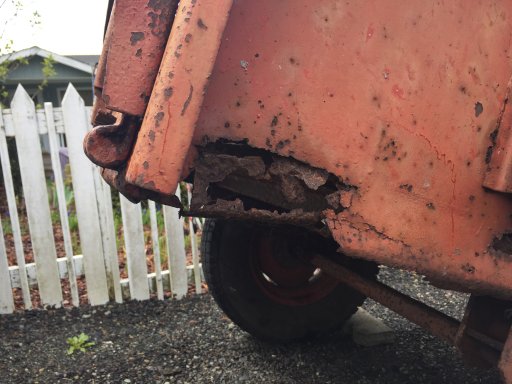
Got to his house and the trailer was in TERRIBLE shape. A LOT of rust everywhere, we had to use a ratchet strap to hold the front down since it was rusted out and was not attached to the frame at all. After looking over it for a while, and talking to the guy he was reasonable and said he basically wanted someone to have it and actually use it. There was some sentimental meaning behind it as his dad bought it for him when he was young, it's been in their family ever since. I told him my plans for it and we talked a little bit more and he came down to $250 for the trailer.
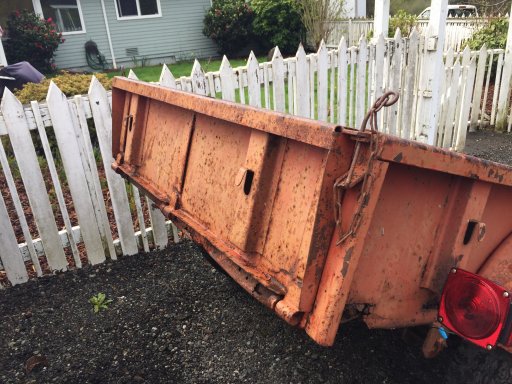
Being as we could use a decent amount of the trailer; Wheels, Axle, leafsprings, tailgate, tongue, lights, and probably of most value it was already licensed so all I had to do was transfer the title. To me all of that listed above was worth $250. Of course I would have liked it in way better shape but it has character and a good place to start.
Additional photos from the other day showing condition

-----------------------------------------------
4.20.17
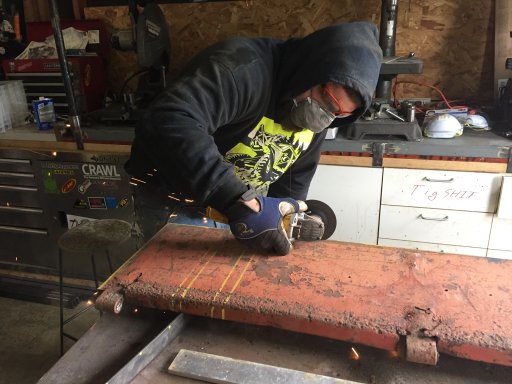
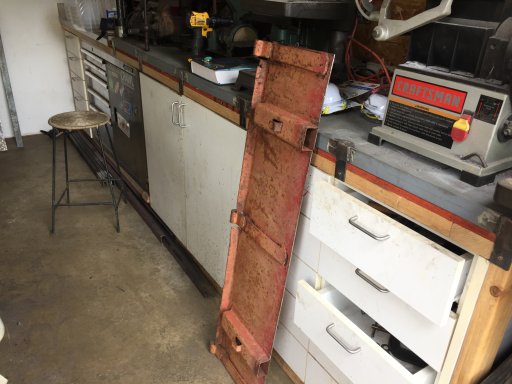
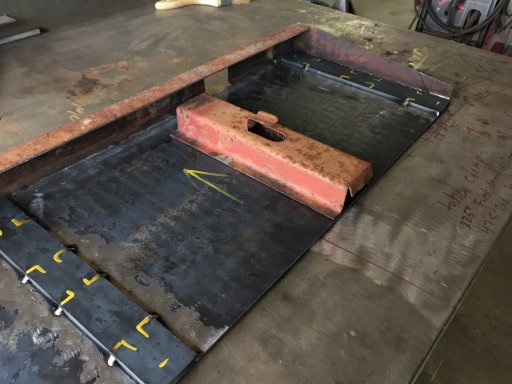
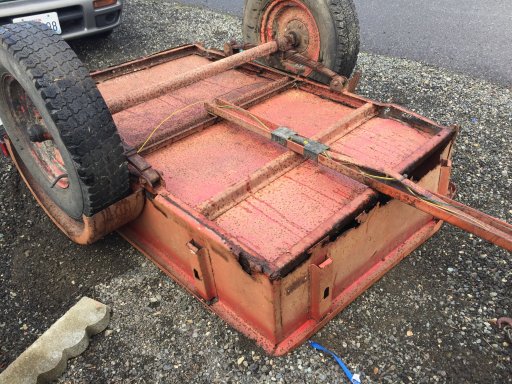
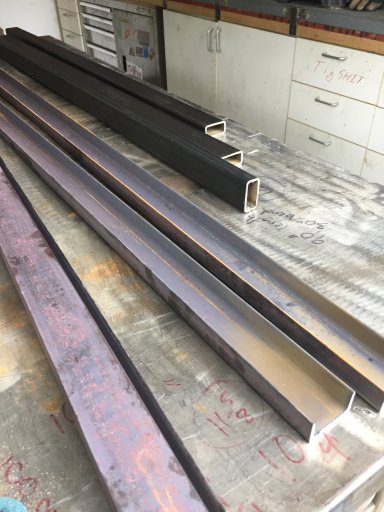
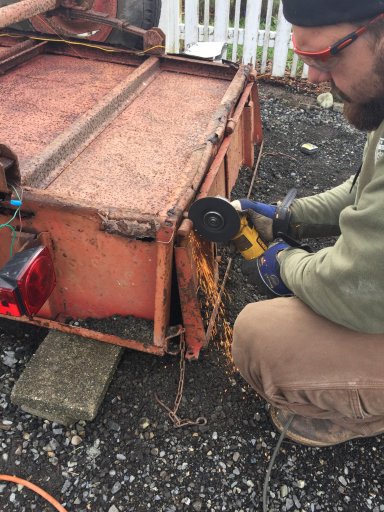
Cut the tailgate off the original trailer, it still opened and closed but there was no point in saving the original hinges. They were rusted everywhere and we have some hinges in mind to pick up. Also, picked up all the metal for the frame.
- (2) 3" X 6' C Channel (need to remember thickness to add in)
- (2) 3" X 4' C Channel (need to remember thickness to add in)
- (3) 3" X 4' Box Tube (need to remember thickness to add in)
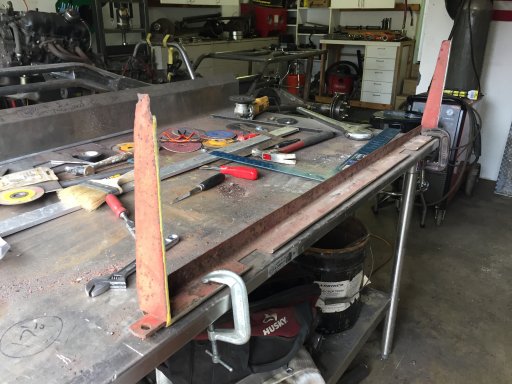
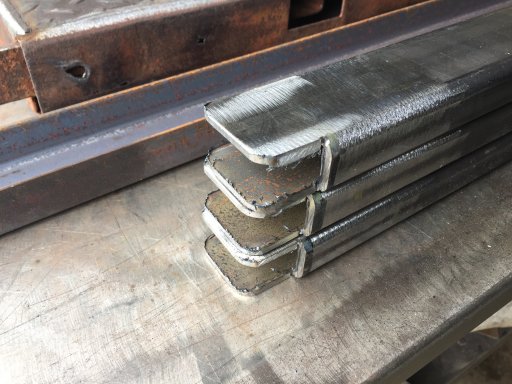
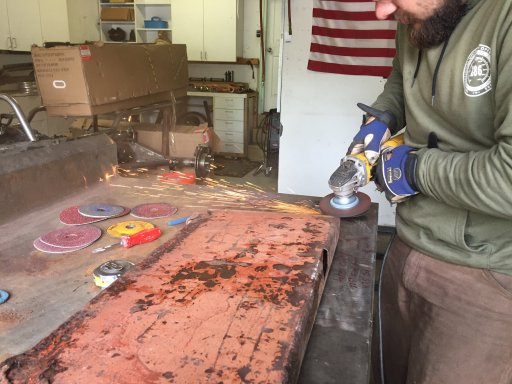
Cleaned up our work area, prepped the box tube for some cutting/grinding to fit into the C Channel as well as prepped for welding.
Going to work on the tailgate first to establish the width of the trailer. It will be roughly 4' wide, but this will ensure we have a nice fit with the sides and tailgate. Dis some light grinding around the edge of the trailer to see what we were working with.
-----------------------------------------------
4.24.17
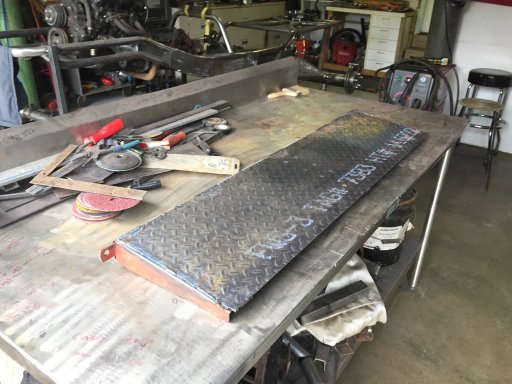
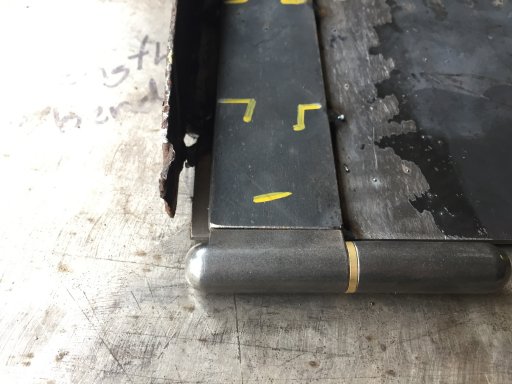
Today we picked up hinges, 12"x47" tread plate that will be used to replace the sheet metal on the tailgate, and flat bar to replicate the original design of the tailgate as well as add strength since it will be able to be used when folded down.
-----------------------------------------------
4.25.17
Now that I have my build thread going, I am going to keep updating in this first post, but just with hyperlinks to the post below for the actual update. Click on the date above to go into the more detailed post with photos. I will add a little bit of text for each update here but below will have the full write up of that day.
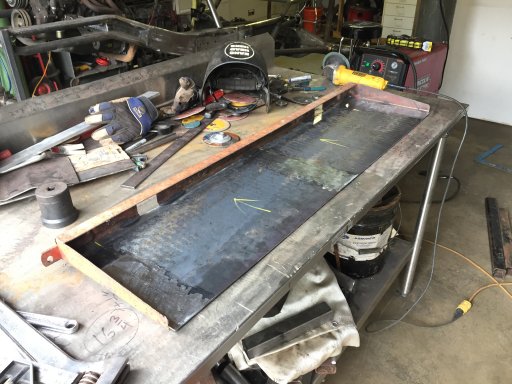
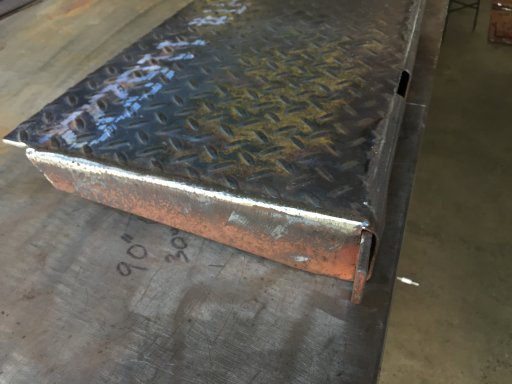
Today we got most of the tailgate done! cut out the sheet metal, placed the new one in, cut the flatbar, tacked everything up and is good to get a full weld all the way around in the next couple of days.
-----------------------------------------------
5.15.17
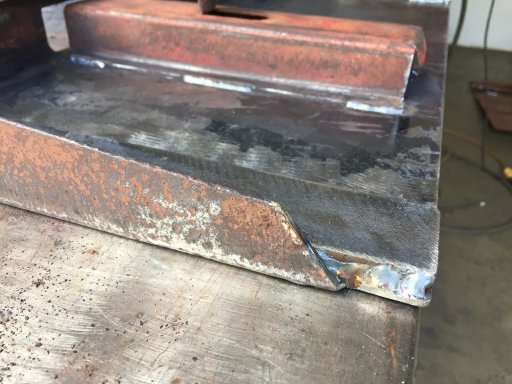
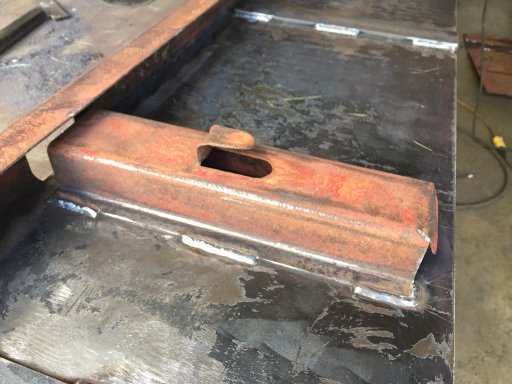
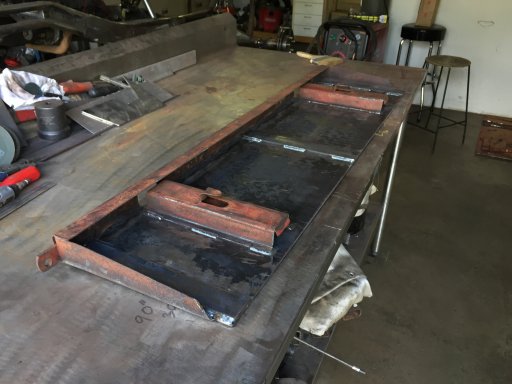
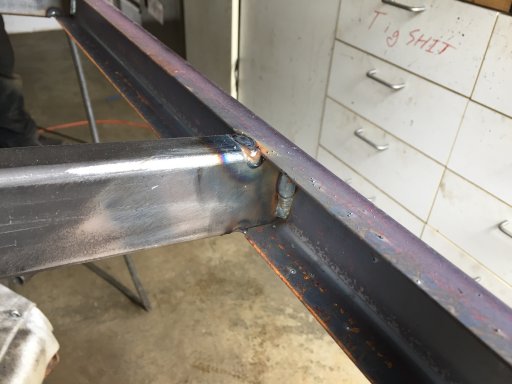
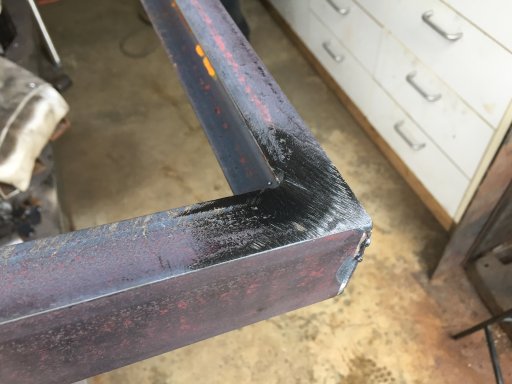
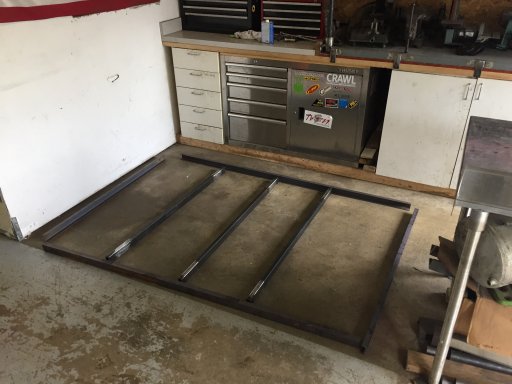
A couple small updates, started on the frame and got it basically all buttoned up.
I have a buddy who is a professional welder who will be doing about 80% of the work while I lend a hand where I can. I will probably be limited to grinding, sweeping, grabbing beers and pulling out the CC to buy stuff.
Build Details:
Trailer: 1961 Ben Hur Farm Trailer
Use: Camping, light overlanding. (planning on building the trailer as needed and growing with our adventures) Tow behind 2015 Jeep Cherokee KL. Mount RTT on a short rack on the trailer, use the trailer to haul most camping items.
Plan: Restore/maintain as much as possible of the original trailer. Needs 100% a new frame, 3" of new sides (bottom rusted out), and new front. Tailgate is mostly salvageable, will need to patch rust/cut out sheet metal and replace.
Build/Cost Sheet:
Parts/Materials
- Trailer | $250
- (2) 6' - 1" X 2" .125 wall C Channel | $20.4
- (2) 4' - 1" X 2" .125 wall C Channel | $13.60
- (3) 4' - 1" X 2" .125 wall Box Tube | $31.20
- 2" X .125" X 46" Flatbar | $6.75 (going to cut into 3 12" strips")
- 12" X 47 " Treadplate | $33.94 (for tailgate)
- (3) 4" Mild Steel weld on hinge | $12.81 ($4.27 ea.)
Consumables/Fees
- (3) 5" Sand Disc | $6.93 ($2.31 ea.)
- Cutting charge | $2.50 (4.20.17)
- (2) grinding wheel | $9.20 (4.60 ea.)
- (6) cutoff wheel | $10.50 (1.75 ea.)
- (2) 2 pack 3M respirators $19.98 | ($9.99 ea.)
- Safety Glasses | $8
Materials Total: $368.70
Consumables Total: $57.11
TOTAL: $425.81
-----------------------------------------------
2.20.17
Picked up this trailer after searching online for a while and figuring out what I want to use as a platform. Went back and forth between finding a trailer like this or just going and buying a new frame from Harbor Freight or similar.
Drove about 30 minutes to go look at this trailer after seeing it posted on CraigsList for a day. Guy wanted $350 for the trailer and I was happy to pay it based on photos I saw.
Got to his house and the trailer was in TERRIBLE shape. A LOT of rust everywhere, we had to use a ratchet strap to hold the front down since it was rusted out and was not attached to the frame at all. After looking over it for a while, and talking to the guy he was reasonable and said he basically wanted someone to have it and actually use it. There was some sentimental meaning behind it as his dad bought it for him when he was young, it's been in their family ever since. I told him my plans for it and we talked a little bit more and he came down to $250 for the trailer.
Being as we could use a decent amount of the trailer; Wheels, Axle, leafsprings, tailgate, tongue, lights, and probably of most value it was already licensed so all I had to do was transfer the title. To me all of that listed above was worth $250. Of course I would have liked it in way better shape but it has character and a good place to start.
Additional photos from the other day showing condition
-----------------------------------------------
4.20.17
Cut the tailgate off the original trailer, it still opened and closed but there was no point in saving the original hinges. They were rusted everywhere and we have some hinges in mind to pick up. Also, picked up all the metal for the frame.
- (2) 3" X 6' C Channel (need to remember thickness to add in)
- (2) 3" X 4' C Channel (need to remember thickness to add in)
- (3) 3" X 4' Box Tube (need to remember thickness to add in)
Cleaned up our work area, prepped the box tube for some cutting/grinding to fit into the C Channel as well as prepped for welding.
Going to work on the tailgate first to establish the width of the trailer. It will be roughly 4' wide, but this will ensure we have a nice fit with the sides and tailgate. Dis some light grinding around the edge of the trailer to see what we were working with.
-----------------------------------------------
4.24.17
Today we picked up hinges, 12"x47" tread plate that will be used to replace the sheet metal on the tailgate, and flat bar to replicate the original design of the tailgate as well as add strength since it will be able to be used when folded down.
-----------------------------------------------
4.25.17
Now that I have my build thread going, I am going to keep updating in this first post, but just with hyperlinks to the post below for the actual update. Click on the date above to go into the more detailed post with photos. I will add a little bit of text for each update here but below will have the full write up of that day.
Today we got most of the tailgate done! cut out the sheet metal, placed the new one in, cut the flatbar, tacked everything up and is good to get a full weld all the way around in the next couple of days.
-----------------------------------------------
5.15.17
A couple small updates, started on the frame and got it basically all buttoned up.
Last edited: