99 Toyota 4Runner build

  • HTML tutorial

flanate89

Rank II
Founder 500
Launch Member

Traveler III

327
Ormond beach
First Name
Nathan
Last Name
Perry
Member #

284

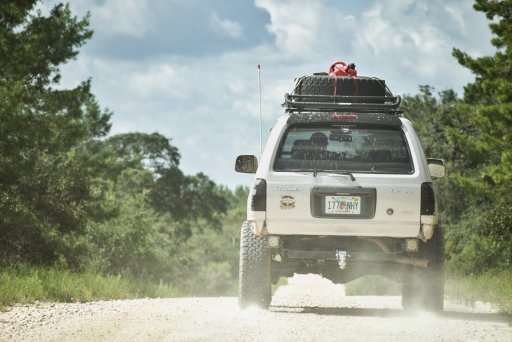
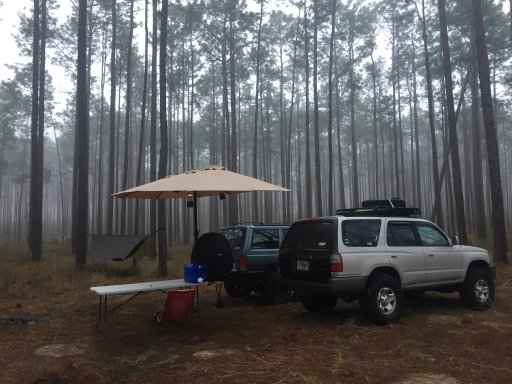
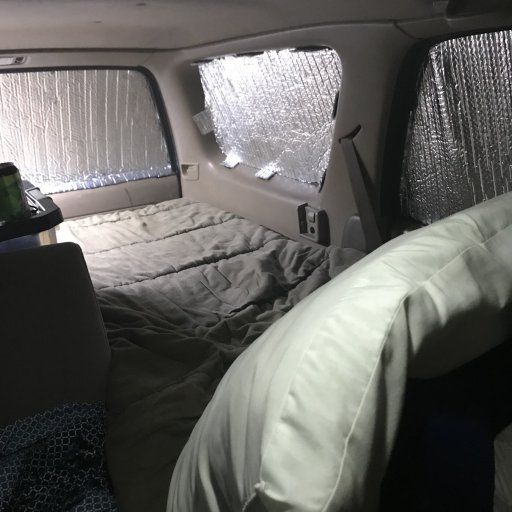
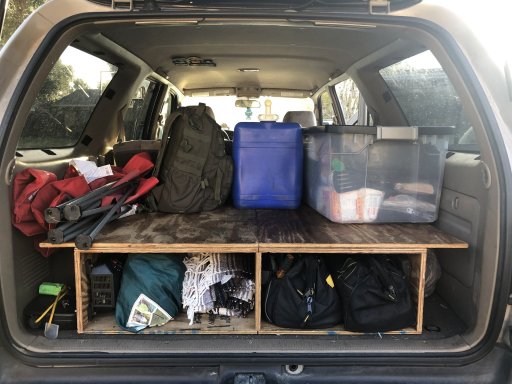
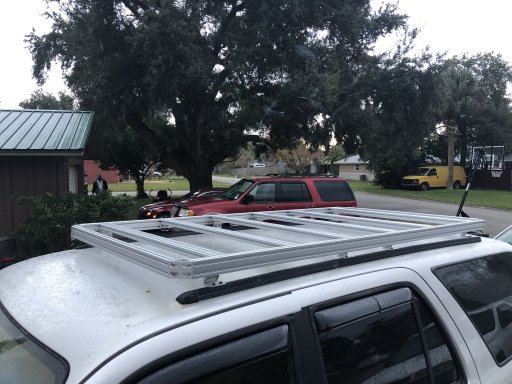
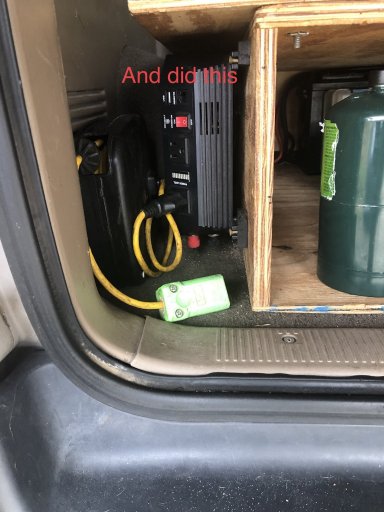
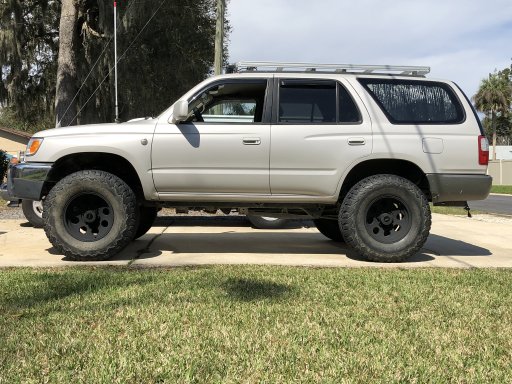
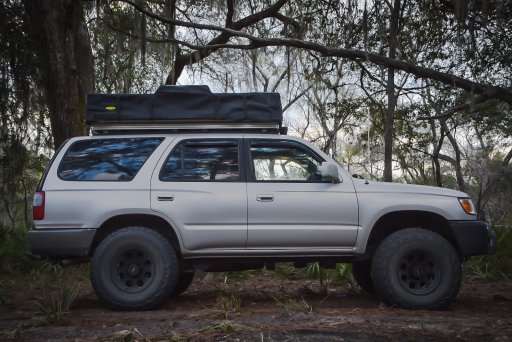
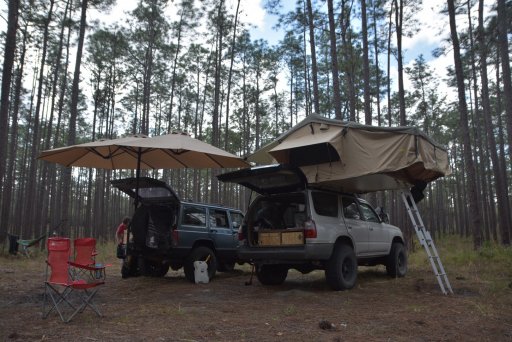
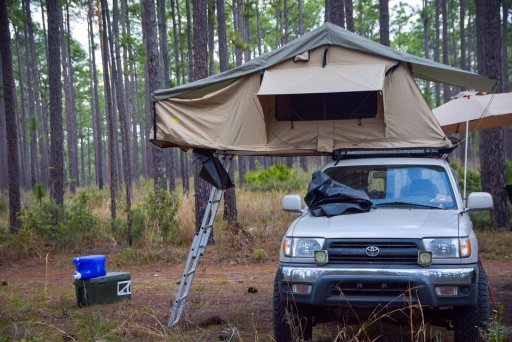
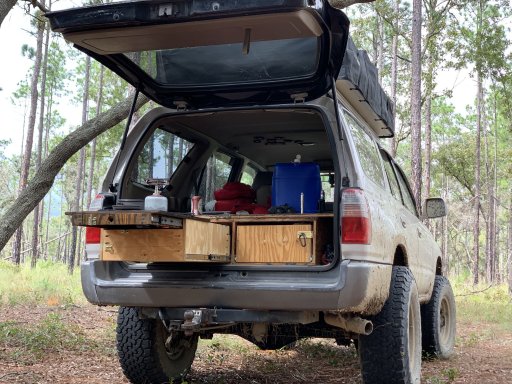
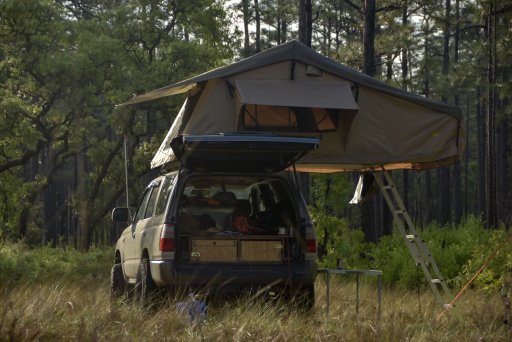
B73F56D1-C043-42F7-B26B-E56F3B2A4C6D.jpegSo it all starts with a 99 4Runner sr5, it has the 3.4l and an automatic transmission. I started by doing all the preventative maintenance which was plugs, wires, timing belt, water pump, valve cover gaskets, lbj’s, and a new steering rack. From there I wanted to get it lifted but was limited on funds, went with the rough country 3” lift with spacers and rear springs. Found a set of 285/75/16 BFF A/T on Craigslist for $300, added some wheel spacers and started hitting the trails. I ran that setup until I needed front shocks, at that point I went with the toytec 3” springs and bilstien 5100 tundra shocks. After adding about 150lbs to the back with my (1st) drawer setup filled with tools, recovery gear, camp equipment, and plans for a rear bumper/tire carrier one day I needed heavier springs out back. I went with the OME 891 springs to help with the added weight. Then came time for new tires, I opted for a new set of BFG ko2 in the same 285/75/16 size with some Pro Comp 69 series wheels to eliminate the wheel spacers. With the suspension taken care of I moved on to refining my drawer system, 3 builds later I have my current setup (for now) which has a full drawer for my recovery gear, tools, etc and it has a shallower drawer setup as my galley with a slide out work/cook table. The box also houses my aux battery and power inverter. I was sleeping in the rig until I got the RTT so I built the box to also be a sleeping platform which when fully setup could accommodate a full size air mattress. That worked for a while until I got the smittybilt overlander xl which I installed on top of the aluminum full length flat rack I made out of extrusion. I am now planning on modifying the rear box to also have an added on power distribution box to house all my relays and fuse blocks as well as some other goodies. As for the exterior at this point it’s just the rack, a light bar, and 2 4” squares on the front bumper. I recently just installed a set of axles which included an e-locker and 4.10 gears. The most exciting thing coming for me tho is the 4xinnovations front and rear bumpers with tire carrier. It has been a fun process and it’s nowhere near being done (are they ever done tho) and I look forward to furlture additions and changes. Well if you made it thru all that your a real champ and I applaud you, I hope it interested you and if you have any questions, tips, or ideas I’m always open to hear them.
 

Attachments

Last edited:

flanate89

Rank II
Founder 500
Launch Member

Traveler III

327
Ormond beach
First Name
Nathan
Last Name
Perry
Member #

284

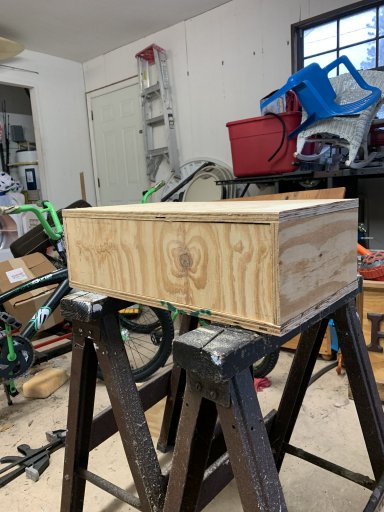
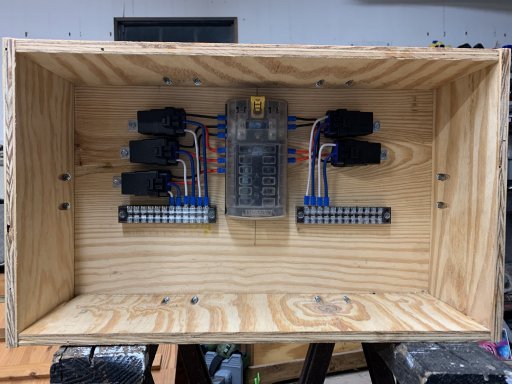
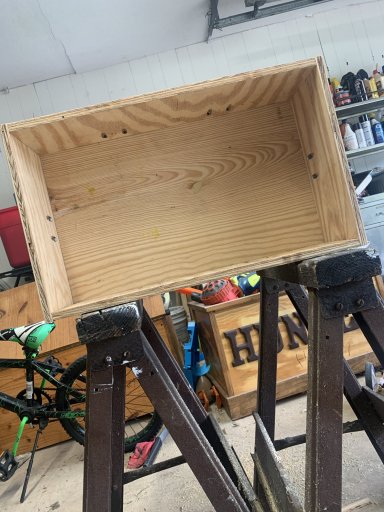
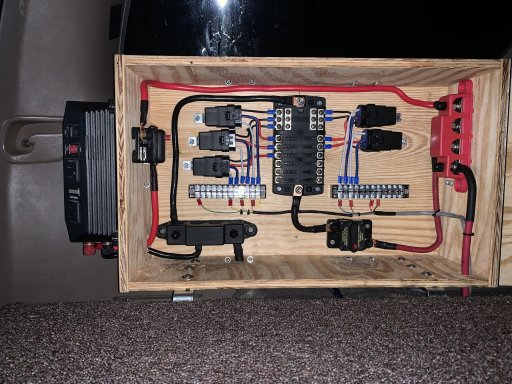
Started working on an electrical panel for the rear tonight. This is where I got so far, really wish I had gotten 6 relays tho for aesthetics. Still waiting on breakers and a switch panel with voltage meter and sockets to mount on the face.
 

Attachments

  • Like
Reactions: Offroadnutz

flanate89

Rank II
Founder 500
Launch Member

Traveler III

327
Ormond beach
First Name
Nathan
Last Name
Perry
Member #

284

Really nice set up. Why is the circuit box so big?
Thank you. I am planning on doing a bit more to it, I’m installing a few breakers, my inverter is going to mount to it, it will have a 3 switch panel on the face with 2 sockets a voltage gauge and usb. I will be adding Anderson plugs to it as well. I need to do some research but I want to also add a “shore power” battery tender if possible. Plus I wanted it to be big enough to expand in the future in case I change my mind or don’t do a few things I’m thinking now. The box itself measures 20”x 12”x 6.5” , I did think about trimming it down a little bit tho. We will see once I get everything mounted and roughed in.
 
  • Like
Reactions: M Rose

M Rose

Local Expert
Mod Team
Member

Advocate III

5,584
Northeast Oregon, United States
First Name
Michael
Last Name
Rose
Member #

20990

Ham/GMRS Callsign
W7FSB
Service Branch
US ARMY Retired
Thank you. I am planning on doing a bit more to it, I’m installing a few breakers, my inverter is going to mount to it, it will have a 3 switch panel on the face with 2 sockets a voltage gauge and usb. I will be adding Anderson plugs to it as well. I need to do some research but I want to also add a “shore power” battery tender if possible. Plus I wanted it to be big enough to expand in the future in case I change my mind or don’t do a few things I’m thinking now. The box itself measures 20”x 12”x 6.5” , I did think about trimming it down a little bit tho. We will see once I get everything mounted and roughed in.
I would get a Smart battery tender that can double as a Solar charger as well. Besides an inverter, I would look into a converter... some converters can take care of shore power charging, solar charging, and would bypass the inverter while on shore power.
 

flanate89

Rank II
Founder 500
Launch Member

Traveler III

327
Ormond beach
First Name
Nathan
Last Name
Perry
Member #

284

I really like the way you are thinking your build all the way through.
I’m trying to, I just want to do it once and do it the right way and the way I want it so I’m going to take my time with it and try and think everything thru for a little bit before I do it.
 
  • Like
Reactions: M Rose

flanate89

Rank II
Founder 500
Launch Member

Traveler III

327
Ormond beach
First Name
Nathan
Last Name
Perry
Member #

284

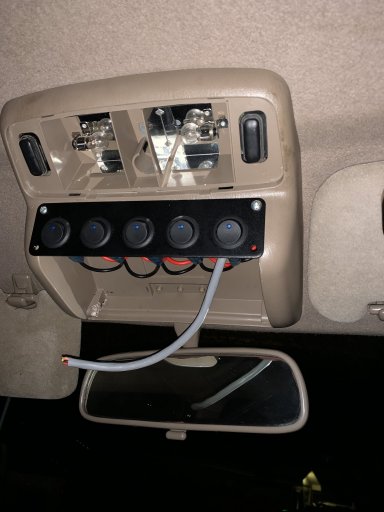
So I have been working on the power distribution box in the back attached to my drawer system. So far this is where I’ve gotten. Still need to do a few things but I can’t decide if I want to either stain, pain, or carpet the box. After I do that I will tidy everything up and secure all the wires. What do you think?
Oh and the switch panel is wired now as well. Just need to fabricate a cover for the bottom to hide the wires.
 

Attachments

  • Like
Reactions: WAYAWAY and M Rose

M Rose

Local Expert
Mod Team
Member

Advocate III

5,584
Northeast Oregon, United States
First Name
Michael
Last Name
Rose
Member #

20990

Ham/GMRS Callsign
W7FSB
Service Branch
US ARMY Retired
So I have been working on the power distribution box in the back attached to my drawer system. So far this is where I’ve gotten. Still need to do a few things but I can’t decide if I want to either stain, pain, or carpet the box. After I do that I will tidy everything up and secure all the wires. What do you think?
Oh and the switch panel is wired now as well. Just need to fabricate a cover for the bottom to hide the wires.
I see now what you are doing... looks very nice and thought out.
What RTT is that?
 

flanate89

Rank II
Founder 500
Launch Member

Traveler III

327
Ormond beach
First Name
Nathan
Last Name
Perry
Member #

284

I see now what you are doing... looks very nice and thought out.
What RTT is that?
Thank you. The rtt is the smittybilt overlander xl, it’s large and in charge but I have 3 kiddos so I needed the room, otherwise I would have went with the smaller one. I do however like the overhang for added shade/cover
 
  • Like
Reactions: M Rose

M Rose

Local Expert
Mod Team
Member

Advocate III

5,584
Northeast Oregon, United States
First Name
Michael
Last Name
Rose
Member #

20990

Ham/GMRS Callsign
W7FSB
Service Branch
US ARMY Retired
Thanks for that information... I have been against RTTs in the not so distant past, but after thinking about what @KRose wants done to her Runner when we get it, and the trips we have planned this year, it might not be such a bad idea... how long does it take you to set up the tent, and more importantly stow the tent.
 

flanate89

Rank II
Founder 500
Launch Member

Traveler III

327
Ormond beach
First Name
Nathan
Last Name
Perry
Member #

284

Because it’s so big it takes a little longer than some of the smaller ones to stow away but to set it up I’d say realisticly 3-5 mins on average from park to sleep. Stowing it takes maybe 10-15 mins to do it right and tidy (and sleepy). The overhang is the most annoying part of putting it away, you’ve got all that material to stuff in. Once you do it a few times you get the hang of it real quick tho. Plus storing your sleeping gear in there frees up quite a bit of space inside. I will say if my truck was maybe 2” lower it’d be substantially easier tho, gotta hop up and down on tires to do everything lol
 
  • Like
Reactions: M Rose

WAYAWAY

Rank V
Launch Member

Member III

1,473
San Diego, CA
First Name
Joe
Last Name
P
Member #

20487

So I have been working on the power distribution box in the back attached to my drawer system. So far this is where I’ve gotten. Still need to do a few things but I can’t decide if I want to either stain, pain, or carpet the box. After I do that I will tidy everything up and secure all the wires. What do you think?
Oh and the switch panel is wired now as well. Just need to fabricate a cover for the bottom to hide the wires.
That is a great idea, mounting the switches there.
I think the blue LEDs would make me crazy, though.
 

flanate89

Rank II
Founder 500
Launch Member

Traveler III

327
Ormond beach
First Name
Nathan
Last Name
Perry
Member #

284

That is a great idea, mounting the switches there.
I think the blue LEDs would make me crazy, though.
We will see, I’ve already taken that into consideration and will take some nail polish or something of the sorts and dab it over the light to “dim” them if they are. I’ve had to do it before because some switches have super bright lights
 
  • Like
Reactions: WAYAWAY and M Rose

M Rose

Local Expert
Mod Team
Member

Advocate III

5,584
Northeast Oregon, United States
First Name
Michael
Last Name
Rose
Member #

20990

Ham/GMRS Callsign
W7FSB
Service Branch
US ARMY Retired
We will see, I’ve already taken that into consideration and will take some nail polish or something of the sorts and dab it over the light to “dim” them if they are. I’ve had to do it before because some switches have super bright lights
Did you tie the LEDs into the dash dimmer wires coming out of the dimmer switch? (Usually a orange wire to the stereo)
 

flanate89

Rank II
Founder 500
Launch Member

Traveler III

327
Ormond beach
First Name
Nathan
Last Name
Perry
Member #

284

No I didn’t, I fed my switches from my aux battery so they weren’t tied in to the vehicle system at all. I will go wire the switch panel feed up and see how bright they are right now because now I’m curious.
 
  • Like
Reactions: WAYAWAY